
Thomas Tilley
[ Home ] [ Publications ] [ Resume ] [ Family ] [ Projects ] [ The Others ] [ Sitemap ]
[ Home ] [ Publications ] [ Resume ] [ Family ] [ Projects ] [ The Others ] [ Sitemap ]
 | |
 | |
 | |
 | |
 | |
 | |
 |
The international college at Payap University decided to host a student talent quest called "Payap's Got Talent". Modelled after some other shows with a similar name, the students perform their variety acts in front of three judges (armed with buzzers that look suspiciously like the buttons from Multiplayer Guitar Hero!) and an audience. The contest organisers wanted a machine to record audience votes after the final round so that they could determine the winning acts - and I offered to help.
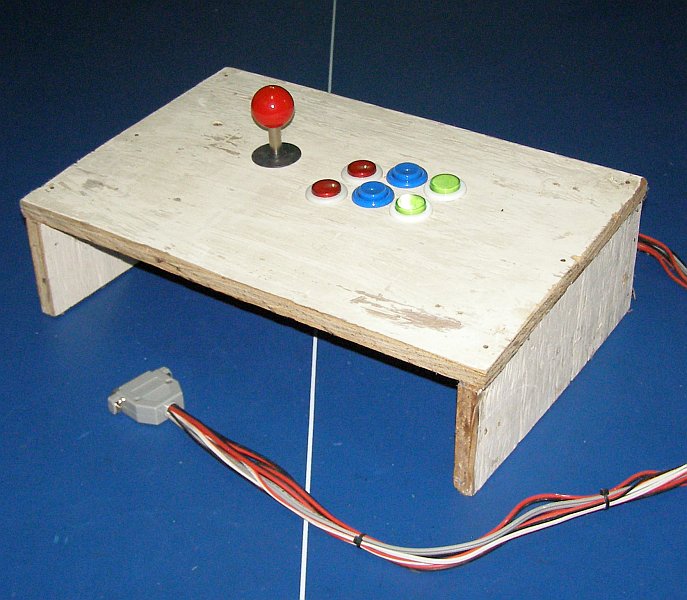
We didn't have access to a touch-screen so instead I built an ATM-like voting machine using a PC with an LCD monitor, some arcade buttons, and a hacked joystick. After the ten finalists had performed the audience would file out of the auditorium past the voting machine. Each member of the audience could then cast a vote for their favourite act by simply pressing a button. When voting was finished the machine tabulated the results in a CSV file and the judges could then announce the winners. You can read on below for more information about how I built the machine and some construction pictures.


The machine is essentially just an LCD monitor with a cardboard surround for the ten arcade buttons. I wrote some software using Delphi 7 (my IDE of choice for building something quickly) that splits the screen into ten regions near each of the buttons with a picture of the performer(s) and information about each of their acts. The information is stored in a text file so it can be easily edited and changed.
With each vote a tick is displayed over the corresponding act and a
re-assuring Family
Fued-esque ding
is played. The buttons are then locked out
for a short period so voters can't easily vote multiple times. Before
and after voting the machine displays an image on the screen and the
buttons are disabled.
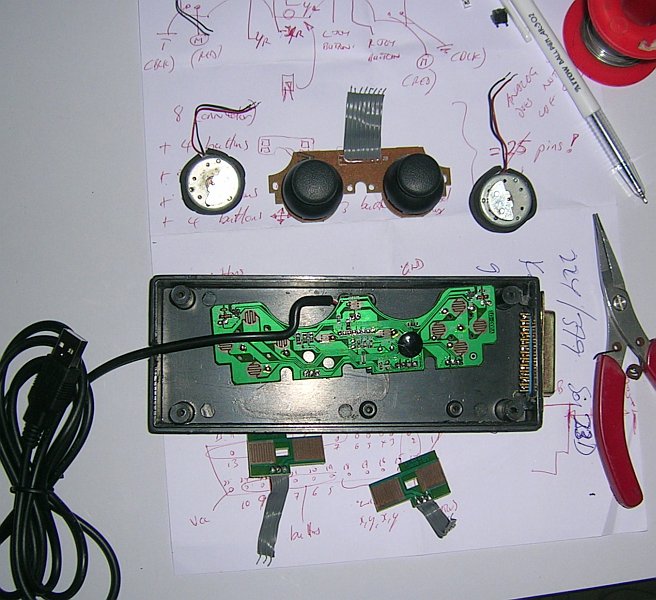
The buttons are wired to a 25-pin D-SUB connector which is connected to the PC via a hacked USB joystick (see below right). A suitable joystick costs around $5 (USD) here in Thailand. USB joysticks are a HID (Human Interface Device) class device and using Robert Marquardt's SimpleHIDWrite utility I was able to observe the data being sent from the joystick as buttons were pressed. Using a USB HID Controller component suite for Delphi I was then able to write some code to communicate with the joystick and read button presses.

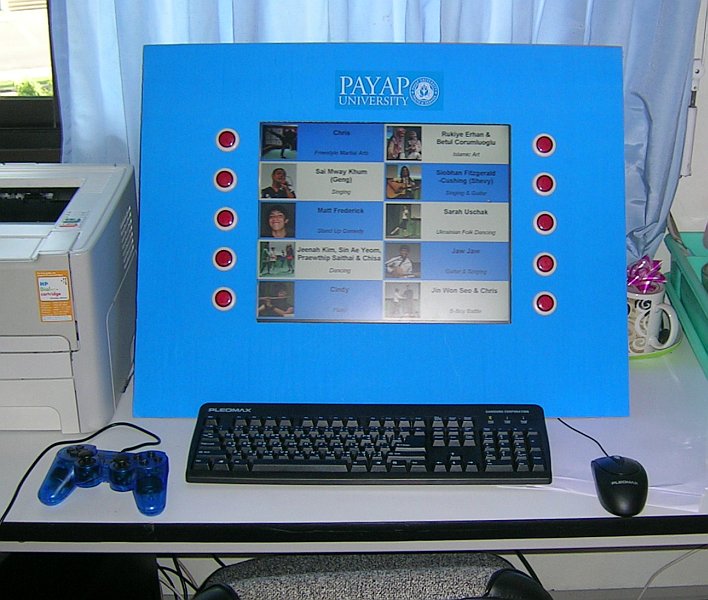
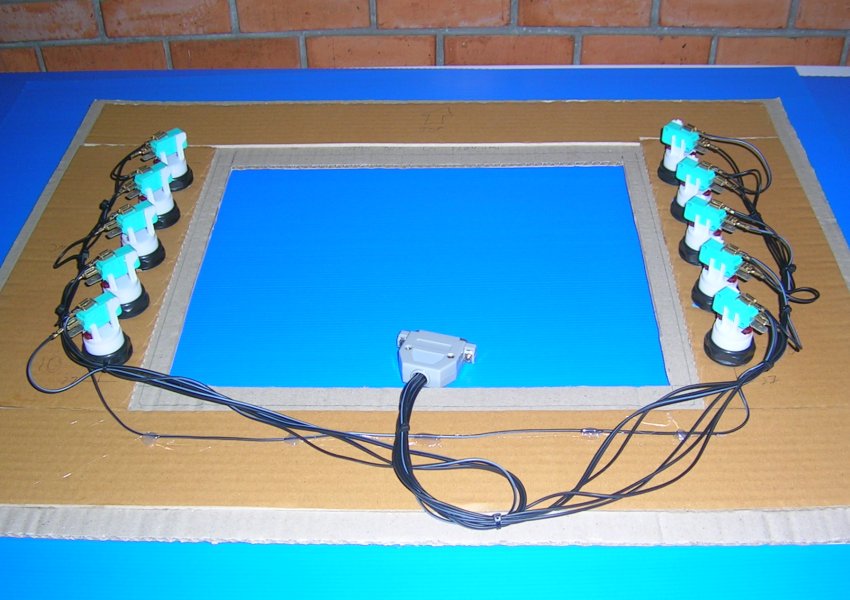
Most of my projects only require a small number of inputs (e.g., my wooden ddr-pad, GL-Tron controller, virtual pinball machine, multiplayer Guitar Hero, bamboo and PVC racing cars) and so a 9-pin D-SUB connector underneath a hacked joystick is usually sufficient. However, for this project I needed at least 11 connections - one for each of the ten arcade buttons plus one common connection - hence the 25-pin connector.
Now, the original joystick that I hacked while making the wooden DDR pad used a 25-pin connector but over time the wiring had become dodgy. I later rewired and re-packaged it to power the virtual pinball machine but it eventually died while being used for a student project. I needed a joystick that would support at least ten buttons and decided to upgrade it using the board from a DualShock-like USB joystick. I also thought that while I was in there I may as well provide access to all of the joystick's functionality including the ability to plug-in external rumble motors and use the analog inputs.
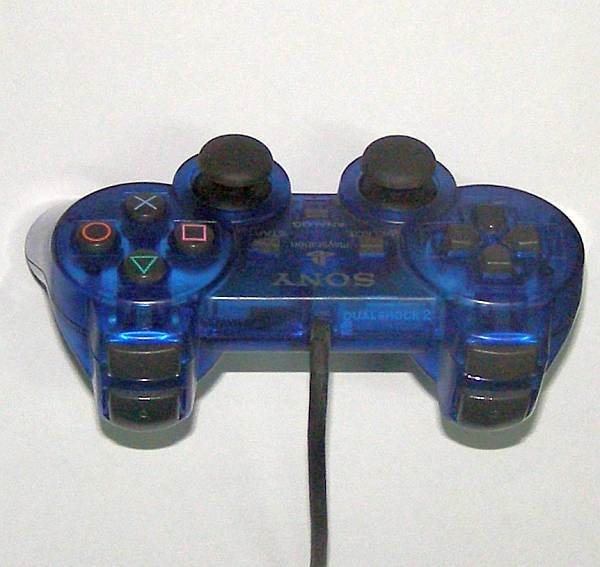
The picture below shows the rear view of a DualShock controller .
There are 4 rear buttons, 4 right-thumb buttons (with the
famous Having newly refurbished the joystick for the voting machine I was
also able to use it to connect an arcade joystick and some buttons so
some friends could play
the Street
Fighter series of games (see above right). In keeping with the
tradition of my wooden DDR mat I made the crusty controller using the
wood from some old bookshelves and
a button
layout from
the Slagcoin Joystick
Controller page (which is a fantastic resource for DIY controllers).
X
, box, circle, and triangle), 4 direction pad buttons
(up, down, left, and right), Start
, Select
, and a button
on each of the analog sticks for a total of 16 buttons. There are
also 4 analog inputs (the X and Y axes on the two analog sticks) and
the two rumble motor outputs. Including the common voltage and ground
connections required a total of 24 pins - leaving me with one unused
connection on the DB-25 connector. The stripped down board ready for
wiring into its new home is shown below.
Yip, yip, yip, yip, yip!- Chun-Li
Back to the voting machine. Fortunately, there was an office with
a sliding glass window right next to the contest auditorium doors
which we used to make a "hole in the wall" for the voting machine. We
moved a desk right next to the window and built the machine in the
center of the opening using two old PC cases to raise the monitor to
an appropriate height (see the picture below left). The monitor was
duct-taped atop the PCs, the surround was taped to the LCD, and then
the top and side panels were taped to the top and bottom of the
window. The surround panels were made from corrugated plastic board
(also known as PP board
or future board
here in
Thailand). We could then simply close the gaps on the side of the
machine by sliding the windows up against the surround which gave it a
neat finish.
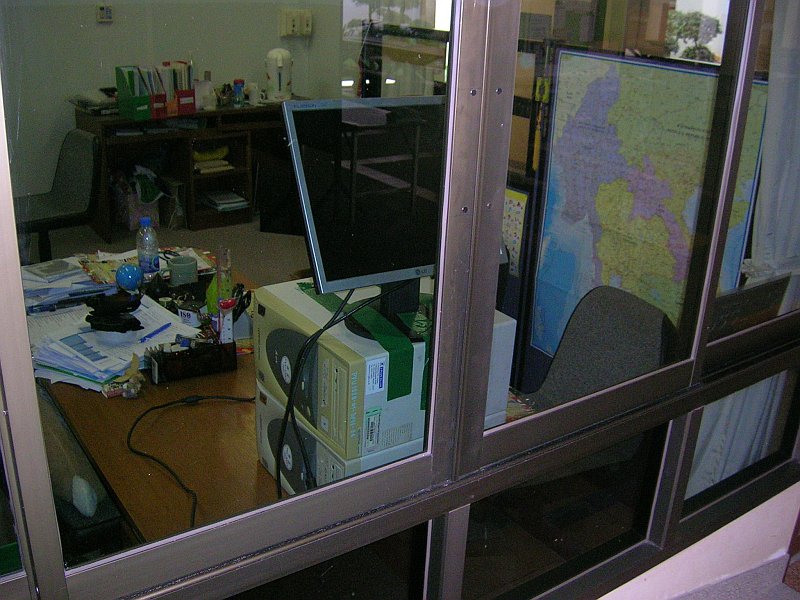
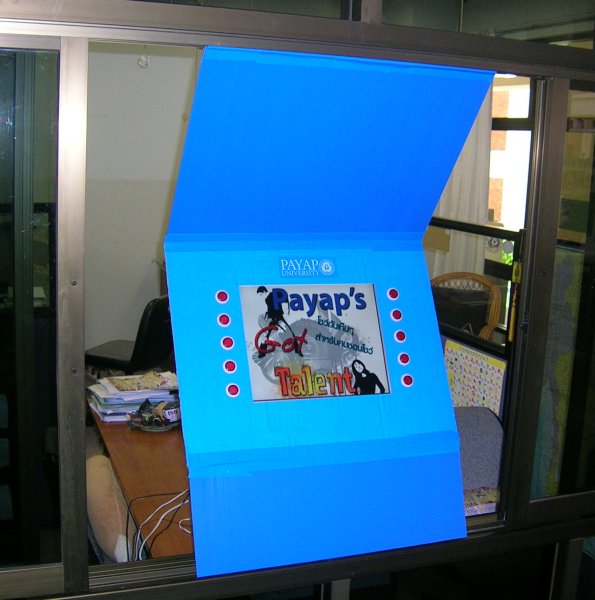
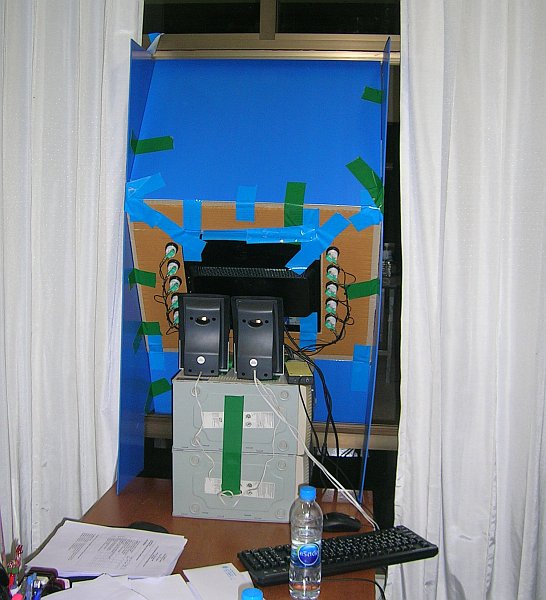
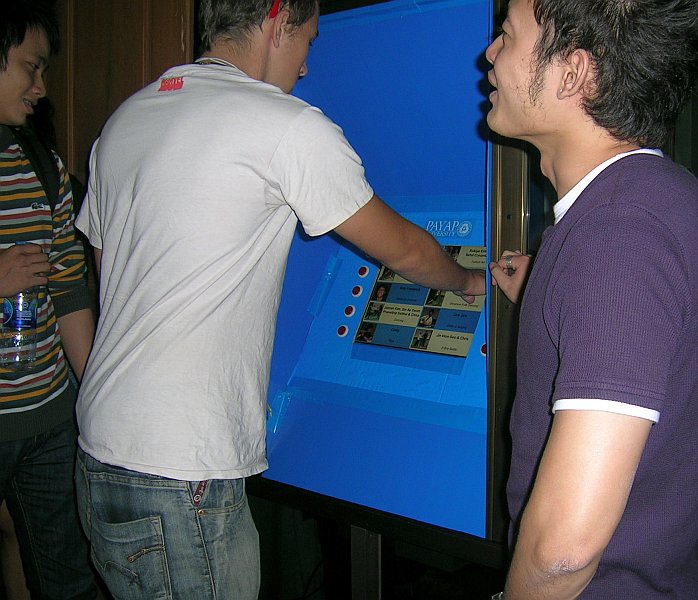
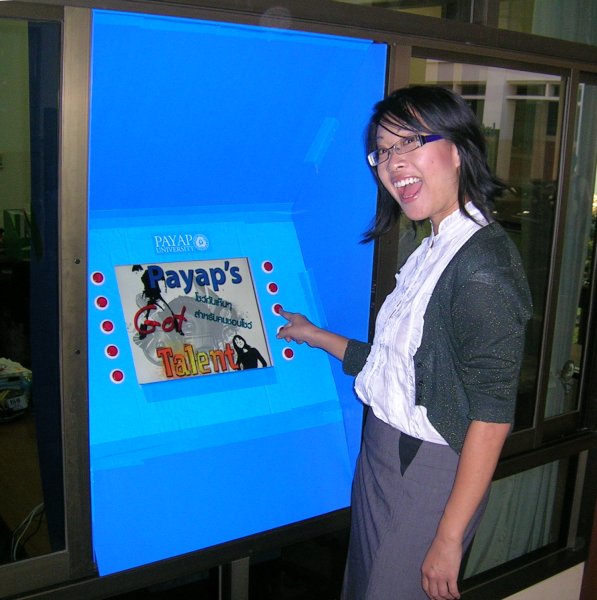
The view behind the scenes is somewhat scarier and if you look at the full-size image you can see the joystick in its new body sitting to the right of the speakers on top of the PCs. The last image shows the machine in action at the finals and it worked very well. The machine was cheap to build, it worked well on the day, and it was fun for the audience to use.
You may also be interested in reading about the buzzers used by the judges which are also powered by a hacked joystick, or some of my other projects: