
Thomas Tilley
[ Home ] [ Publications ] [ Resume ] [ Family ] [ Projects ] [ The Others ] [ Sitemap ]
[ Home ] [ Publications ] [ Resume ] [ Family ] [ Projects ] [ The Others ] [ Sitemap ]
 | |
 | |
 | |
 | |
 | |
 | |
 |
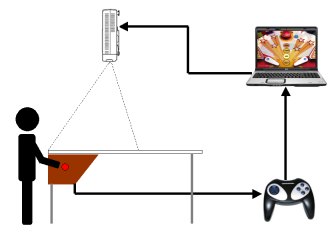
One day
during a meeting I found myself staring at the white office table in
front of me when I had a moment of inspiration. It occurred to me
that with a few minor modifications the table in front of me could be
used as a virtual pinball machine. By attaching some wood underneath
one end of the table it would be possible to mount some flipper
buttons. These could then be attached to a computer (via, say, a hacked USB joystick) running a
pinball simulation. Using a data projector the output of the
simulation could be projected directly onto the surface of the table
and you suddenly have yourself a real, tangible interface for a
virtual game! See the diagram below:
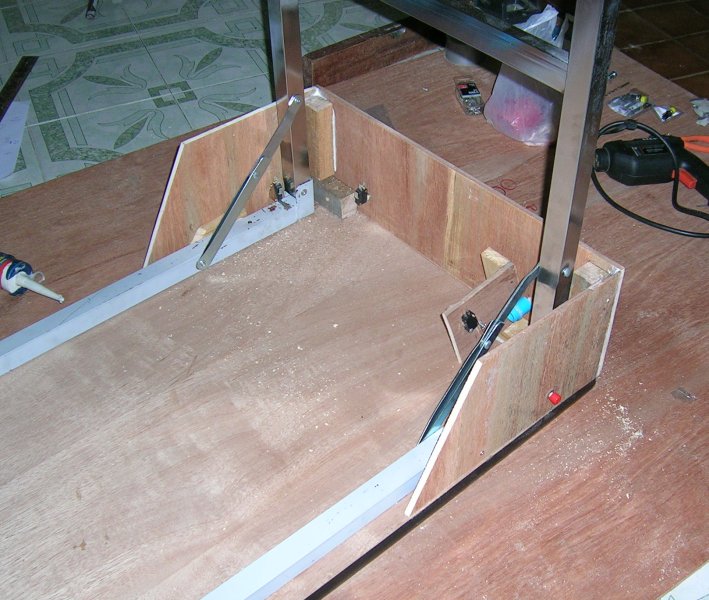
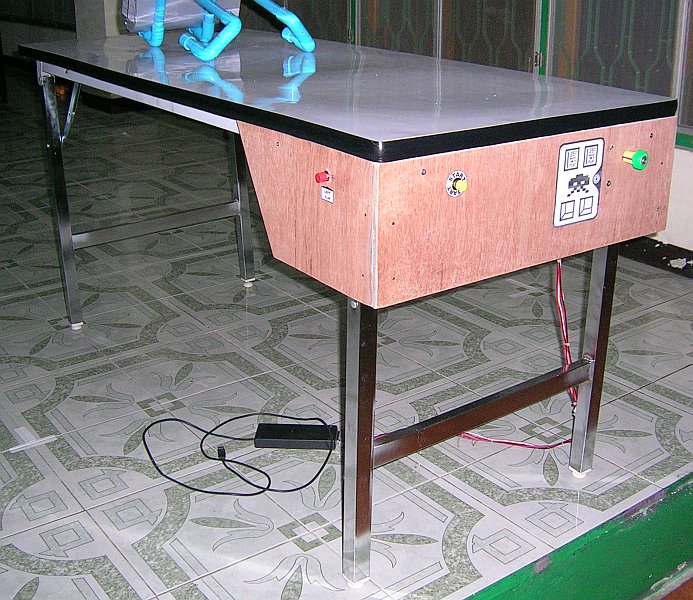
Fortunately for me the people I work with are very understanding and they allowed me to permanently mount four bits of wood under one end of the table (although they did make me climb out from under the table and wait until the meeting had finished). I then constructed a 3-sided "box" that was attached to these mount points by four screws. This arrangement allowed the box to be easily removed and the virtual pinball table could once again return to its guise as a mild mannered table working for a major metropolitan newspaper.

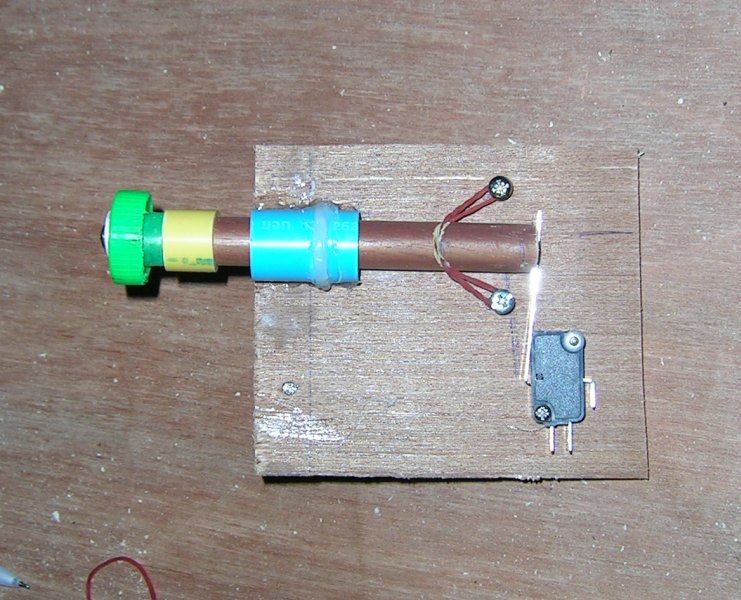
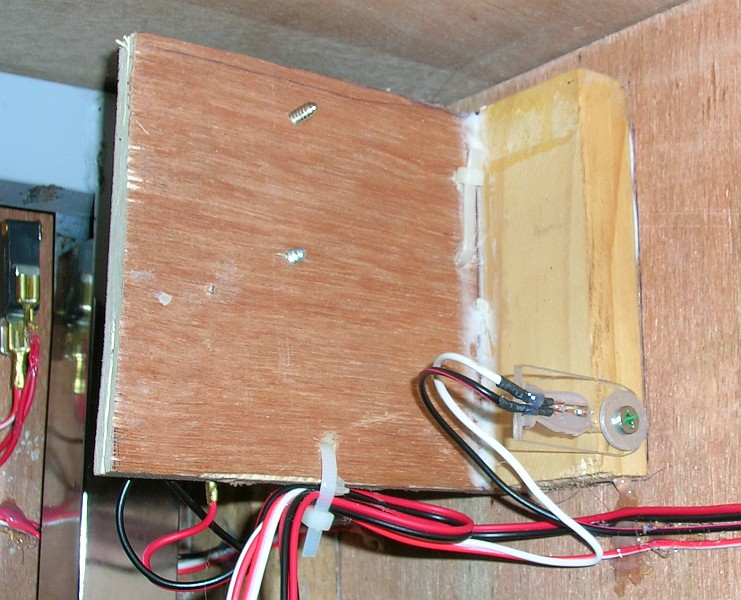
The plunger mechanism was constructed from a piece of wooden dowel, a section of PVC water pipe, a long arm microswitch and a rubber band. The microswitch was wired to operate in normally closed mode so that it works in the same way as the light inside your refrigerator. The arm of the microswitch is normally held close by the rubber bands pulling on the plunger (via 45 degree angle cut in its side). When you pull on the plunger the arm is released and the switch activates. The green knob is actually the stopper from a bottle of Thai paint thinner and the yellow spacer is a section of PVC electrical conduit.
On the reverse side of the plunger mechanism I also mounted a mercury switch which was hot-melt glued onto a small piece of clear acrylic. The switch acts as a bump sensor that allows you to give the table a nudge while the acrylic mount allows the angle and hence the sensitivity of the switch to be adjusted.
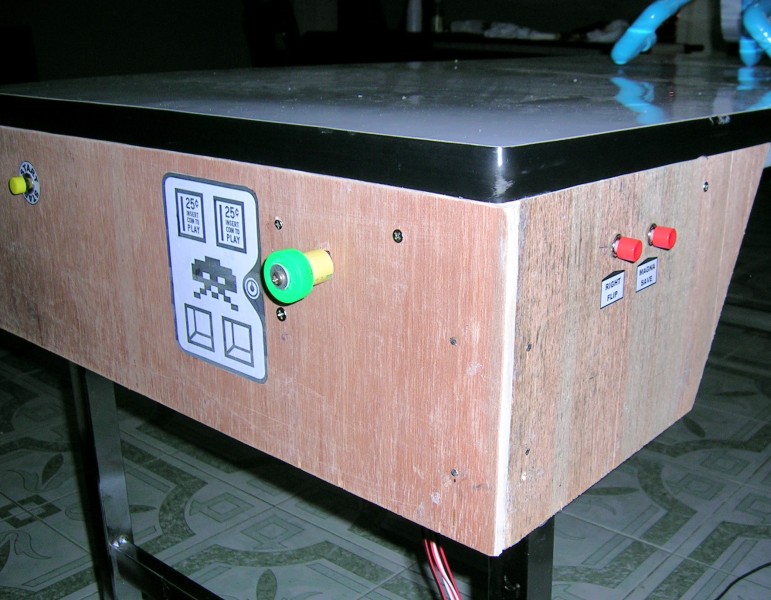
Having previously learnt my lesson about unreliable buttons I decided to track down some microswitch buttons and eventually found some like the one you can see on the left in the image below. I built the table with Pro Pinball: Timeshock! in mind and although the game is now over ten years old it is immensely fun and I knew that the hardware in my laptop would be able to cope with it.
The table in Timeshock! includes a magna-save feature (also found in some classic tables like Black Night 2000) so in addition to the left and right flipper buttons I also added a magna-save button on the right-hand side of the table. More recently I managed to find some genuine arcade buttons like the one shown left and the table has since been retrofitted.

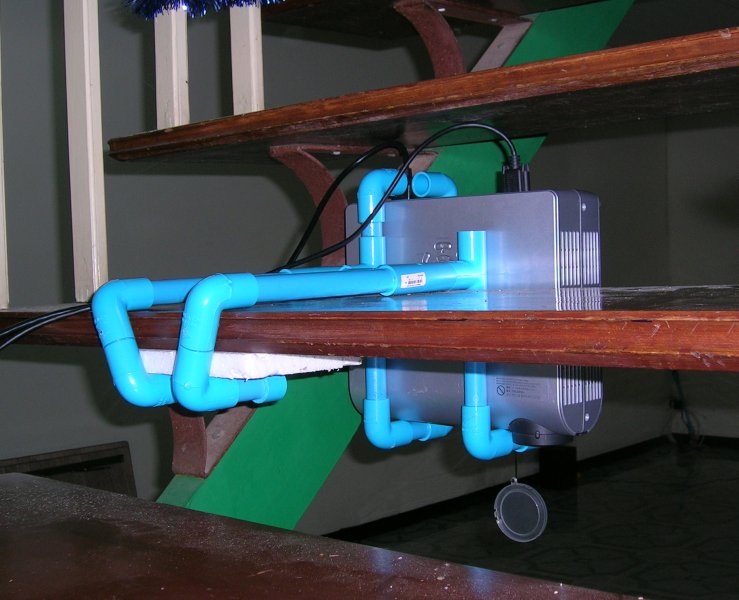
In addition to understanding team mates I also have some very understanding friends who agreed to allow me to suspend their data projector from beneath the top of our stairs. I purpose-built a cage out of PVC water pipe and internally reinforced some of the critical joints with wooden dowel - just to be safe. The projector fit snugly into the cage which was then further secured with duct tape.
Now, if you have looked at any of the other project pages on this site you will know by now that when I need to connect anything to a computer or a game console then a hacked joystick is my friend. Unfortunately my first and dearest friend - the Thrustmaster USB joypad that we originally hacked for our wooden DDR mat - was getting well past its prime. By this time some of the buttons weren't working reliably and you needed to wrap the lead just-so while standing on one foot and pointing it in a northerly direction to get it to work.
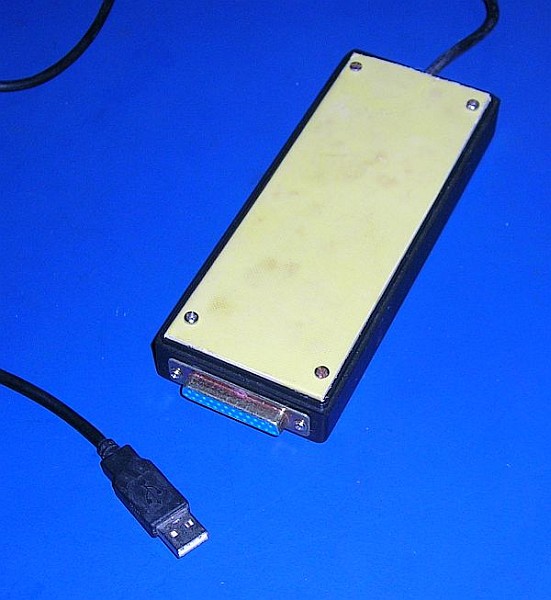
Following the lead of mad scientists everywhere I decided that the solution was to transfer my old friend's brain into a new body. I started by trimming and rewiring the USB cable to remove the intermittent wiring. Then I transferred the PCB into a new box made from the left-over half of the project case used in the bug-zapper guitar hero controller and some spare cutting board left-over from the pedals of the PVC car controller. I wired the bump switch and the four table buttons (start, magna-save, and the two flipper buttons) to a male 25 pin D-SUB connector. The connector was then plugged into the computer via the hacked joypad and all that remained to be done was to set the appropriate input key mappings in the simulator.
Here's a short video of the completed table in action playing Pro Pinball: Timeshock!:
While Timeshock! is able to provide four different table views, they can only be displayed in landscape mode. To match the orientation of the projected image with the real table underneath requires the image to be projected at 90 degrees across the short-side of the table rather than along its length. To make better use of the real table's display real-estate requires a pinball simulator like Future Pinball which allows you to rotate the table view or display the table in portrait mode.
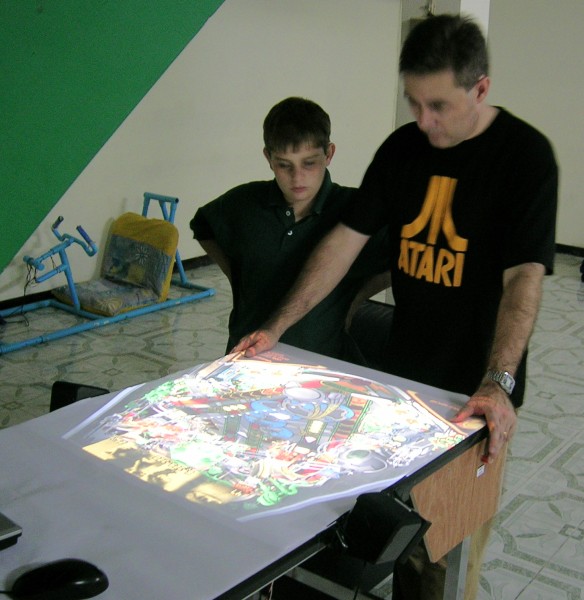
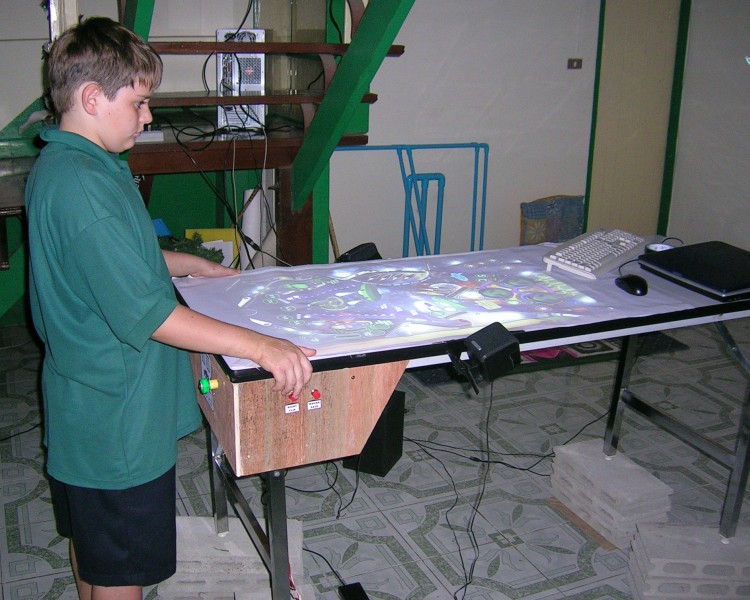
Future Pinball is a free pinball simulator with real-time 3D graphics, dynamics reflections, advanced physics, and a built in editor and scripting engine. The picture below left shows my son playing Future Pinball's Sci-Fi Classic demo table. The game is running on the desktop machine seen behind the stairs because unlike Timeshock! or Pro Pinball: Big Race USA (another great simulation we've played on the table), Future Pinball requires a decent graphics card.
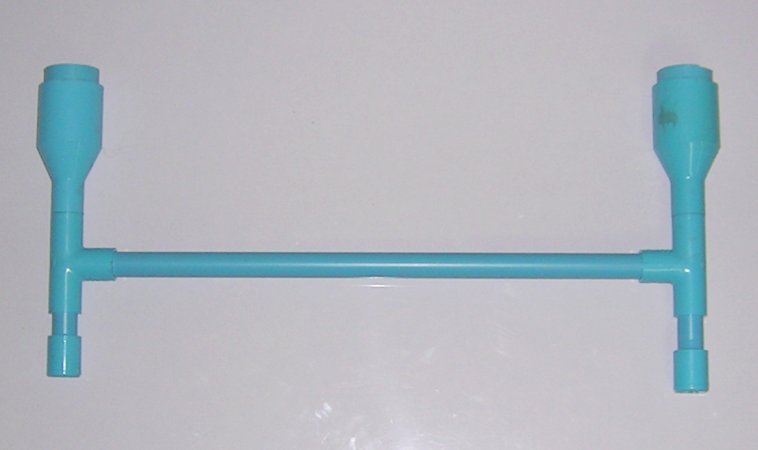
You may also note that the table is sitting on bricks used to raise the height to a more ergonomic level. These have now been replaced with more portable PVC leg extensions.
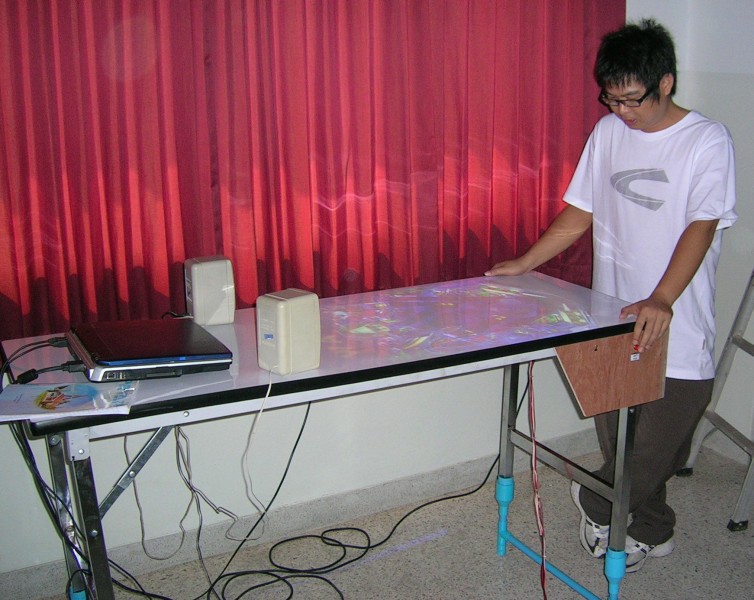
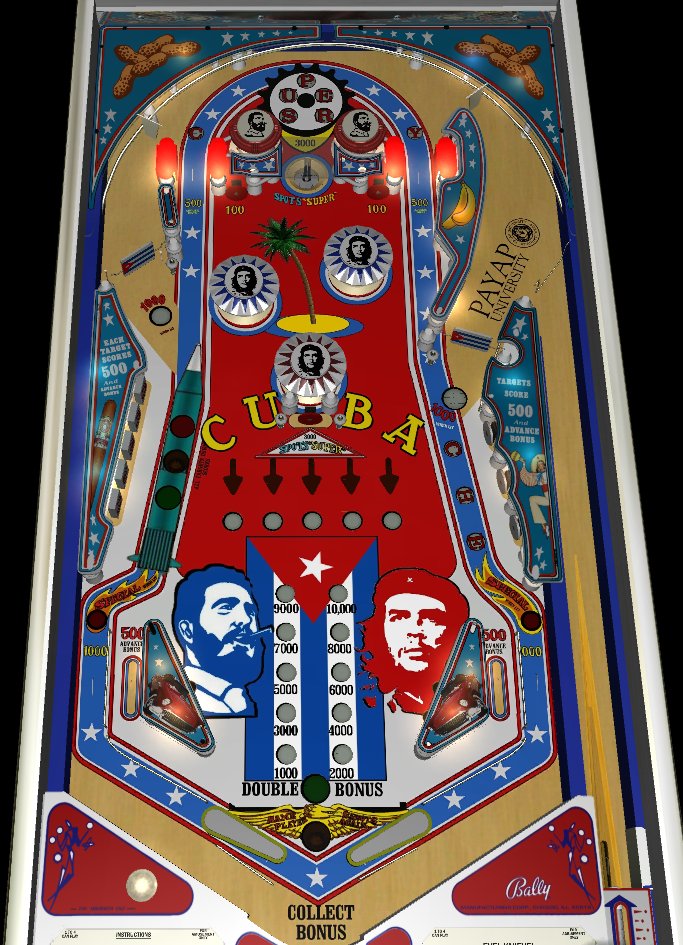
The virtual pinball table is great fun to play and has now been used in a number of different locations. As a result I have a growing collection of cages which have been used to suspend different models of data projectors beneath various air-conditioners and ceilings. One of these locations was the 2008 International Day at Payap University where we created a Cuban-themed Future Pinball table. The table was based on Greywolf's electro-mechanical Evel Knievel table and included iconic Cuban imagery like peanuts, palm trees, bananas, cigars, missiles, maracas, classic cars, Che Guevara and Fidel Castro. Click on the picture below right for a screenshot.

You may also be interested in reading about my Payap Pinball Machine or some of my other projects, many of which use hacked controllers, PVC water pipe and/or mercury switches: