
Thomas Tilley
[ Home ] [ Publications ] [ Resume ] [ Family ] [ Projects ] [ The Others ] [ Sitemap ]
[ Home ] [ Publications ] [ Resume ] [ Family ] [ Projects ] [ The Others ] [ Sitemap ]
 | |
 | |
 | |
 | |
 | |
 | |
 |
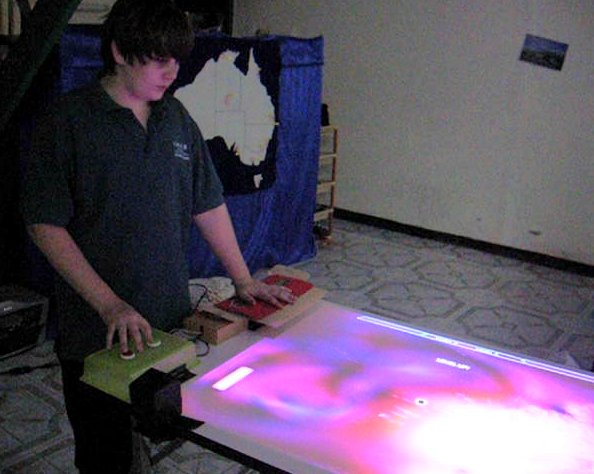
This is a table I built to play Steve Taylor's Plasma Pong game using an ordinary office table, an overhead mounted data projector, a hacked optical mouse, some arcade buttons, a pizza box, and some duct tape.
I had been thinking about some simple projects to make with students in the Computer Information Systems Department at Payap University where I teach. The projects needed to be something that a group of students could put together in a few hours but they should also be geeky, engaging and fun. This was one of those ideas. I wanted to use the same overhead data projector setup from the virtual pinball machine but with a very cheap controller constructed from an inverted optical mouse and some cardboard.
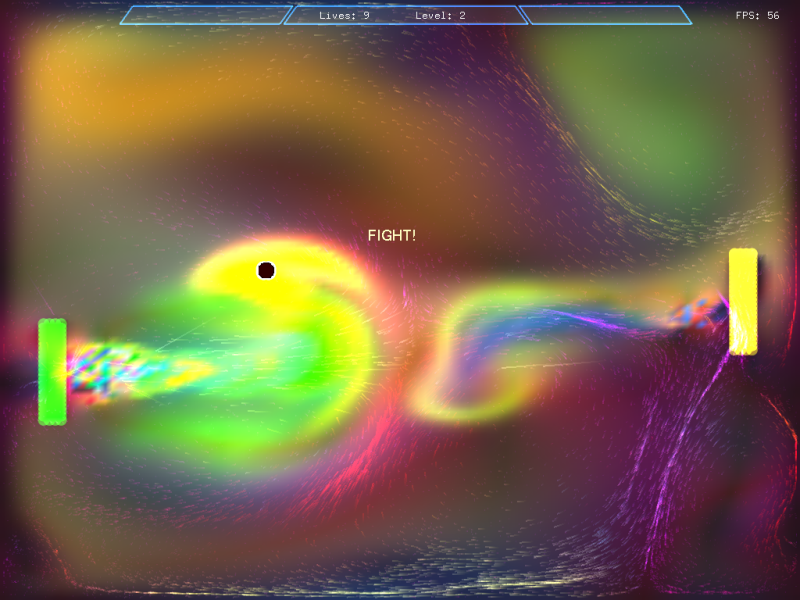
Here's a description of Plasma Pong from the game's README file:
Plasma Pong is a variant of the popular PONG game, with a high tech
twist – it
uses computational
fluid dynamics to drive the environment. As the game starts you
will have to duke it out against the opposing paddle, using the fluid
as your weapon. To do this you can shoot plasma out of the paddle to
push the fluid around, which in turn pushes the ball around. Another
weapon at your disposal is the ability to suction fluid back into your
paddle. By doing this, possession of the ball can be controlled by the
player. Once the ball is fully sucked into the paddle you can blast
the ball across to the opposing player’s side.
Unfortunately the game is no longer available because "Pong" is a
registered trademark of Atari,
however, you can still find videos online of people playing Plasma
Pong using some novel interfaces like:
a pen on a tablet
computer,
a Wii-mote and
IR-pen using Johny Chung
Lee's Wii-mote
whiteboard software, and
a musical
keyboard via a MIDI interface.
Mouse Hacking
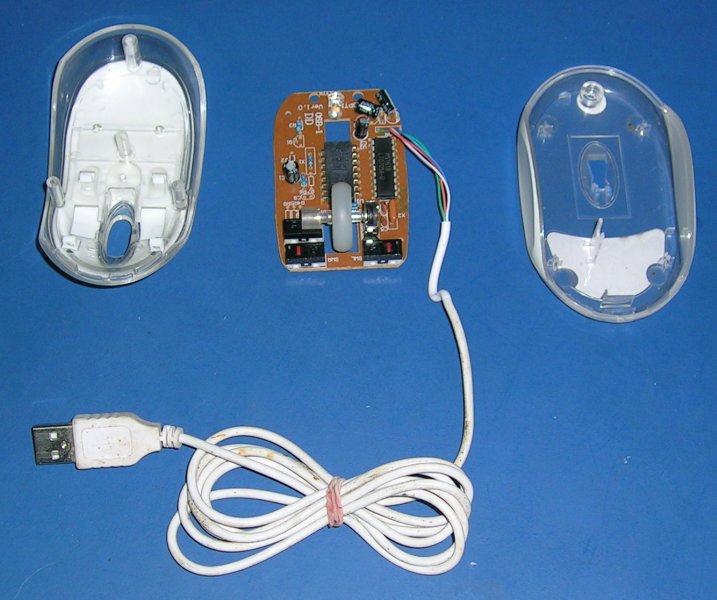
I wanted to use an inverted optical mouse for paddle control on the table and I didn't want to destroy the mouse but I needed a way to access the left and right mouse buttons to play the game. Fortunately, a friend had donated an intermittently working mouse to me so I decided to fix the mouse and at the same time add an external connector that was patched into the buttons. This would allow me to use external buttons for the game that could then be unplugged for normal, non-inverted mouse operation.
While hunting for a suitable connector to steal I opened up the back of an old printer (that had also been donated to me by a friend) and this is what I found:

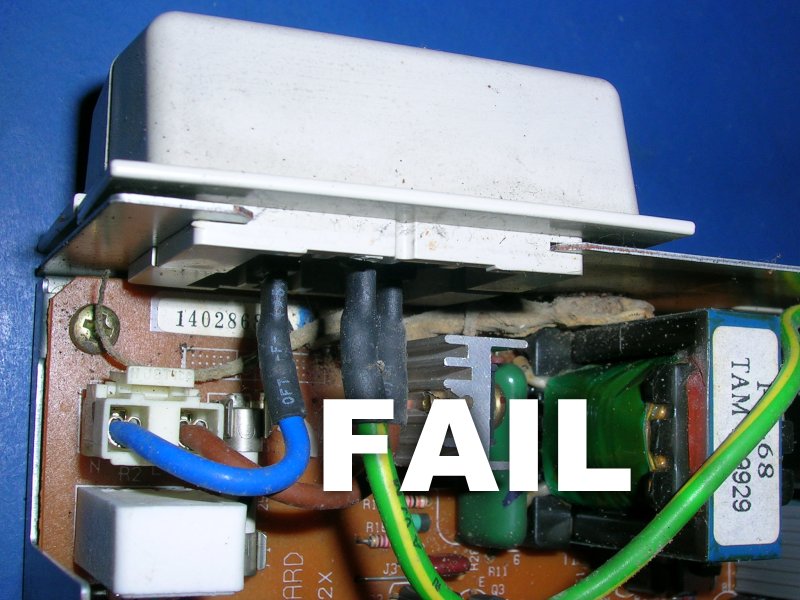
I couldn't decide which of the two captions was most appropriate for this poor gecko so I included both. Recently, one of my colleagues had a related experience when he discovered that his ADSL modem had died. When he opened the case he discovered that the Internet tubes were completely blocked with tiny red ants.
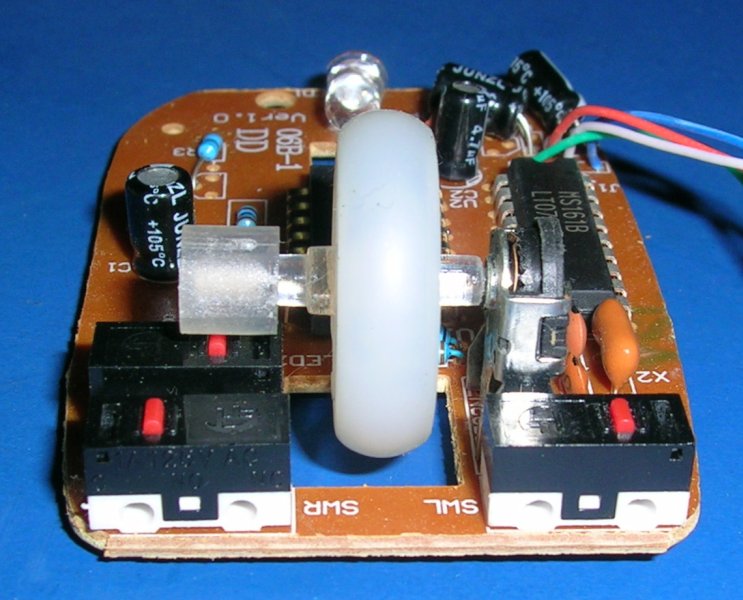
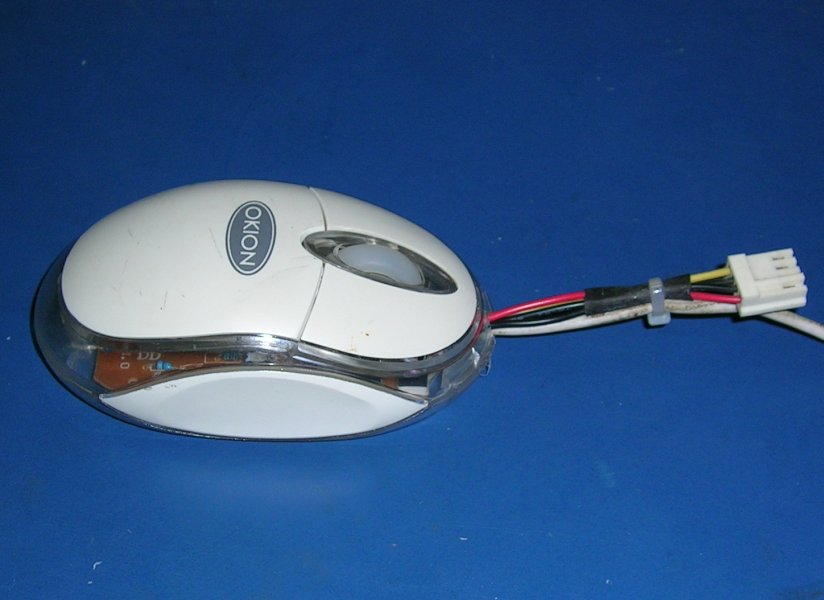
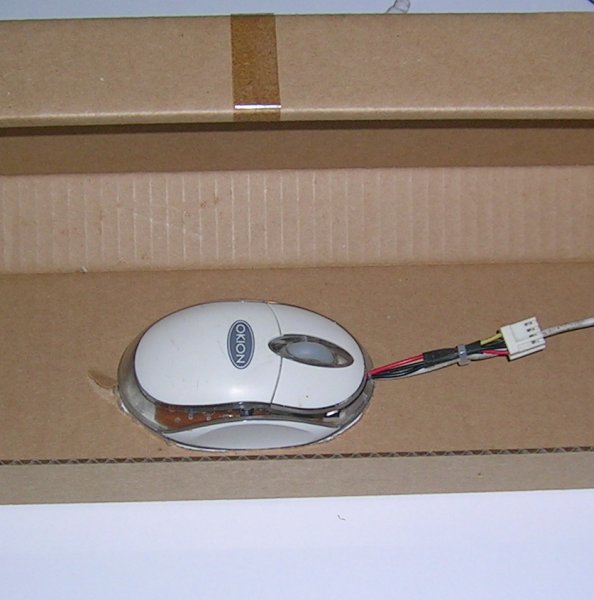
Despite the large number of non-working donated items that my poor wife puts up with I failed to find the connector I wanted so in the end I cannibalised a 4-pin Mini-Molex connector from an old floppy drive. The middle picture below shows the naked mouse which had an intermittent wire in the kinked section of cable. The three black boxes near the wheel are the button microswitches.
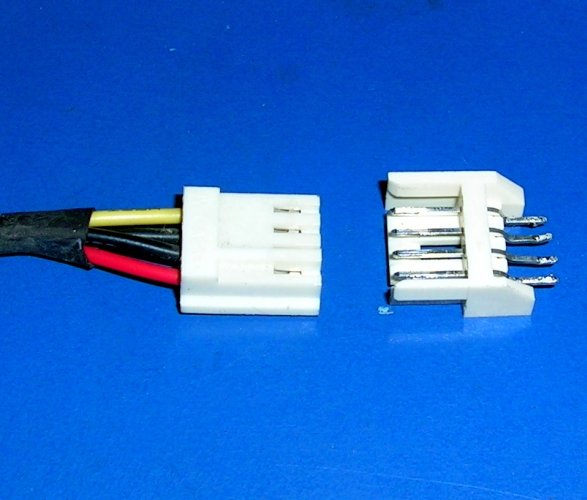
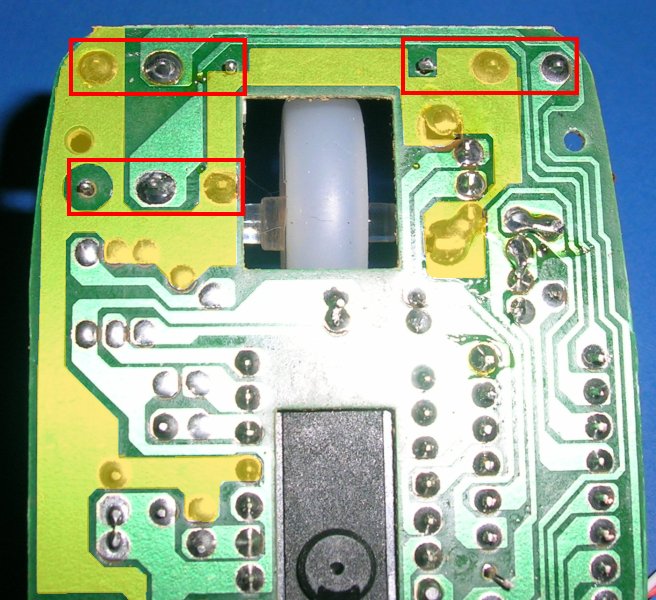
The first picture below shows the mouse's printed circuit board (PCB) with the common connection highlighted in yellow and the location of the three buttons shown in red. Although I only need the left and right mouse buttons I also wired the middle button because I had a spare wire on the Molex connector and it may come in handy for a future project. The yellow wire is the common connection, red is the right mouse button, and the two black wires (normally the 5v and 12v ground connections on a floppy drive) are patched into the left and middle buttons. While the mouse was open I also trimmed and re-soldered the intermittent section of cable.
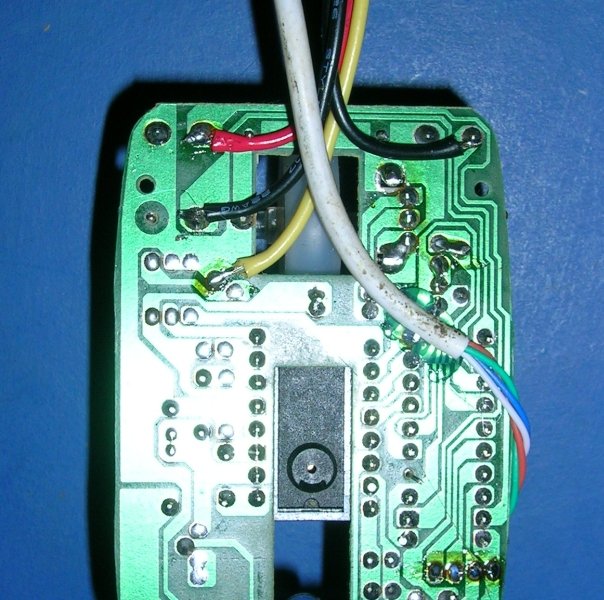
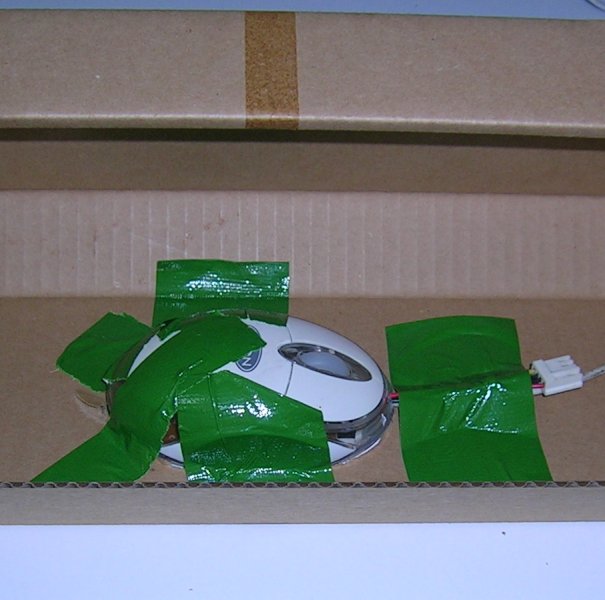
The original opening in the front of the mouse needed to be enlarged slightly to allow for the extra four wires but otherwise it went back together easily and the completed "franken-mouse" can be seen below right. The connector is larger than what I originally hoped to use but: it was all I could find at the time, it works, and the mouse is now working (although it is now also somewhat uglier than when I received it).
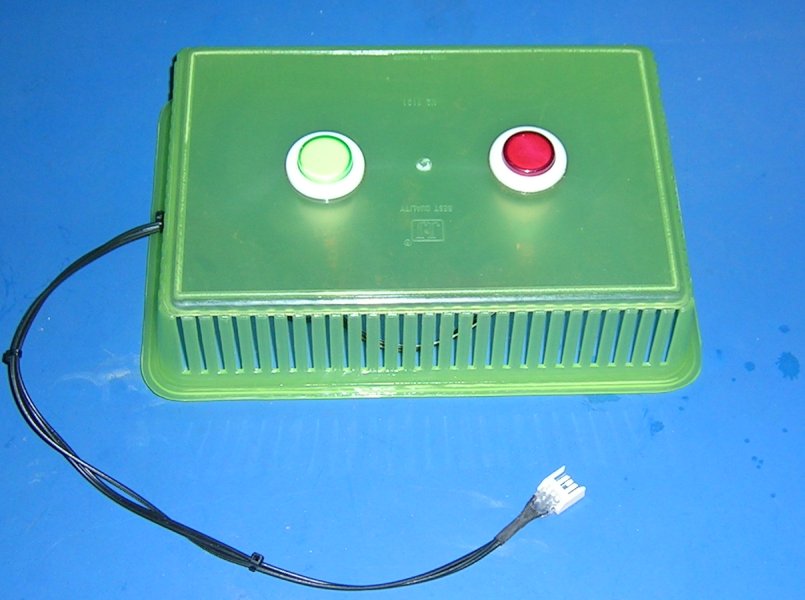
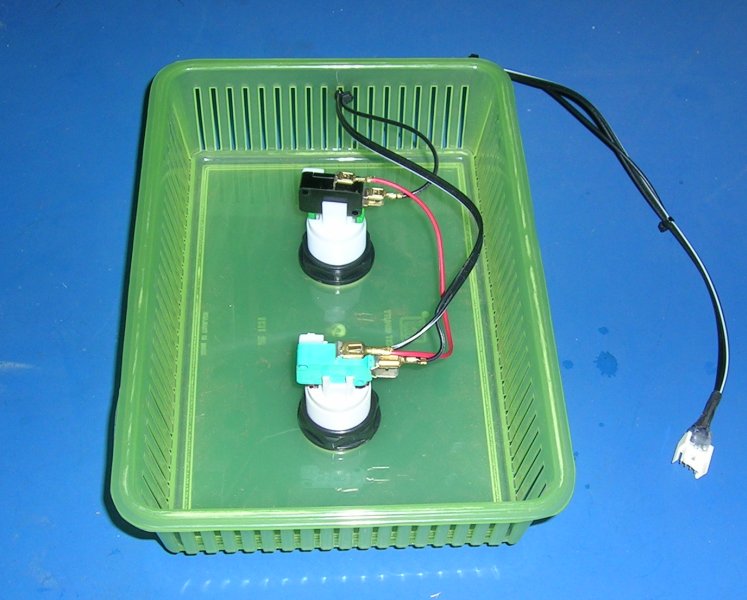
The male-side of the Mini-Molex connector is wired to two microswitch arcade buttons mounted in the bottom of a cheap plastic basket that I bought especially for the purpose. These are the "suck" (suction plasma) and "blow" (eject plasma) buttons which are connected to the left and right mouse buttons. The current gap between the centres of the two buttons is about 9cm (3 and 1/2") but I think 6.5 or 7cm (2 and 1/2" to 2 and 3/4") would have been more ergonomic.
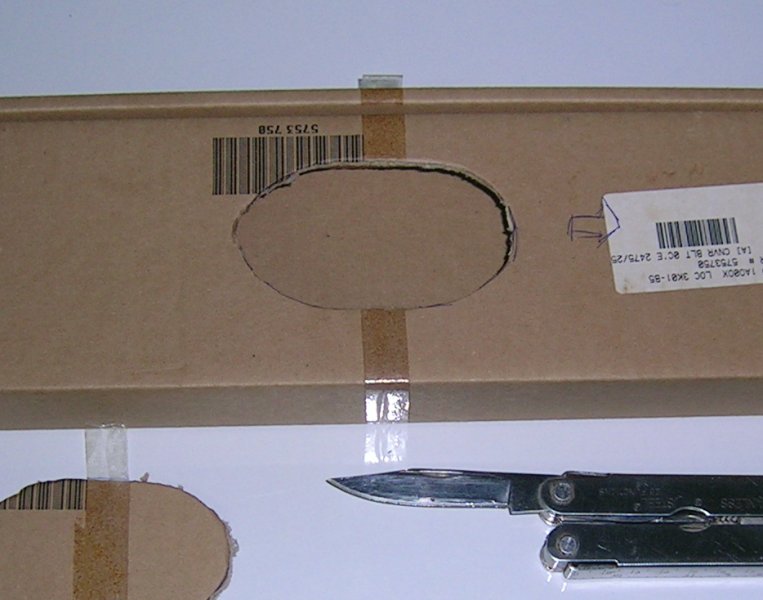
The mouse is mounted upside down in the lid of a cardboard box that I stole from our recycling bin. The dimensions of the box aren't that important but the height must be big enough so that the mouse fits comfortably inside. Also note that the cable points towards the right - this gives the correct control orientation within Plasma Pong so that sliding something (say a pizza box) over the inverted mouse will also move the paddle to the right (more about this later). The mouse is simply held in position using some duct tape.
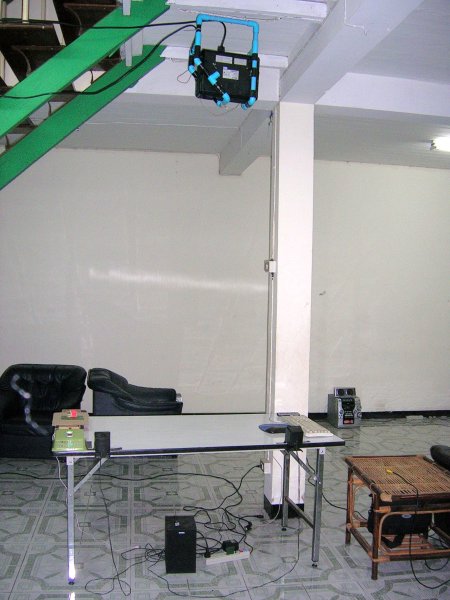
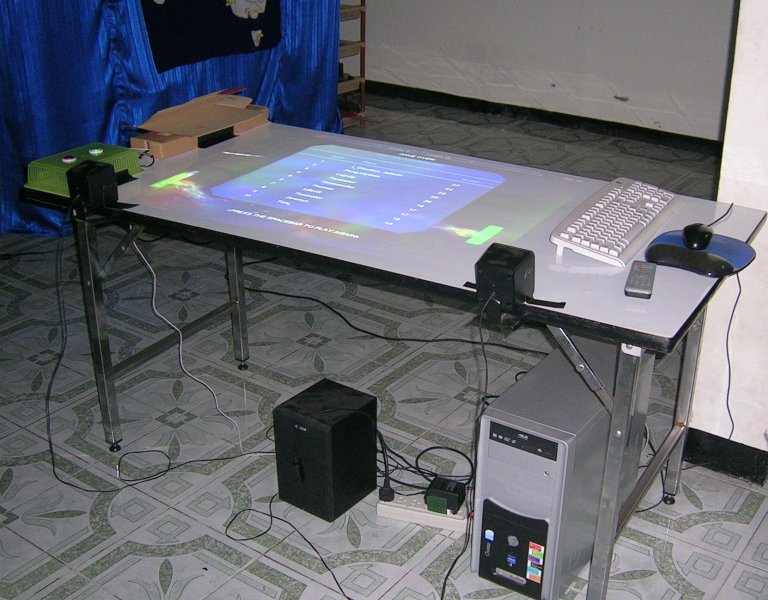
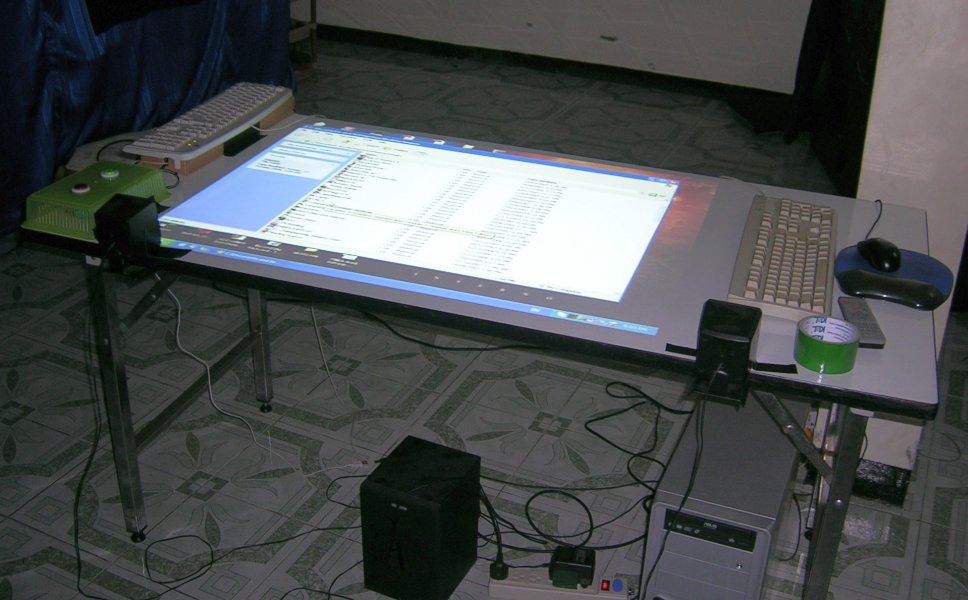
Below you can see a picture of the box and the buttons mounted at one end of a white office table using more duct tape. This table is about 76cm (2 and 1/2') wide and 153cm (5') long which is larger than the one I use for pinball. The data projector was mounted using one of the PVC cages I built for the virtual pinball machine and there is enough adjustment in the projector's throw so that the image nicely fills the table. The pumping soundtrack is a huge part of the Plasma Pong experience so using still more duct tape I mounted speakers at each end of the table. A second mouse and keyboard are used to start the game and change settings.

Here's a video of the table in action:
As you can see in the video we originally used the lid from a pizza box which was folded in half as the "slider" for our controller. Sliding the pizza box lid to make the paddle move has a very intuitive feel and the sensitivity can be easily adjusted via the Control Panel in Windows. Our mark 2 controller - aka "Mr Spock with extra anchovies" (see the image below) - is somewhat more stylish and was made by cutting the lid in half and adding a handle with yet more duct tape. The best control is achieved by playing using the Vulcan salute.
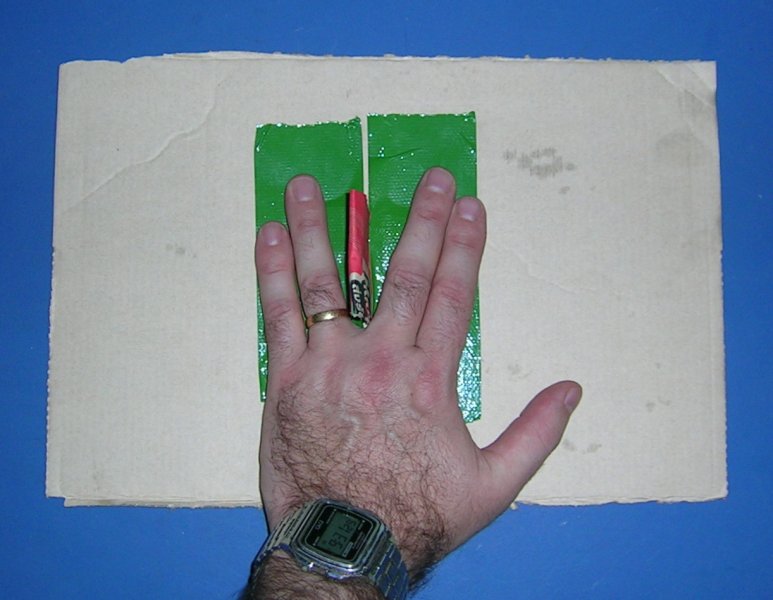

This style of control also lends itself well to playing other Pong-like games where the paddle is positioned at the bottom of the screen. The correct controller orientation is obtained by cutting a hole in the other side of the cardboard box and rotating the mouse 90 degrees so that the cable comes out the "north" side (imagine holding a mouse normally in your hand and then simply turning it over). See the image below.
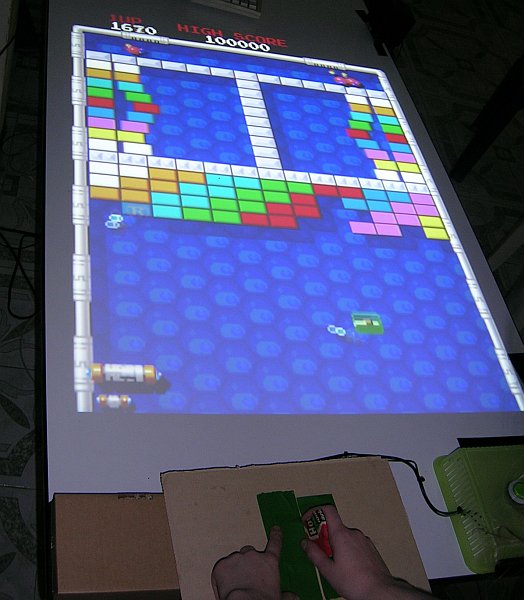
MAME has a built-in command line option to rotate the display which we used to play Arkanoid. I would also like to try Tempest and see how well the control works with a spinner based game. Klax is another favourite game that may work well with this style of control. Of course that are also many other standalone Arkanoid-style games and Breakout-style games that could be played using this setup.
To play Snood we changed the graphics card settings to rotate the display 90 degrees. It may have been simpler to simply physically turn the table 90 degrees and adjust the projector's throw but then it wouldn't make the most of the table's available screen real-estate.


Plasma Pong includes a two player mode but because systems with more than one mouse are rare it uses keyboard input for both players. My son and I battled it out on the table using two USB keyboards but we first had to swear an oath not to "accidentally" press the other player's keys.
It may be possible, however, to play using multiple mice (mouses?) in conjunction with a utility like Carl Kenner's GlovePIE. GlovePIE is a very flexible input emulator and re-mapping tool that supports multiple mice connected to the same computer. Two players could each use an inverted mouse controller remapped via GlovePIE to Plasma Pong's keyboard inputs.
Using this approach it is also possible to play a single player game without hacking the mouse. A keyboard can be used instead of the arcade buttons described above by remapping two keys - say the up and down arrows - using a simple GlovePIE script like this:
You could then use any optical mouse and provided that you have a spare cardboard box, some duct tape, an available office table, you're hungry for pizza, and you're willing to suspend a data projector from the ceiling - then you can build your very own Plasma Pong table.
You may also be interested in reading about some of my other projects: