
Thomas Tilley
[ Home ] [ Publications ] [ Resume ] [ Family ] [ Projects ] [ The Others ] [ Sitemap ]
[ Home ] [ Publications ] [ Resume ] [ Family ] [ Projects ] [ The Others ] [ Sitemap ]
 | |
 | |
 | |
 | |
 | |
 | |
 |
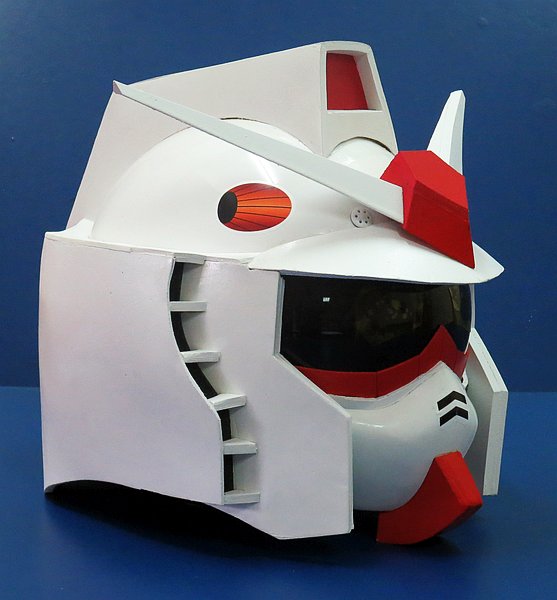
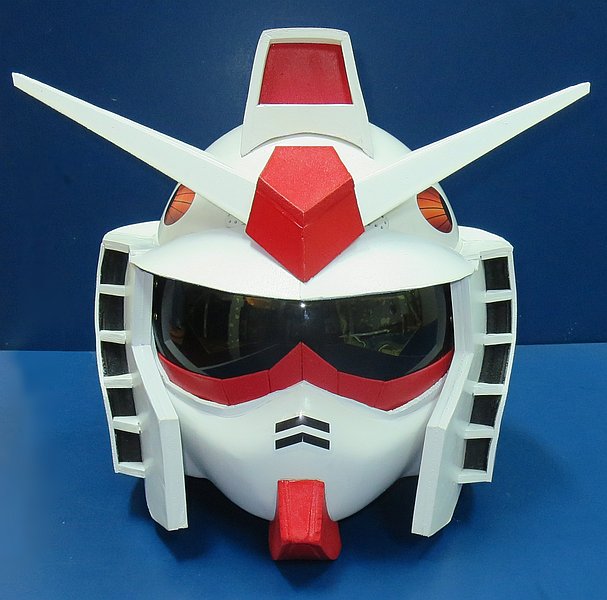
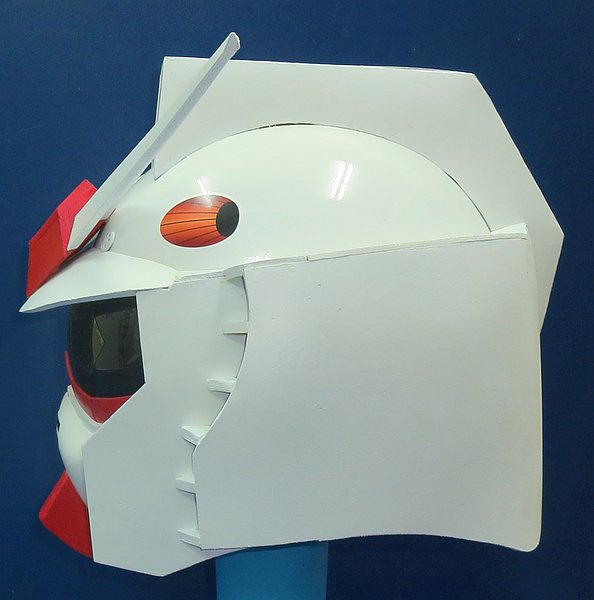
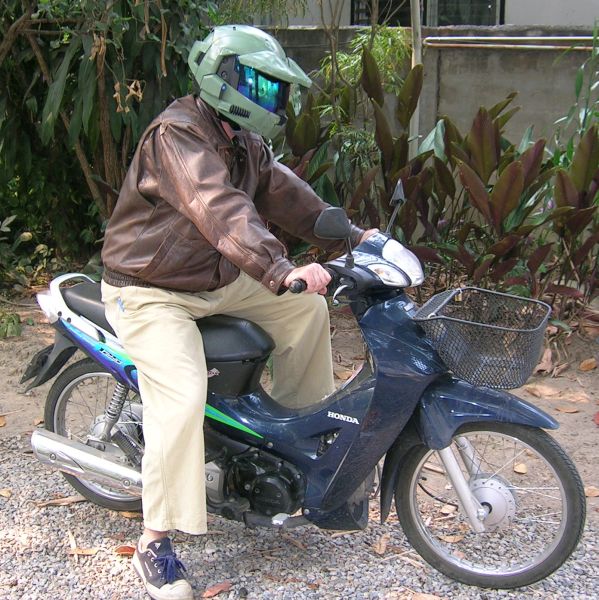
 Over the last 9 years I've noticed the popularity of Gundam ("ガンダム" in Japanese and "กันดั้ม" in Thai) here in Thailand. Back in 2014 Honda actually released a Thailand-only special edition Gundam MSX 125 motorcycle that included a custom painted helmet. I thought it would be fun to make my own Gundam motorbike helmet based on the iconic RX-78-2 mobile suit from the original Mobile Suit Gundam series.
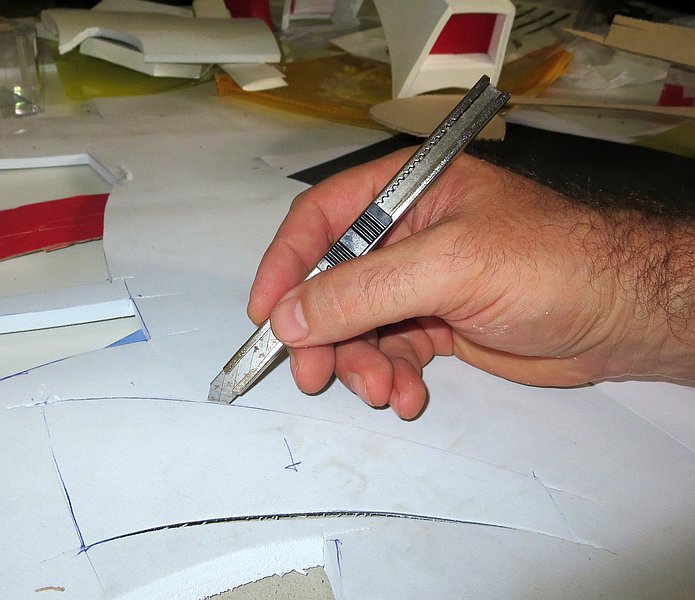
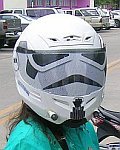
I was originally hoping to use Luna Titanium Alloy for the modifications but apparently it is hard to refine and very expensive. Instead I used some high-density foam rubber that I originally bought when I was making my wife's Stormtrooper motorcycle helmet. All of the modifications to the helmet were made using a combination of high-density foam, PVC stickers, and spray paint and you can read on below to find out how I did it.
It took about 6 weeks of "spare time" to make the helmet which is about 32 cm (0.32 m) high. Based on estimates from images and drawings online the full-size Gundam head appears to be about 2.5 m high which would make my helmet approximately 1:8 scale.
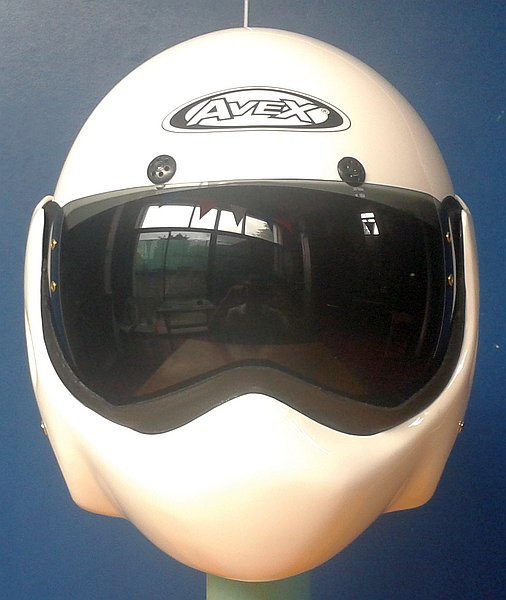
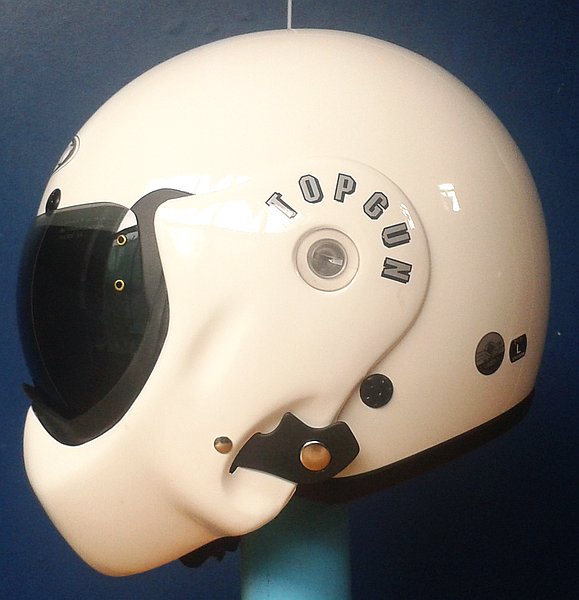
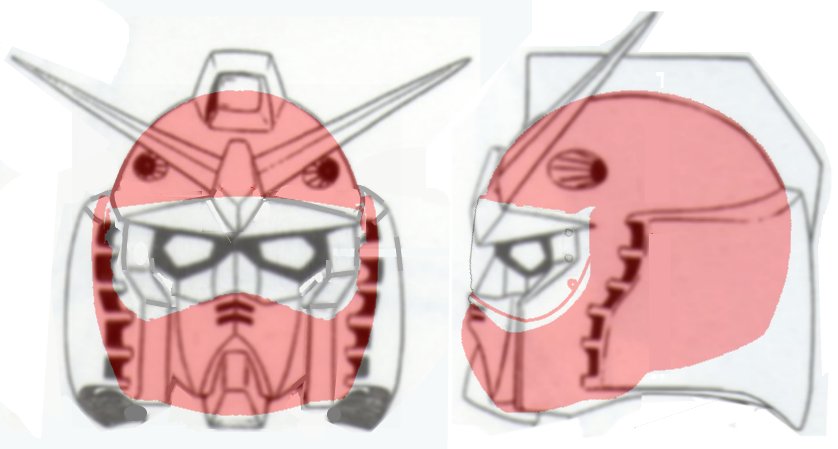
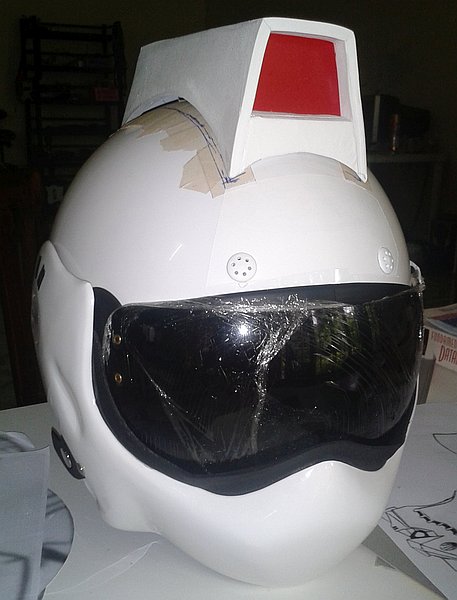
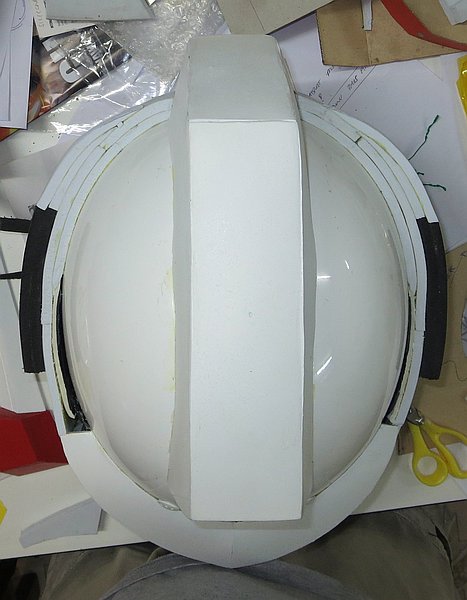
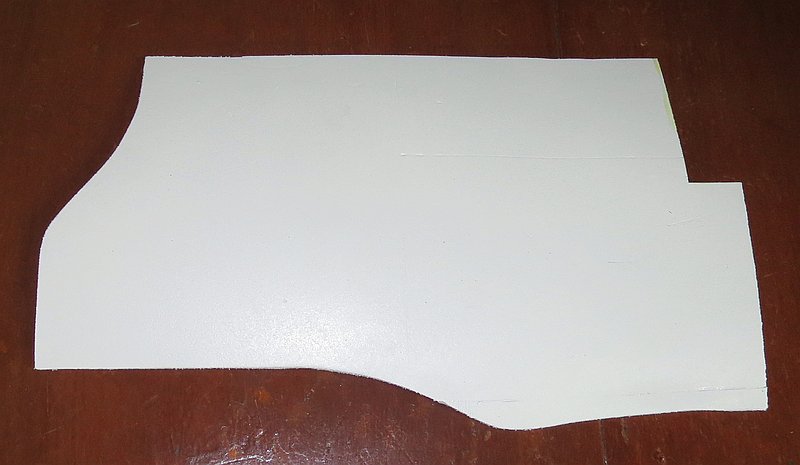
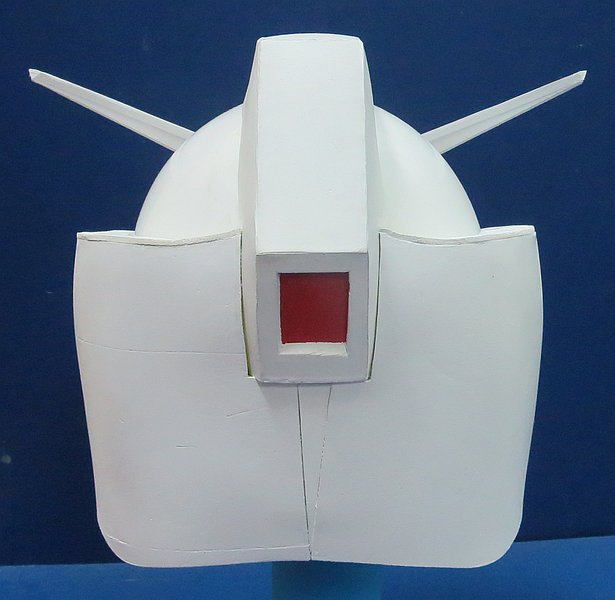
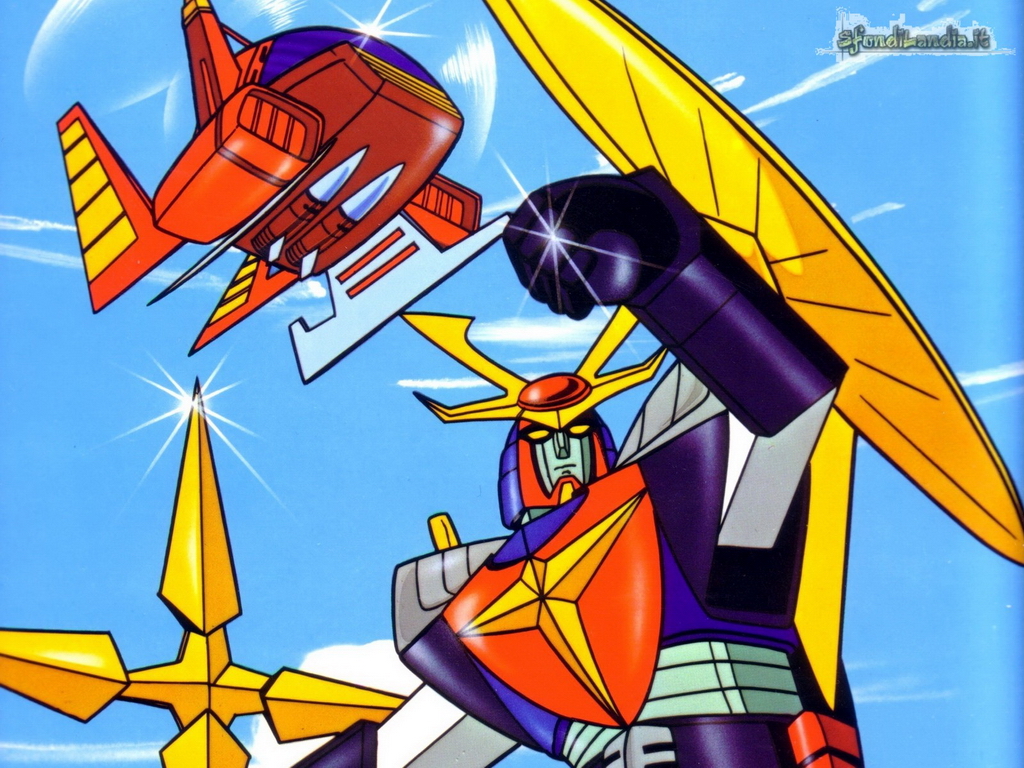
I started with a white Avex Top Gun helmet and then using the three views of the RX-78-2 head in the lower right corner of this image as a reference I made the overlay image shown below right. The proportions of the original Gundam head have been stretched to best fit the shape of the motorcycle helmet.
In a few online forums I read about the influence of Samurai helmets (known as kabuto) on the design of the Gundam mobile suit heads. I also thought the main camera cover/top crest looked a lot like the crest on a Roman galea helmet - until I saw this image. I'm sure there must be a lot more information about this online and I suddenly wished I could read Japanese!
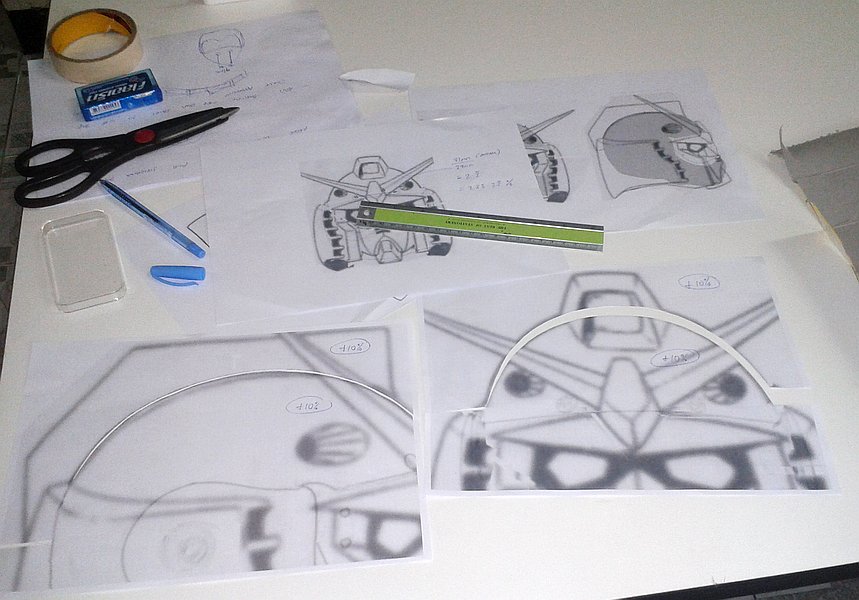
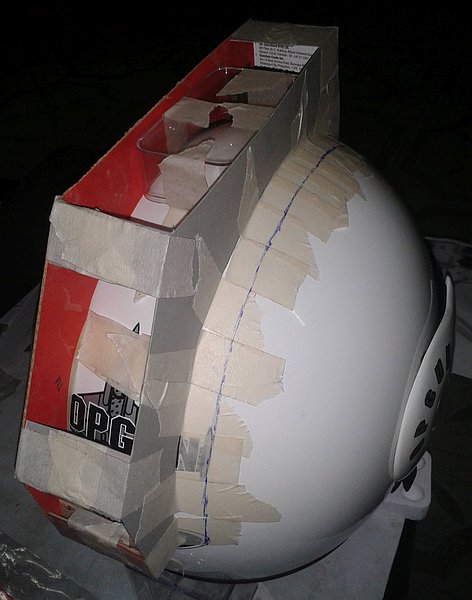
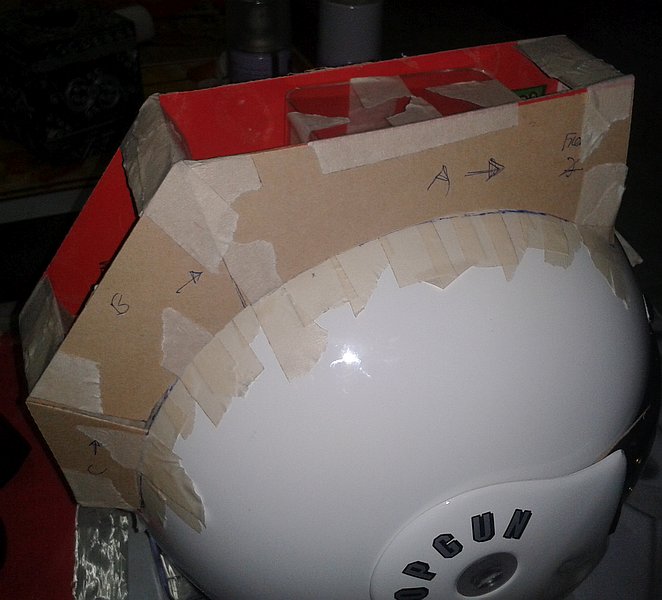
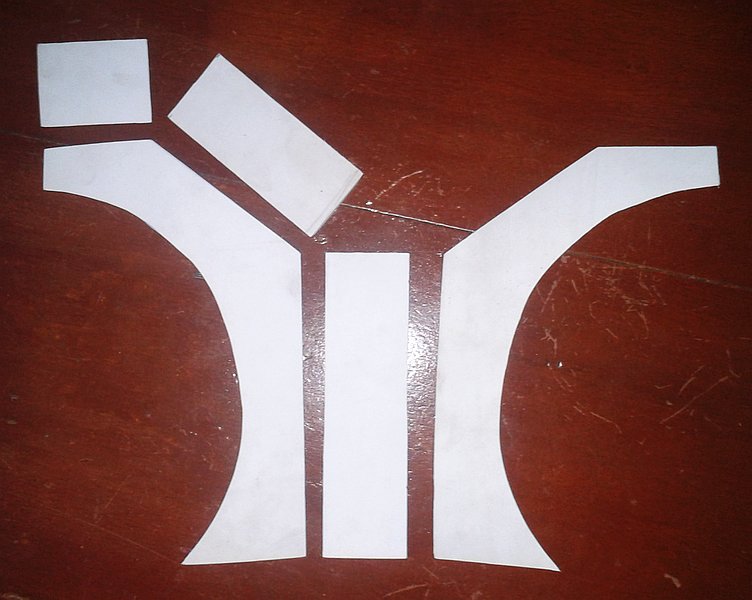
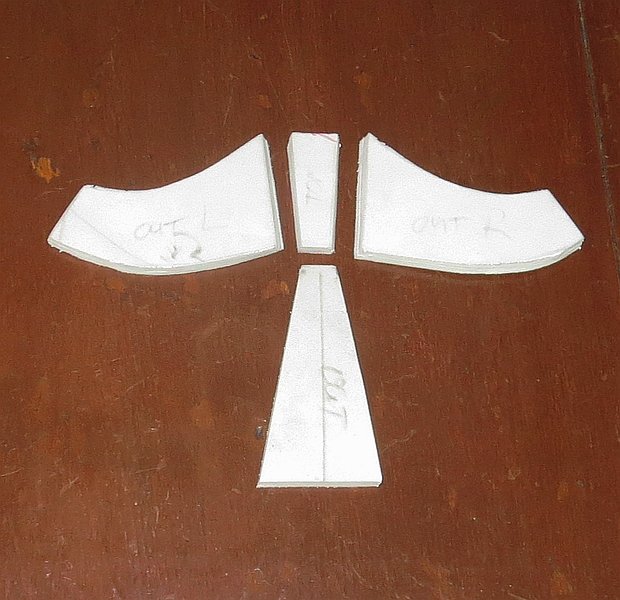
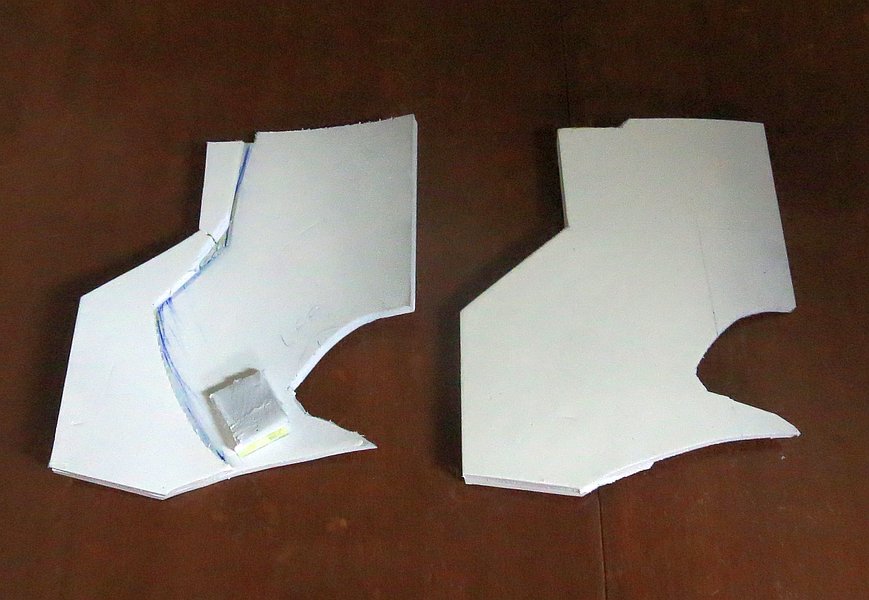
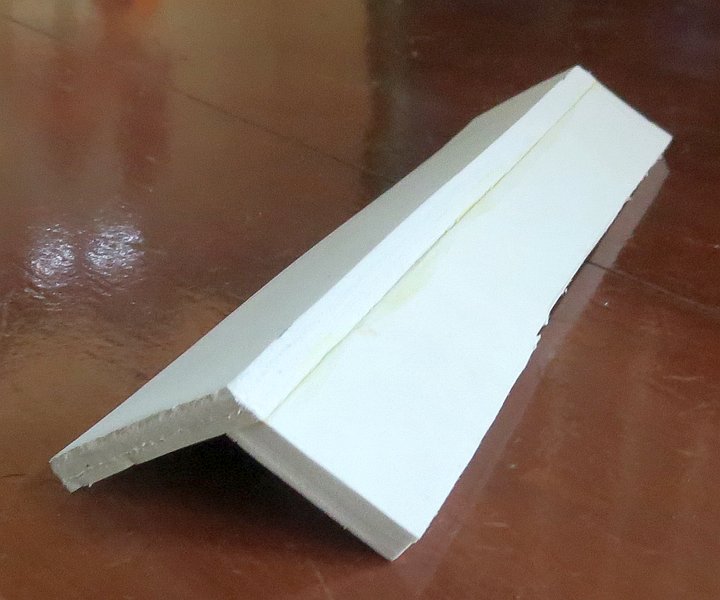
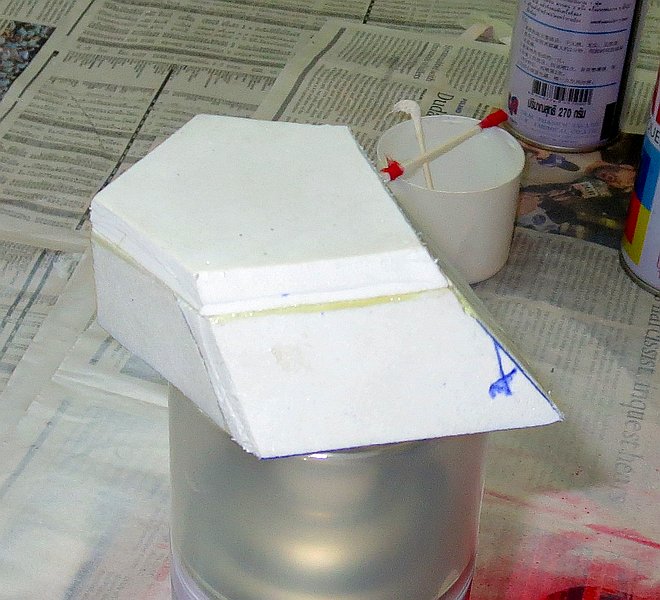
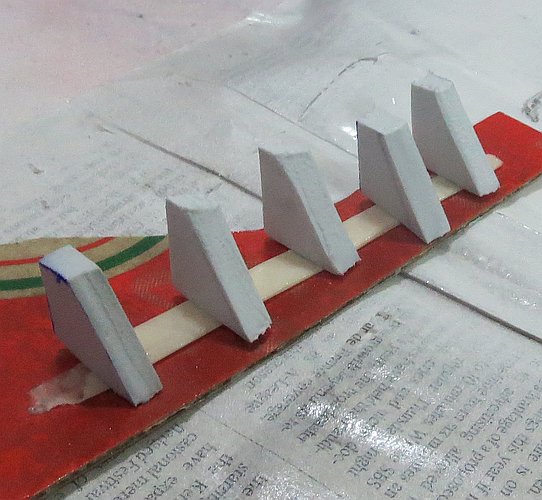
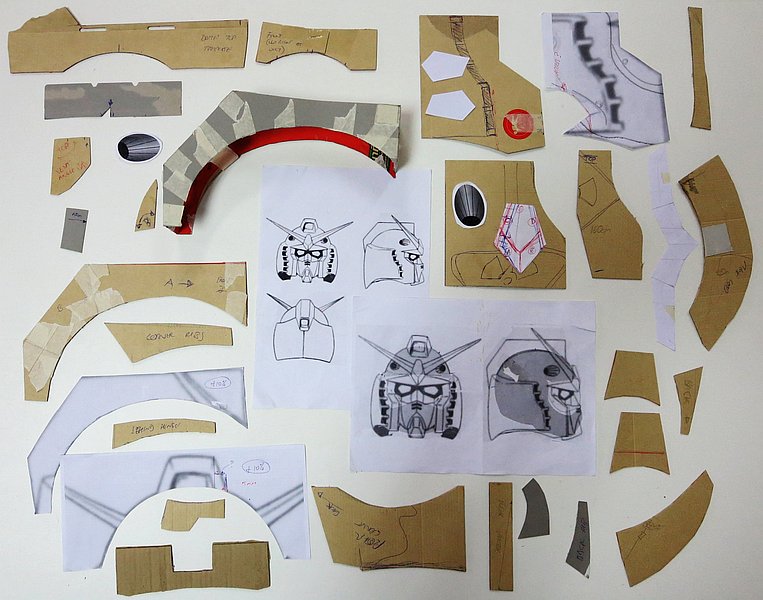
The main camera cover was the first part of the helmet I made and I started by taking some measurements off the real helmet and printing out full-size versions of my overlay images (see the first image below). These were then used to cut cardboard templates from a pizza-box to make a box on top of the helmet. Adding some masking tape to the top of the helmet I then drew a line parallel with the base of the box to give me the right "A-shape" for the sides of the crest. In the final picture below right you can see the cardboard templates which I then used to cut the final pieces from 6 mm thick high-density foam.

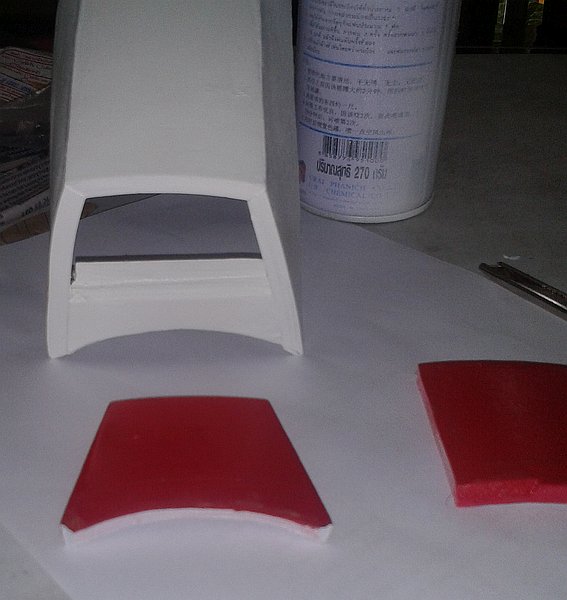
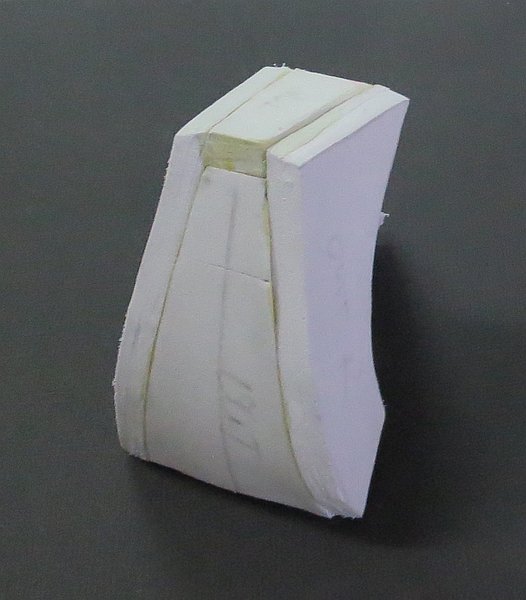
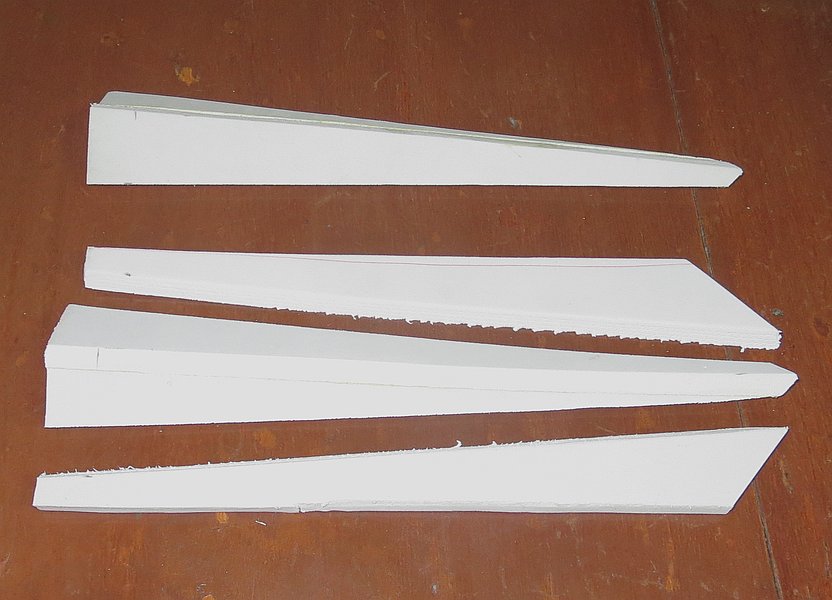
Below is a picture of the cut foam pieces for the top crest ready for assembly. I used yellow contact adhesive to glue the foam to itself as well as for attaching the assembled parts to the helmet. The most nerve wracking part of working on the helmet was the "you only get one-shot at this" nature of contact adhesive - as soon as you touch the two parts together they stick and that's where they stay! I tried to manage this by placing pieces of siliconised parchment/baking paper between the surfaces to be glued so I could carefully position them and then slide out the pieces of paper. The second image below shows the glued crest ready for painting.

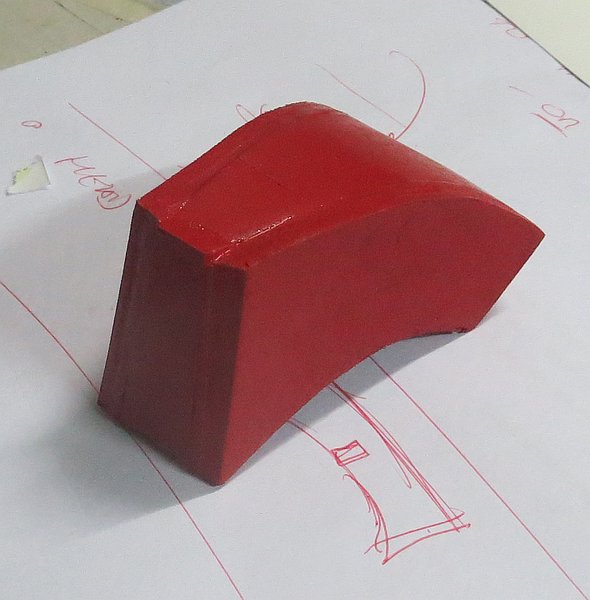
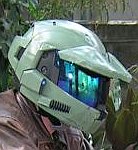
When I made my Halo helmet I did some tests and found that I couldn't get a good finish with spray paint directly on the foam and so the solution I used at that time was to add silver duct tape which I then spray painted machine green. For this helmet I also did some tests and found that if I sprayed two layers of clear lacquer to first seal the foam (which was a light grey/blue colour) I could then get good coverage with two or three coats of spray paint.
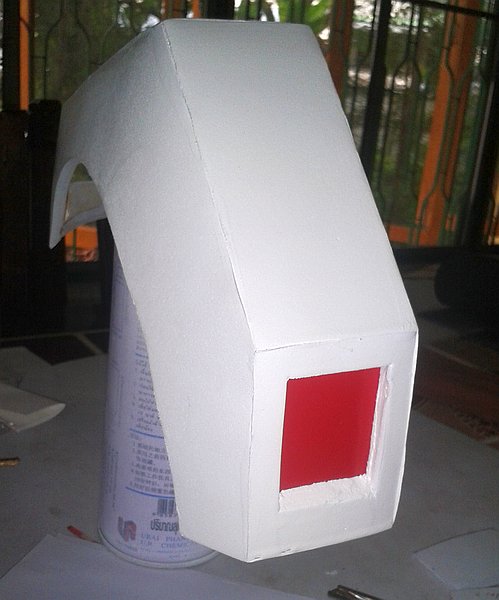
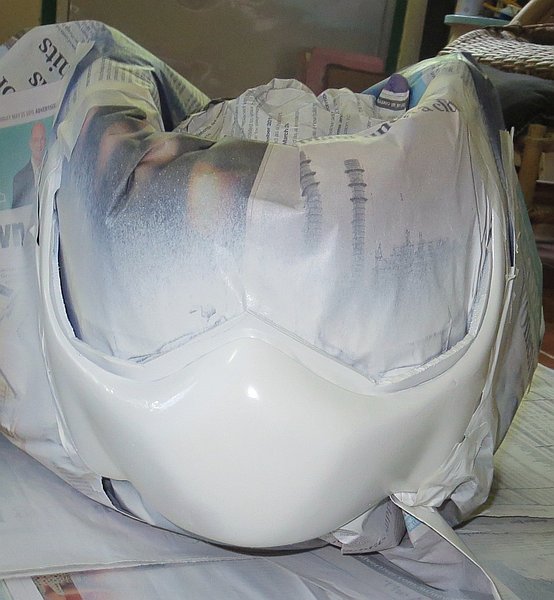
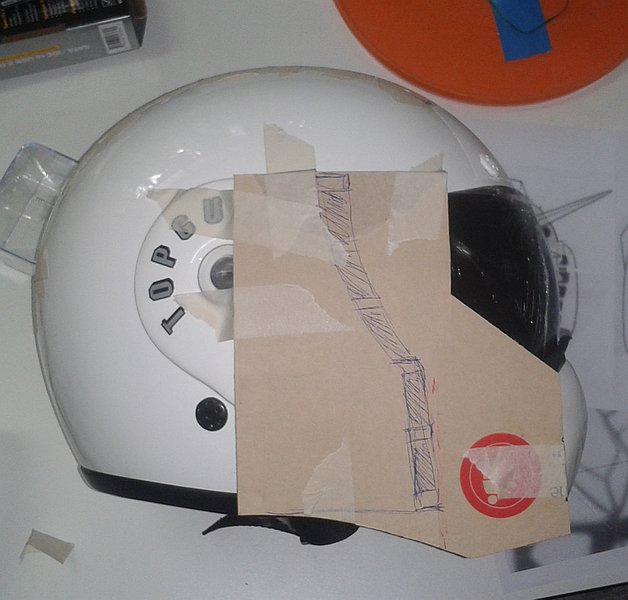
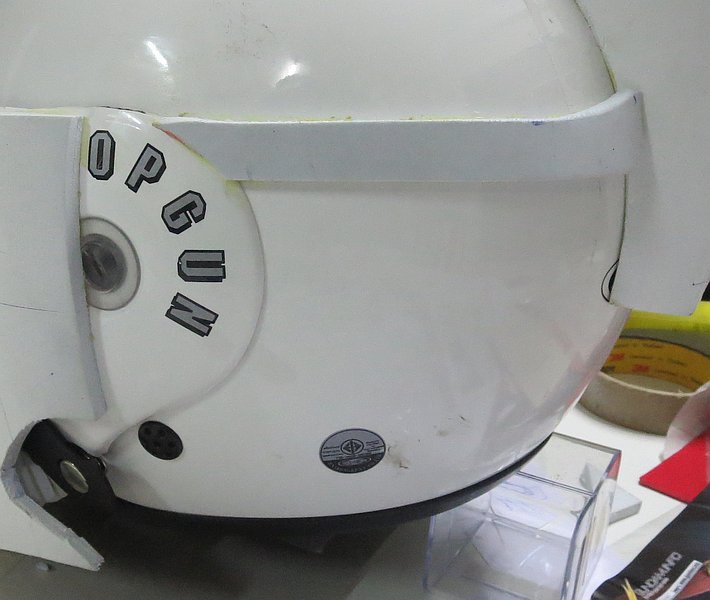
The first image below shows the red camera windows after spraying and this is where I realised I'd made my first mistake! I had forgotten to cut a hole in the foam for the rear window before glueing the cover together! I carefully cut a suitable hole in the back but it wasn't as smooth as I would have liked (see the middle picture below). Later on during my helmet building adventure I discovered that I could actually shape and smooth the foam using some coarse sandpaper or a Dremel-esque rotary tool. At this point I also masked up the helmet with some tape and newspaper and sprayed over the "Avex" logo on the front of the helmet and the wings of the plane on the rear.
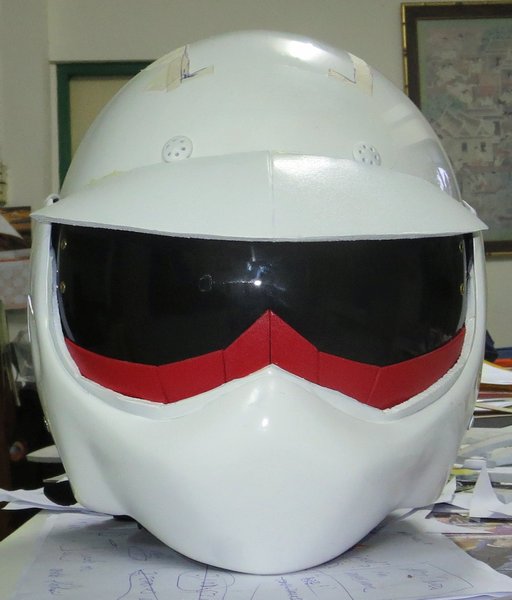
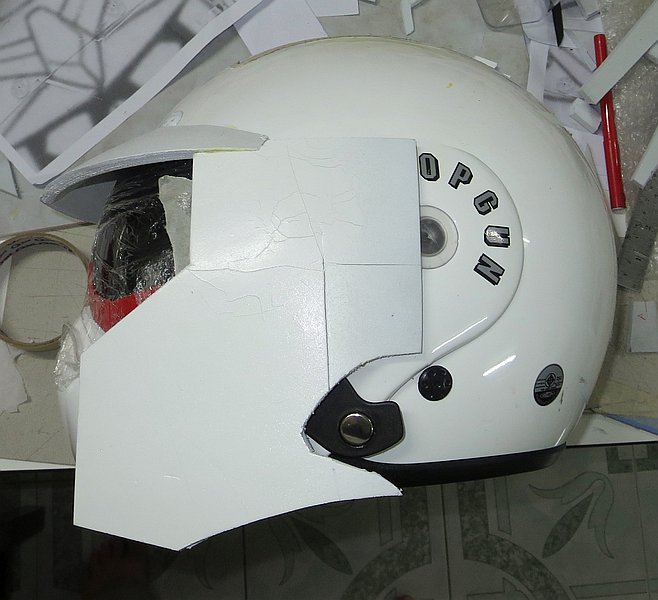
Gundam is famous for spawning the so-called "real robot" genre but the influence of some earlier "super robot" designs like Daitarn 3 can also be seen in the Gundam mobile suit. One example of this is the chin piece. I made a cardboard mock-up of the chin piece which I then used to cut the foam parts. In the last image below the chin piece has been temporarily taped in place to check how it looks.
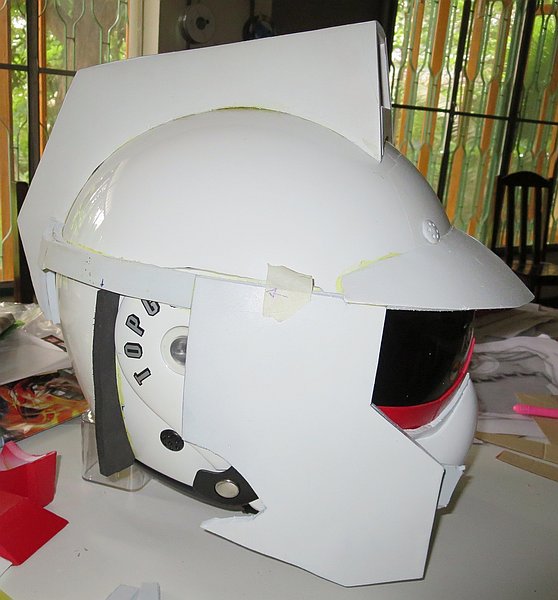
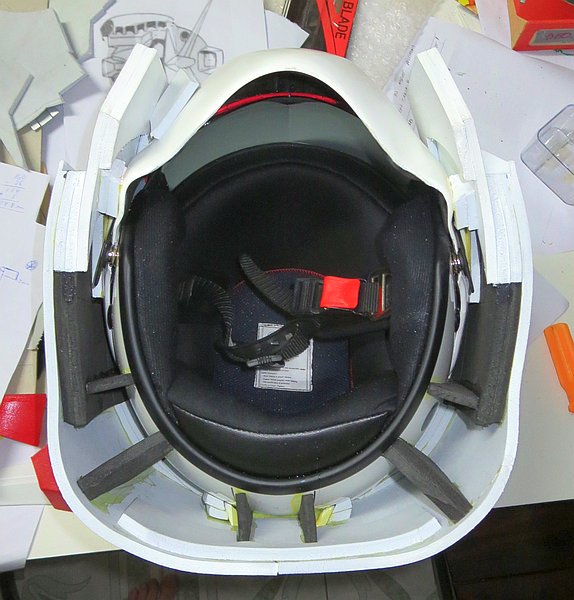
The original Avex helmet has a hinged chin guard which can be rotated up over the top of the helmet. I originally planned to glue a piece of foam across the front of the chin guard that you would then look out over but I was concerned about how much this might reduce the wearer's ability to see out of the helmet. Instead I decided to make the most of the black rubber strip along the top of the guard which I spray painted white and then trimmed down giving it some straighter edges.
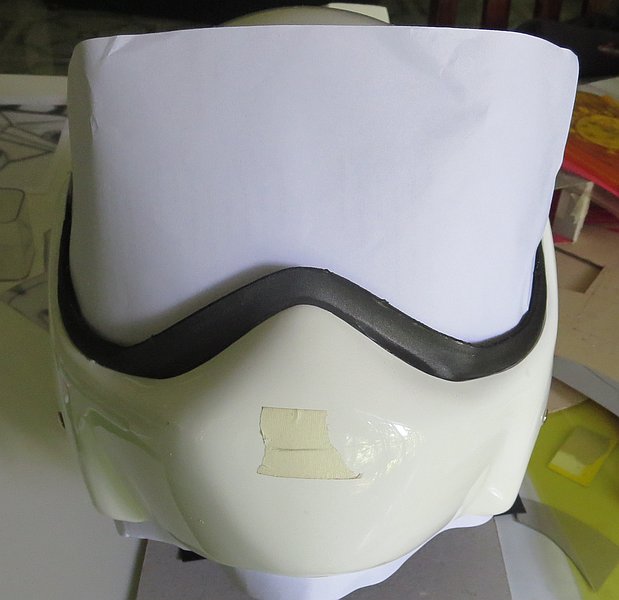
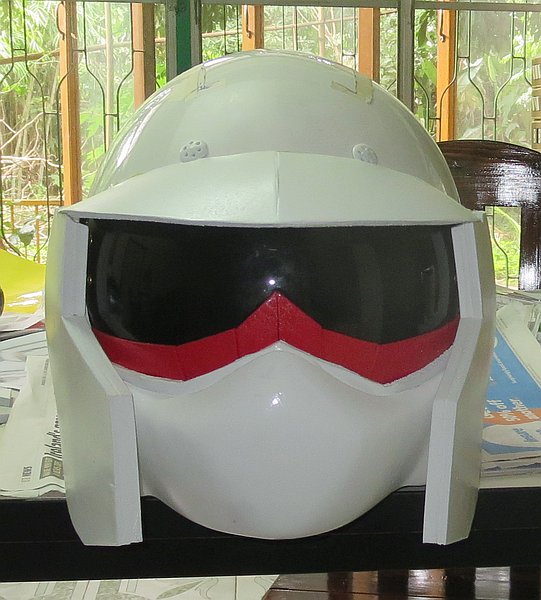
For the red surrounds below the eyes I made a paper template and cut the pieces from 1.5 mm thick red foam. I stuck masking tape around the template which I then used as a guide for glueing the pieces in place.
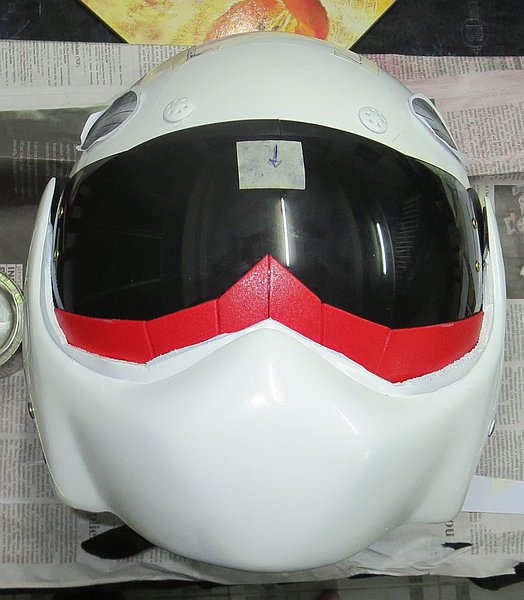
The peak was constructed using two pieces which were glued together in the center to give it a downward sloping curve. It is glued to the helmet just above the visor but doesn't obstruct the two top vents. From this point on the chin guard is now fixed in place!

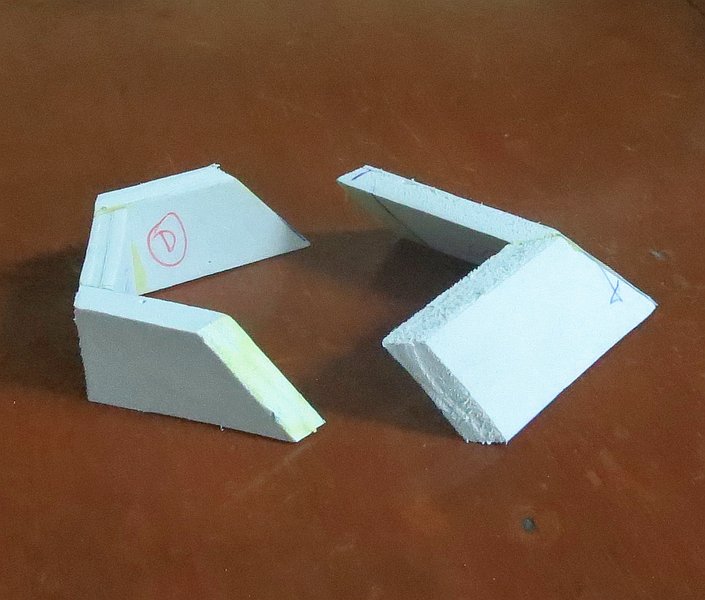
For want of a better name the "cheek guards" on either side at the front of the helmet are reminiscent of those on a Spartan or Corinthian helmet. I started by printing another full-size side view of the overlay image and then made a cardboard template. The two guards are mounted on the side of the helmet so that the wearer won't lose any additional side vision and I also lowered the point where the wider forward diagonal part starts to maximise the wearer's side vision.
The Avex chin guard is normally held closed by two press-studs on either side of the helmet. I cut away the back of each guard so that this would still be accessible (although the chin rotation is now blocked by the peak anyway!). I also ground down the curve on the top of the chin guard's "ear muffs" so that they were level with the top of the guard and lined up with the bottom edge of the peak.
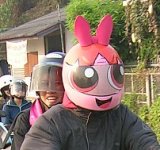
In the second to last photo below you can see some lines on the guard. Some are from existing cuts in the foam and the others are cracks in the paint. The paint forms a hard layer on the outside of the foam which is still flexible underneath but will crack if there's too much movement. In this case I sprayed the cheek guards and let them dry flat before glueing them onto the curved side of the helmet. I simply touched them up with paint later on. If you put the top crest on as well the helmet is now starting to look a lot like Marvin the Martian!
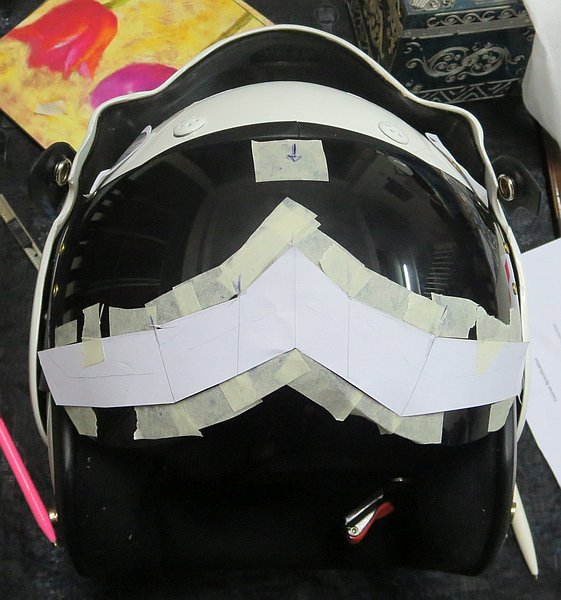
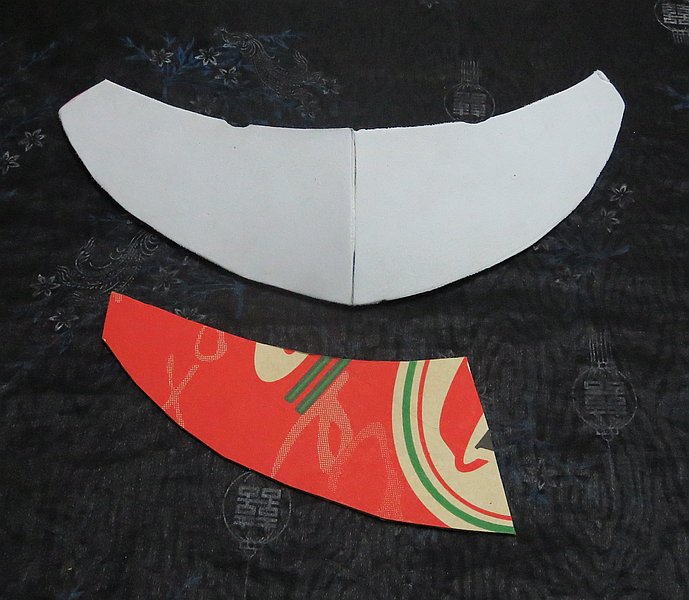
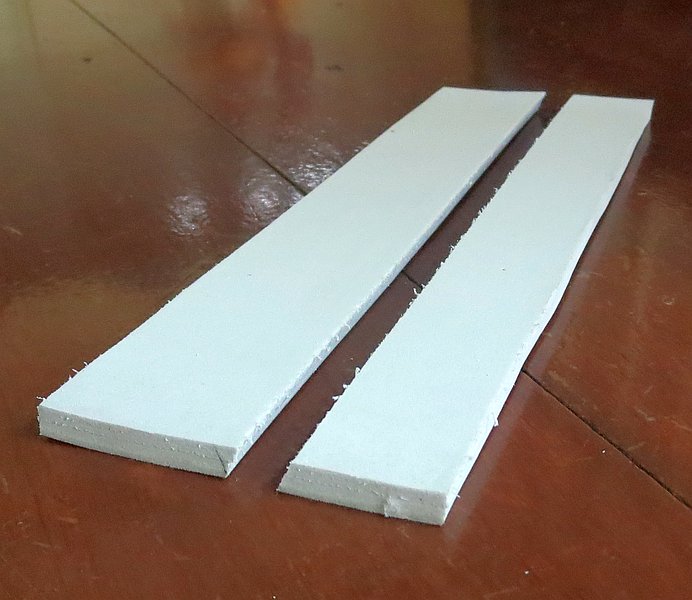
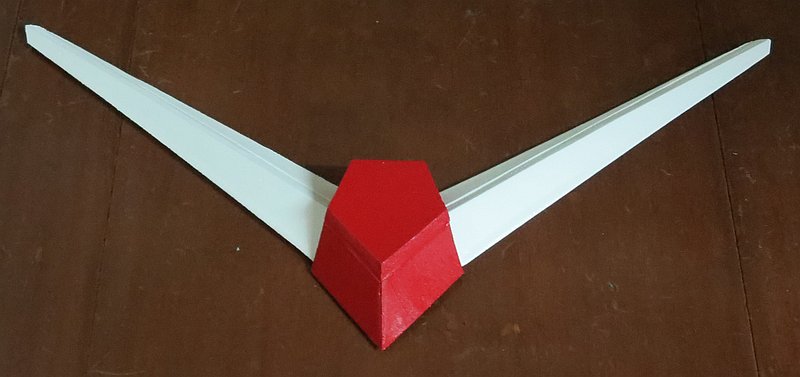
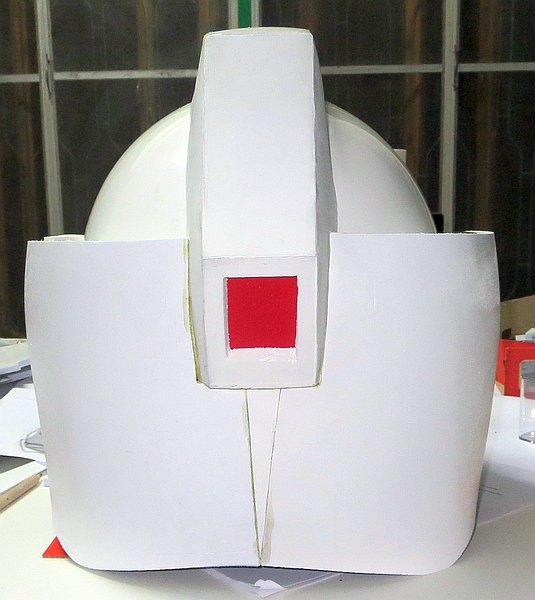
The Samurai-like front crest on the front of the helmet consists of two parts - a red prism in the center and two antennae. To make the antennae I started with a piece of foam about 7 cm wide and 22 cm long (approx. 2.7" x 8.7 "). I made an angled cut lengthwise along the foam (see the first image below) and then flipped one piece over and glued them together (see the center image) to give me an angled piece with a nice sharp edge. Trimming the sides off the angled piece then leaves a nice pointy antenna ready to be sprayed white.
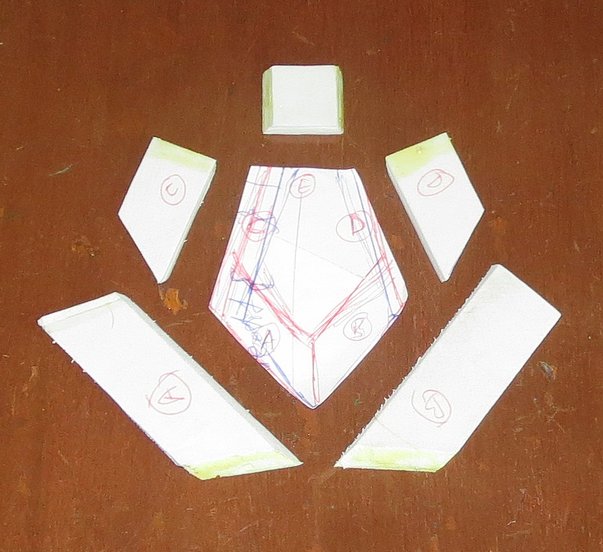
For the prism I started with a paper template and cut the foam pieces (shown surrounding the template in the first image below). The prism consists of five side pieces and a flat top which were glued together and sprayed red.

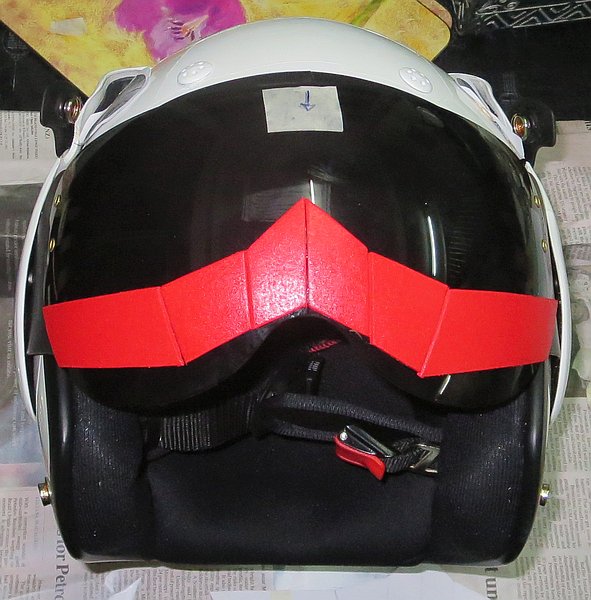
Here's the completed crest:
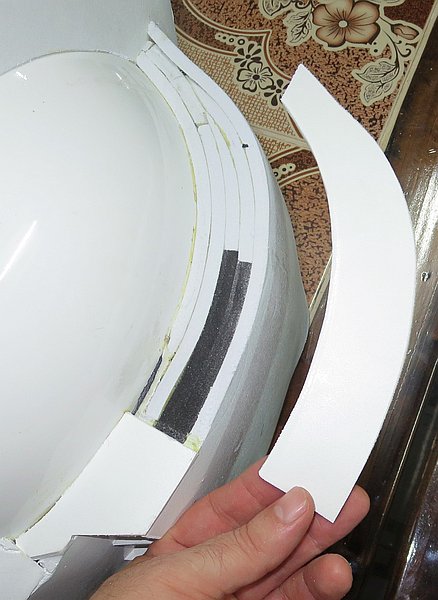
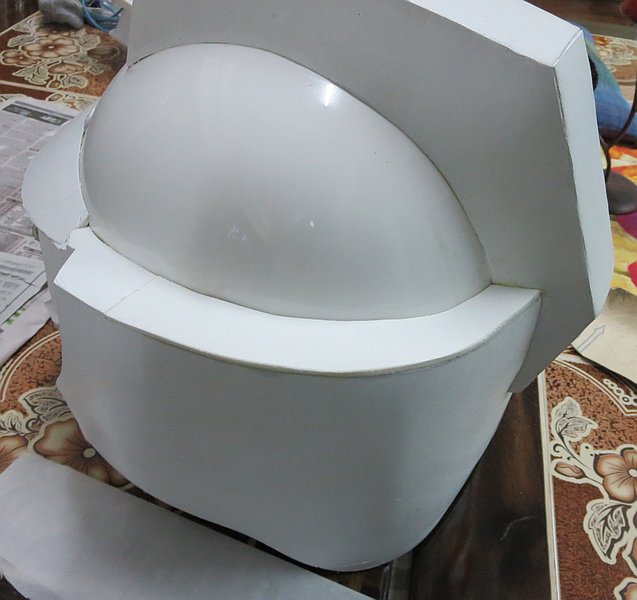
From the overlay image you can be see that the back and sides of the Gundam helmet extended well past the shape of the Avex helmet "inside". Rather than try and make this all out of solid foam I decided to make an outer foam shell or surround to keep the RX-78-2 shape. To do this I started by adding a piece of foam to each side of the helmet that was level with the top of the chin guards to bring the diameter at that point out to the same level as the "earmuffs" (see the first image below).
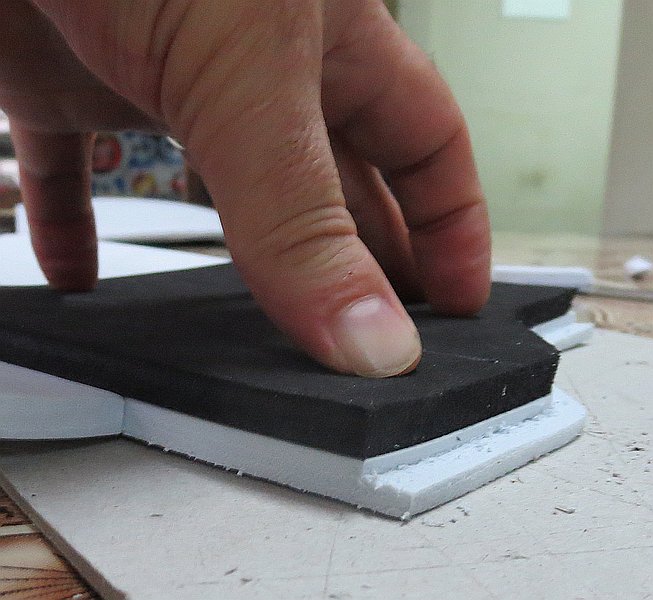
At this point I realised that I was starting to run out of foam so I cut two A4 size pieces which I kept aside to use later for the outer side pieces. I didn't think the remaining amount of 6 mm thick grey/blue foam would be enough to finish constructing the helmet so I went out to buy some more. Unfortunately/fortunately I could only find 6mm thick sheets of black foam and so I decided to use this to my advantage. My original plan was to construct the iconic side vents out of white foam and then cut black square inserts from 1.5 mm thick foam that would be glued in to each of the 5 vents on either side of the helmet. Instead I built out the sides of the helmet using two layers of the 6 mm black foam which I could simply leave unpainted to be the inside of the vents.
To build out the sides I started by adding a black foam support rib behind each of the cheek guards (see the second image below). I then attached the two vent layers and added additional foam bands along the top of the sides to get the right RX-78-2 shape which was curved on the side of the head but squarer along the back (see the second to last image blow). To provide support for the rest of the outer surround I added some additional foam ribs to the back of the helmet which can be seen from the underside of the helmet in the final image below.

With only two layers of foam inside the vents they would look to tall and thin but 3 layers of foam was going to be excessive. To find a happy medium I used one of the side layers as a template and carefully cut a lip on the edge of the two outer foam sides (see the first two images below). I then carefully painted the inside edge of the sides black using a cotton swab/bud so that the resulting vents would appear to be 2.5 layers thick with a thinner 0.5 layer thick outer edge.
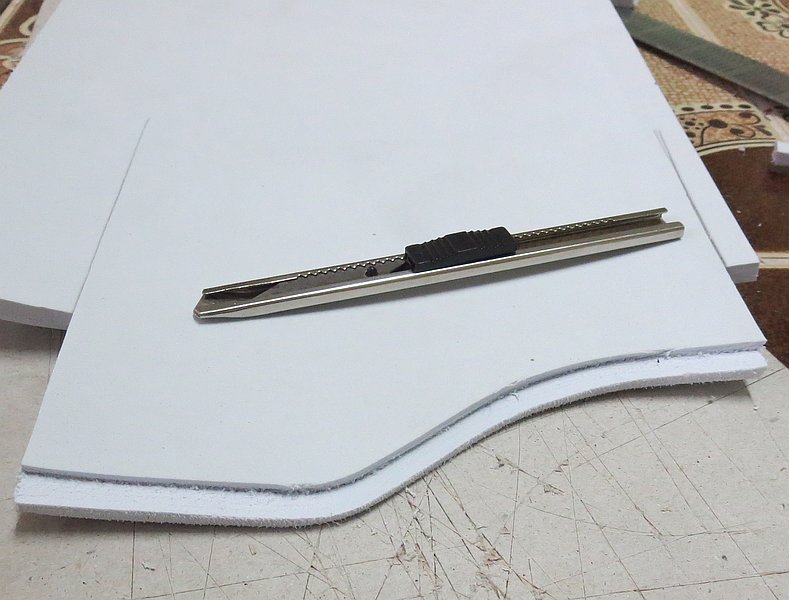
I then carefully cut the rest of the two outer foam sides and included a cut-out at the back where the side would meet the top crest at the back of the helmet. The painted left side is shown ready for mounting in the last image below.
With the sides glued in place I then made a "cap" for the top of each vent using two pieces of 3 mm thick white foam (see the first image below). I then cut the other 5 vent supports, sprayed them and glued them in place.

A second larger cap cut to fit on the top of each side hid the rest of the foam layers (see the first two images below). Unfortunately, when I estimated how much of the original grey/blue 6mm to foam save for the side pieces I had underestimate how much I would need and cut them slightly too short. To compensate I added a small V-piece insert to the back of the helmet below the back of the camera cover.
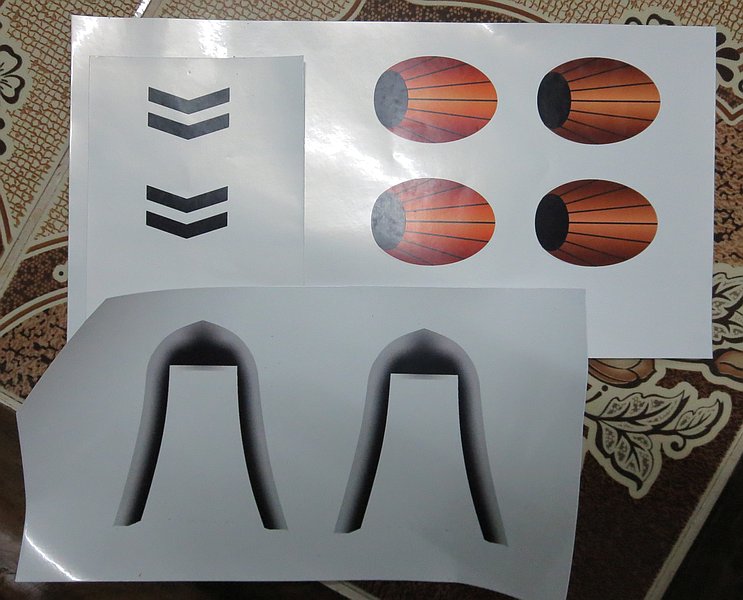
While it would have been cool to make cut-outs for the two 60 mm Vulcan guns on the side of the head I didn't want to alter the shell of the Avex helmet so I opted for PVC stickers instead. I used this image as a colour reference I also printed the front vents and some surrounds for the chin to give it more depth. In the end I decided that there wasn't quite enough room for the chin surrounds so I left these off the final helmet.
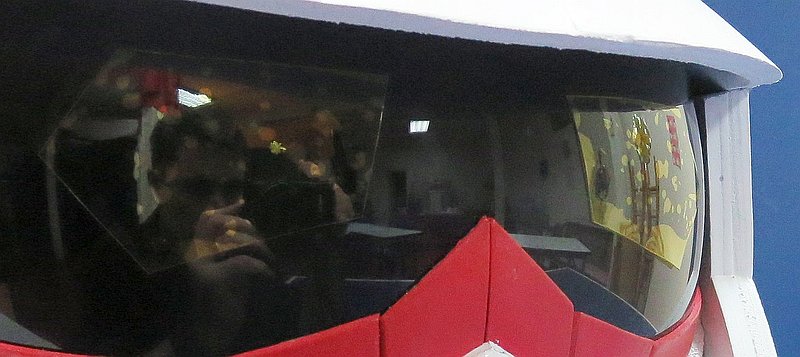
Trying to work out what to do for the eyes was more difficult. I didn't want anything that would affect the vision of the wearer apart from perhaps some colour distortion. In the end I found some yellow plastic binder material and a plastic pencil case that looked promising. The pencil case material was clearer and I did some experiments using crystal clear epoxy glue but found that any variation in thickness resulted in too much visible distortion. In the end I cut two eyes from the pencil case that are simply attached using static cling. They can be peeled off while riding and re-attached afterwards (see the right image below).
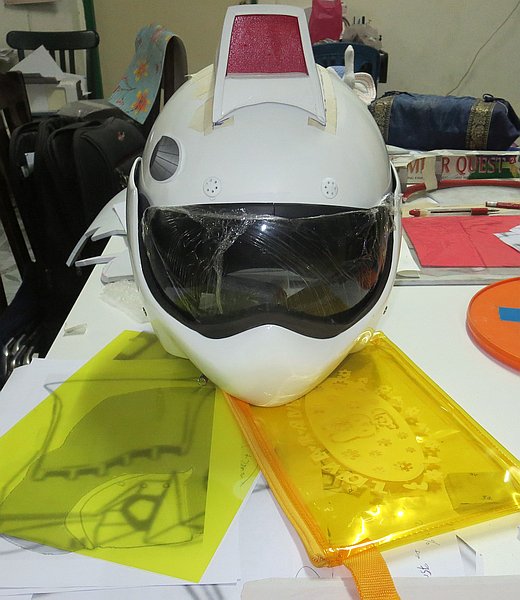
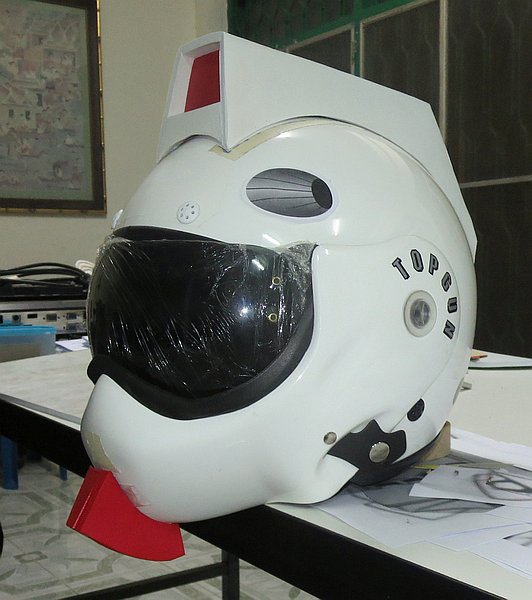
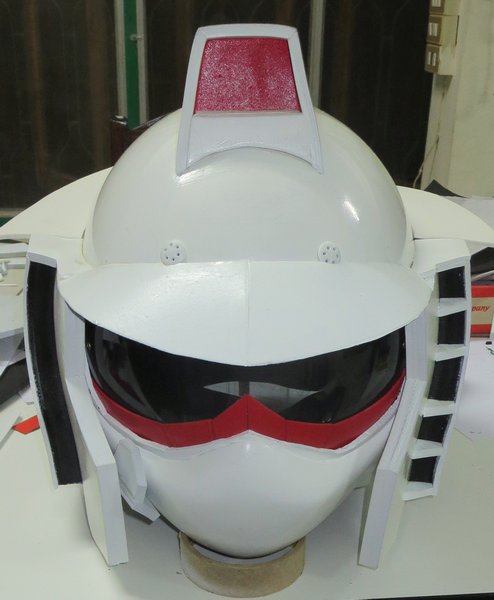
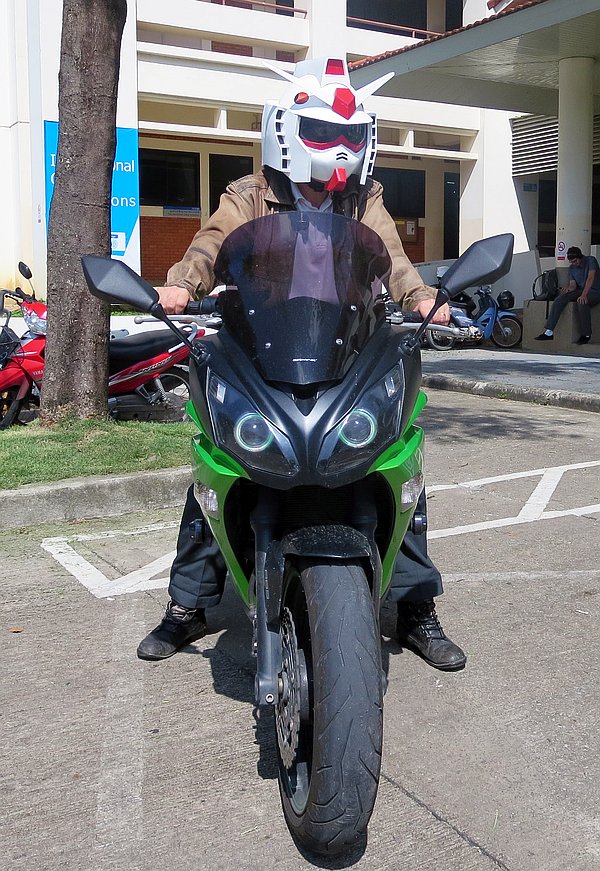
Here are some photographs of the finished helmet. I'm very happy with the overall look given the constraints of working with the original motorbike helmet. I thought that the antennae on the helmet's front crest might start to vibrate at fairly low speeds (like the bow on top of my Blossom helmet) but I took it for a test ride at up to 90 km/hr without any noticeable vibration. However, above 60 km/hr you do notice some resistance when turning your head so it is definitely a helmet for city riding.
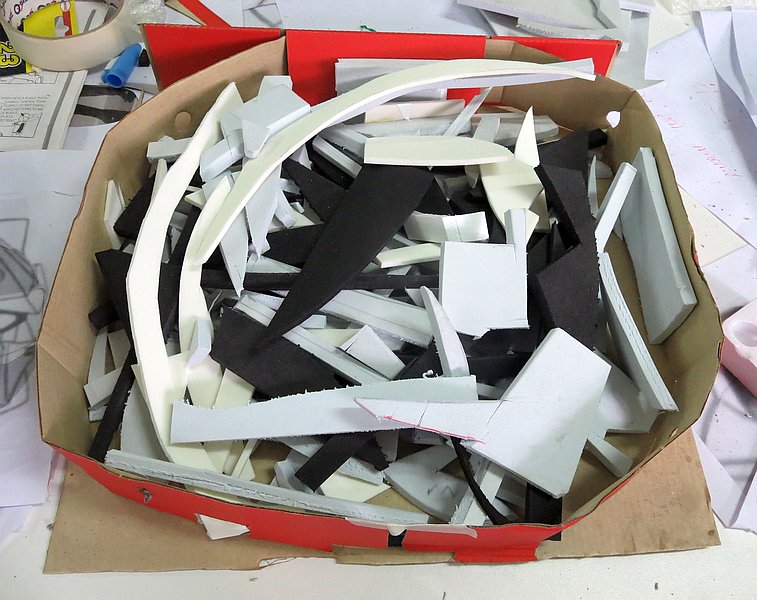
These are all the cardboard and paper templates I made/used during the helmet's construction and the second image below shows all the foam offcuts. So now after 6 weeks my long-suffering wife can finally have her downstairs table back again!
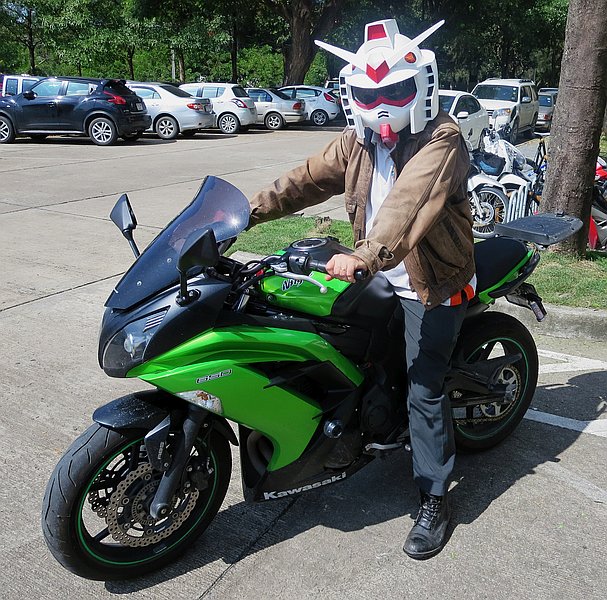
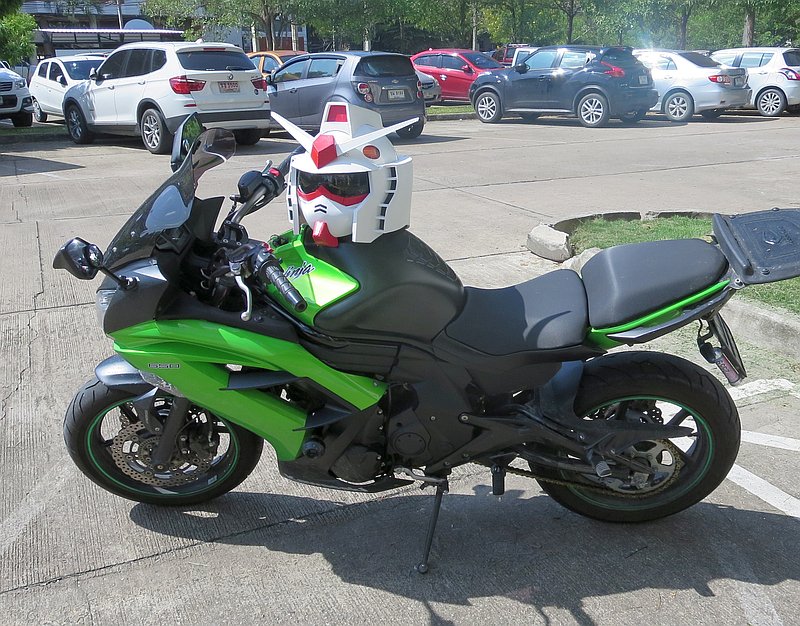
Here are a few final shots of the helmet on a 650 cc Kawasaki Ninja that belongs to one of my students (I still ride this 125 cc Honda Wave) and an SD-scale kid whose mother was super excicted to see the helmet and wanted to take a photo!

You may also be interested in reading about my other motorcycle helmets...
...and/or some of my other projects: