
Thomas Tilley
[ Home ] [ Publications ] [ Resume ] [ Family ] [ Projects ] [ The Others ] [ Sitemap ]
[ Home ] [ Publications ] [ Resume ] [ Family ] [ Projects ] [ The Others ] [ Sitemap ]
 | |
 | |
 | |
 | |
 | |
 | |
 |
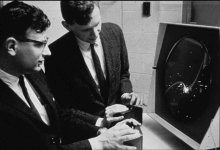
This page describes my attempt to re-create a pair of "retro" 1960's control boxes that were used to play Spacewar!. Spacewar! is a very early computer game that was written after-hours on a PDP-1 computer that was donated by the Digital Equipment Corporation (DEC) to MIT in the early 1960's. The game was very influential and many consider it to be the first "video" game. In September 2013 I spoke at TEDx Chiang Mai about joystick hacking and afterwards, Dan Edwards, who helped write Spacewar!, came up to me and introduced himself. In the image below Dan (left) and Peter Samson are shown playing the game at MIT in 1962.
 Source: Computer History Museum |
 Source: Internet Archive |
 Source: Surplus Sales |
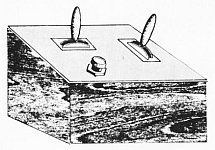
I contacted Dan late last year and asked if he would come and talk to my Game Controller Hacking class at Payap University. Happily he agreed and I thought it would be fun on the day to play the original Spacewar! on a PDP-1 emulator using some controllers similar to those that they used back in the early 1960's. Unfortunately, the only photograph of the control boxes is the one shown above with the controls largely obscured by the player's hands. An article from the August 1981 issue of Creative Computing magazine about the origins of Spacewar! describes the creation of the original control boxes by Alan Kotok and Robert A. Saunders and includes an artist's rendition of the original controls (center image above).
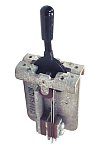
Based on the photograph of Dan and Peter playing Spacewar! I emailed Dan with an estimate of boxes that were about 4" wide and 3.5" deep (10.2cm x 8.9cm). He said that sounded about right and sent me a link to a picture of the type of leaf switches they used for the levers. The boxes were just high enough to cover the wires attached to the bottom of the lever switches.
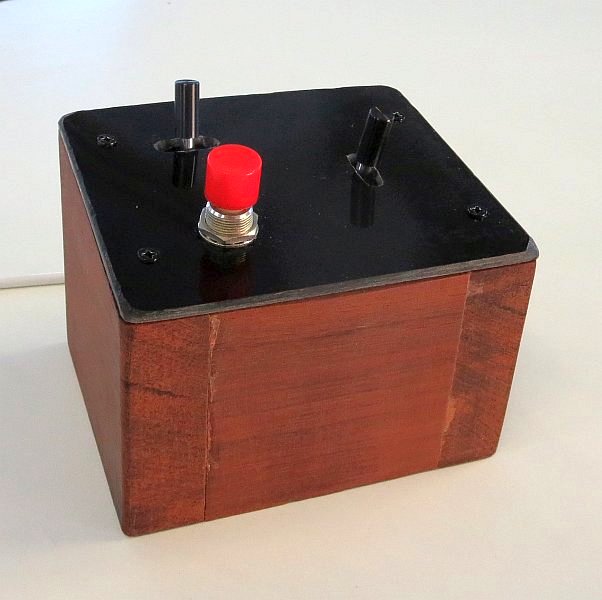
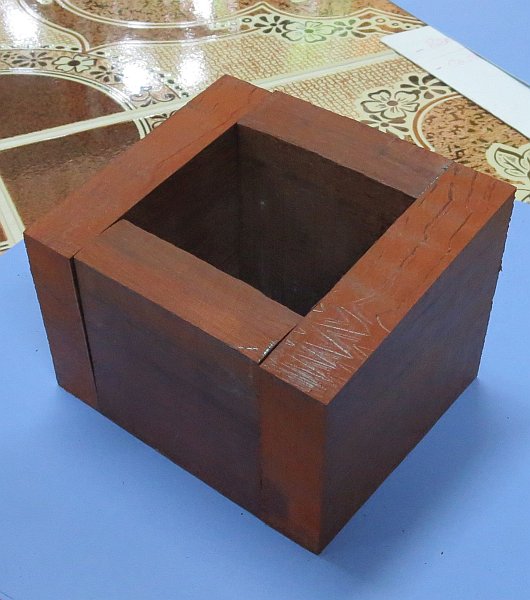
After my discussion with Dan I bought some beautiful 18mm thick red hardwood and cut the pieces for two control boxes that were 4" wide x 3.5" deep x 3" high at the back (10.2cm H x 8.9cm W x7.6cm D) and sloping down to 2.5" (6.4cm) high at the front (see the first image below). I planned on using my control boxes with the on-line JavaScript PDP-1 emulator by Norbert Landsteiner from mass:werk to play Spacewar! It supports game controllers and I tested it with a cheap (< $2.50 US) Dualshock-like USB game controller. With the controller in analog mode the two thumbsticks worked like the levers in the original game: the Y-axis of the left thumbstick would rotate the player's ship while the Y-axis of the right thumbstick provides thrust or a jump into hyperspace.
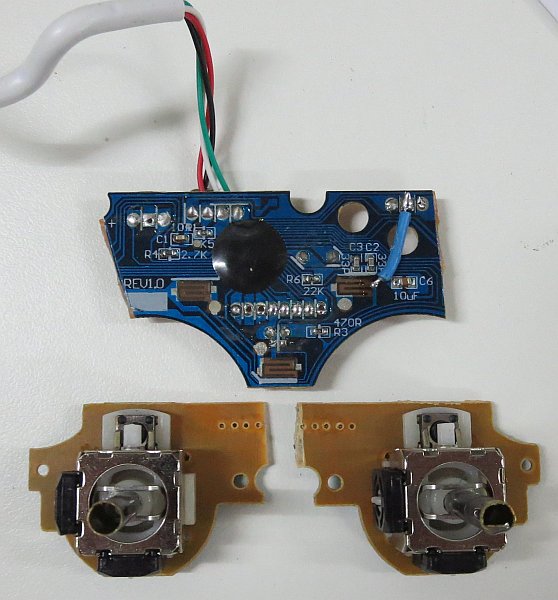
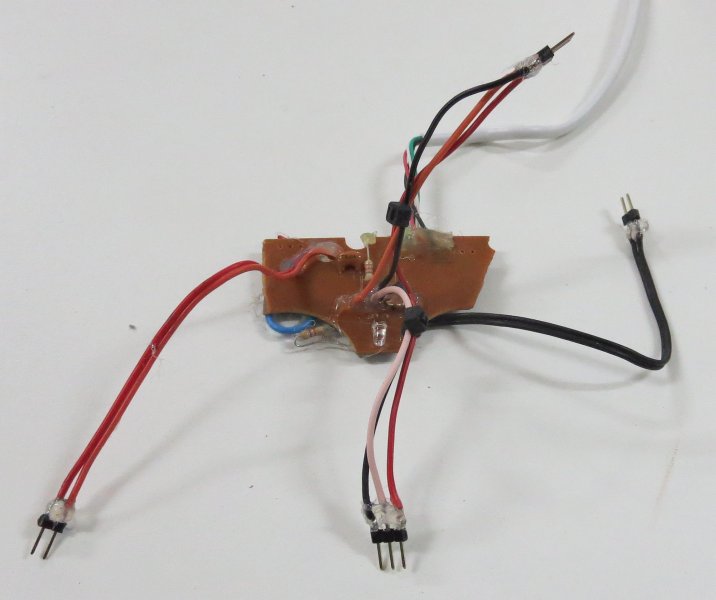
Unfortunately, the main printed circuit board (PCB) of the game controller was 12.5cm (just under 5") wide and my overall box width was only 10.2cm (4")! The inside of the box would be even smaller - only around 6.8cm (2.7") wide - so I was going to have to shrink the controller's PCB. I started by taking a photograph of the main board and tracing out the connections for the buttons (in yellow) and +5V line (red) because most of the USB controllers I've encountered use the +5V line as a common connection. After looking carefully at the traces on the PCB I figured I could cut the board along the blue-lines (see the second figure below) and do away with the sides of the board. All I really needed was one button to fire the photon torpedoes (either of the L1 and R1 trigger switches could be used) and the two thumbsticks.
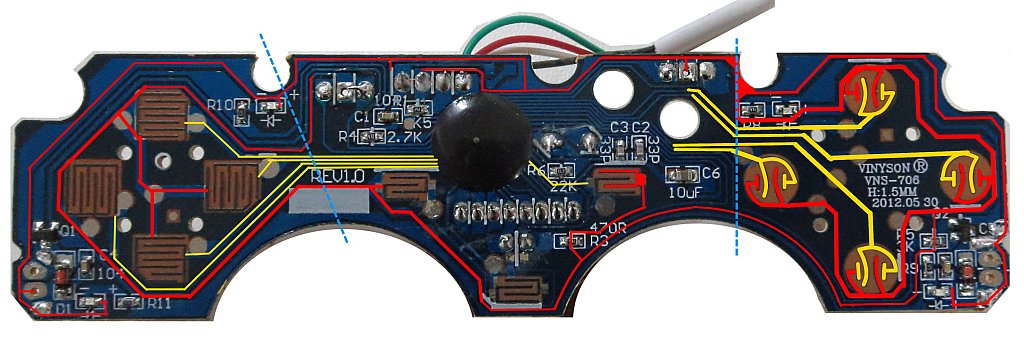
Knowing that there was no going back I carefully scored the first controller's board with a sharp knife where the blue lines are and then snapped the sides of the board off! Unfortunately, when I plugged it in to test it some of the buttons and the analog joysticks would just fluctuate randomly. Had I just wasted $2.50?!? After a second, even more careful look at the traces I realised that there was a +5V line that ran around the outer edge on the right-hand side of the board. I found two points to reconnect the +5V line (with the blue wire in the third picture above) and everything was back working as it should but now with a much shorter board that that would fit inside the box and was only around 5.6cm (2.2") wide.
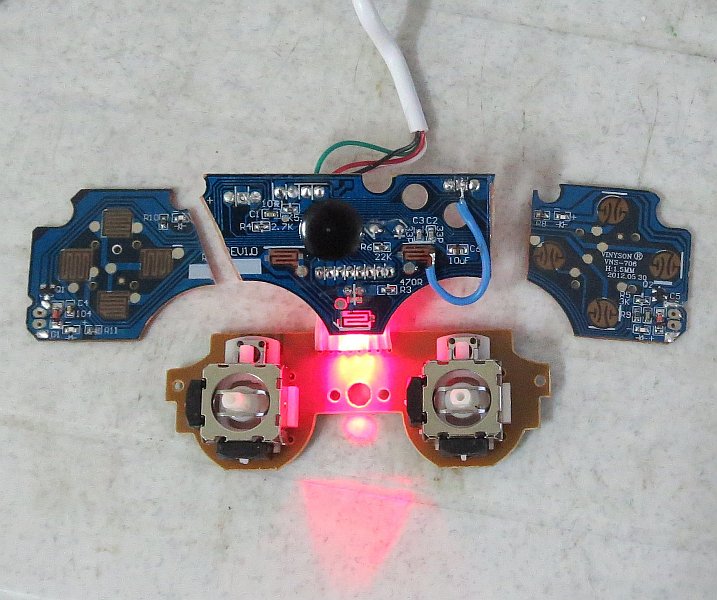
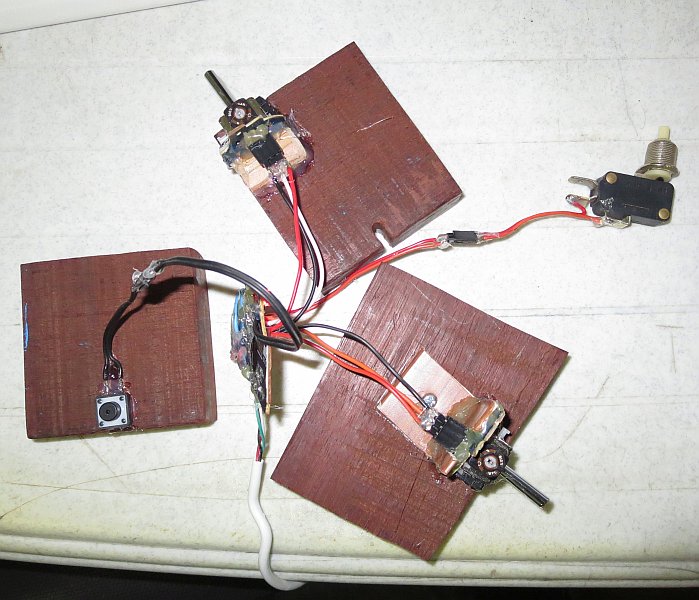
I then carefully de-soldered the ribbon cable linking the main PCB to the thumbstick board and cut the thumbstick board in half to separate the two thumbsticks (see the first image below). Beneath each of the thumbsticks I attached a 3-pin female header directly to the pins of one of the potentiometers (see the middle picture below). As I only planned to use a single axis of each of the thumbstick I only needed to use one of the potentiometers on each stick.


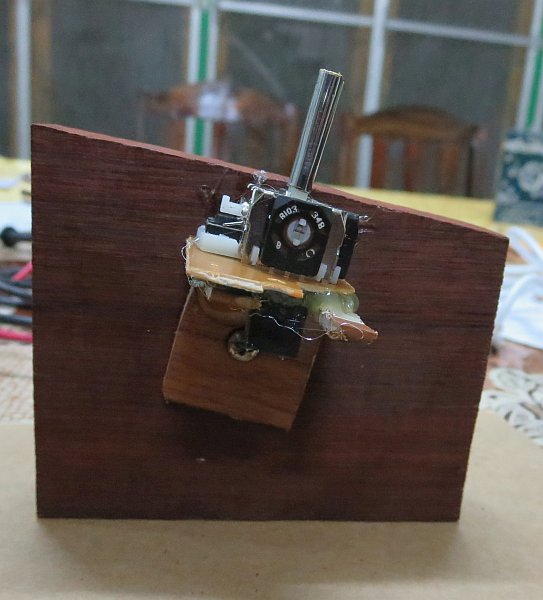
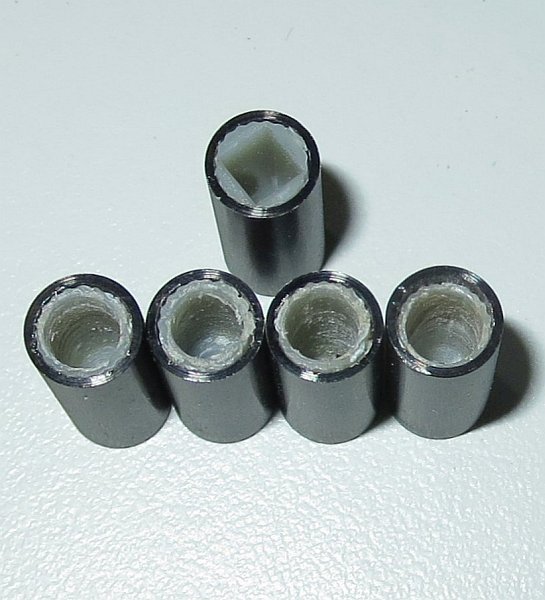
The shaft on the thumbsticks is only 7mm long and I realised that I would need to extend the shaft so that it would be long enough to protrude through the top of the box with a suitable knob attached. After pondering for a while about where to find a thin metal tube with just the right diameter I realised that the telescopic antenna from an old radio was a ready source of metal tubes in assorted diameters. One of the 8cm (π") long antenna sections fit the shaft perfectly and I cut it into 4 x 2cm (0.79") lengths (see the picture above right).
Using a piece of paper cut to the size of the top of my new control boxes and working from the artists rendition and the photograph of the originals I tried to work out some suitable positions for the two levers and the fire button. The right lever (thrust and hyperspace) appeared to be perpendicular to the surface of the control box. I mounted one thumbstick on a small piece of right angled plastic using hot-melt glue and a screwed it in place so the lever was perpendicular to the sloping side of the box (see the first image below).
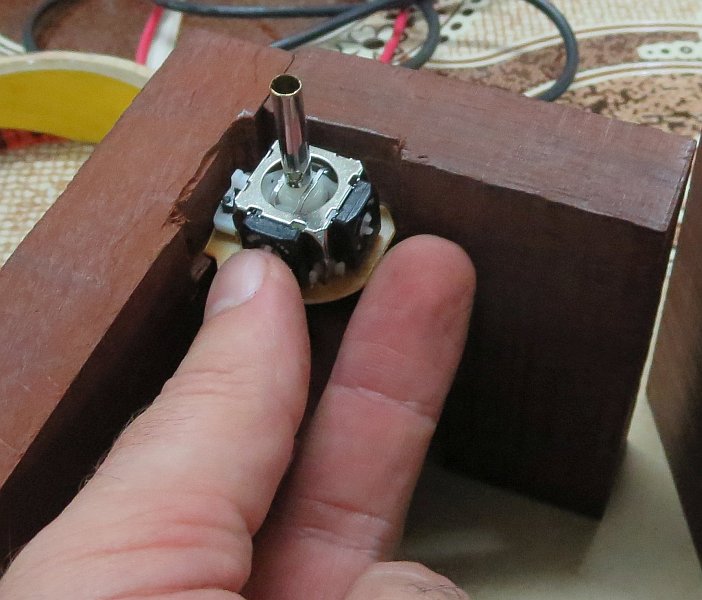
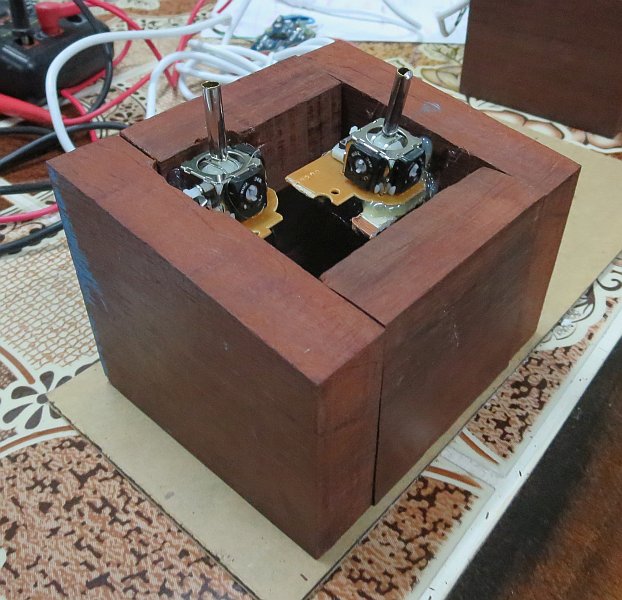
The lever used for rotation at the rear of the control box protruded vertically from the controller and to find a comfortable position for the thumbstick I needed to route a small amount of wood from the left and back sides of the box (see the middle image above). A small piece of wood was glued inside the back of the box to support the left thumbstick. The last image above shows the position of the mounted thumbsticks inside the (as yet unglued) box.
On the cut-down PCB I added some wire extensions with male header pins for the two potentiometers (3-pins +5v, wiper, & ground), the fire button (2-pins, +5v & button 5 ('L1')), and the analog button (2-pins, analog button & ground) - see the first image below. I also made a voltage divider using two 4.7K Ohm 1/4 watt resistors and connected it to the two unused potentiometer wiper points on the main PCB to stop them from floating.
With everything wired I connected all the pieces to make sure it still worked as expected and tried it out with the Spacewar! emulator (See the middle picture below). The 3-pin connectors I'd used for the potentiometers were wired so that if their operation was opposite to what I expected I could simply flip the connector to swap the controls.
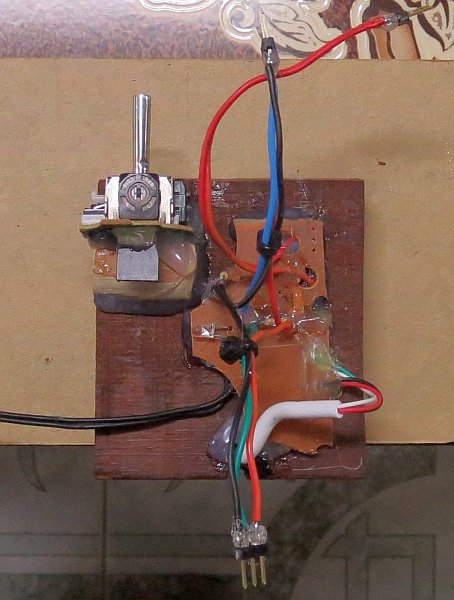
The photon torpedo button was a microswitch with a bright red knob that would simply be mounted through the plastic cover for the box and I glued the analog button switch at the bottom on the inside of the front panel. With everything working I then hot-melt glued the PCB to the back wall of the box (see the last picture above) and then glued the box itself together using construction adhesive (see the first picture below).
The top of the original control boxes was made from Bakelite but I used a piece of 10.2cm x 9cm (4" x 3.54") 3mm thick black acrylic sheet. I drilled a hole for the fire button and a starting hole for each "lever" which I then expanded using a Dremel. The sheet (still with its protective paper covering) can be seen in the foreground of the first image below.
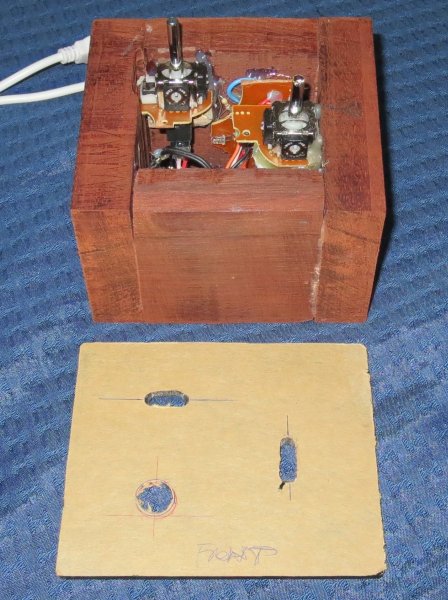
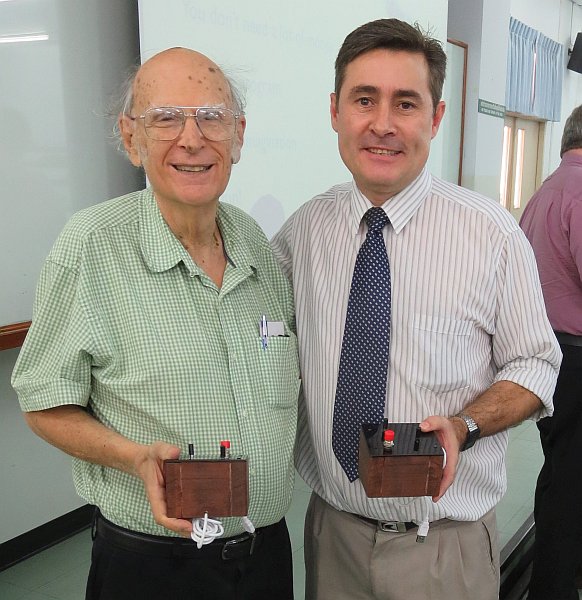
Unfortunately, I couldn't find any knobs that were close to the original so I settled for some push button knobs that were designed to push onto a square shaft. I drilled these out so that they fit snugly on to my antenna shaft thumbstick extensions (see the middle image above). The edges of the acrylic cover were rounded off and this was held in place with four screws. One of the finished controllers is shown in the image above right.
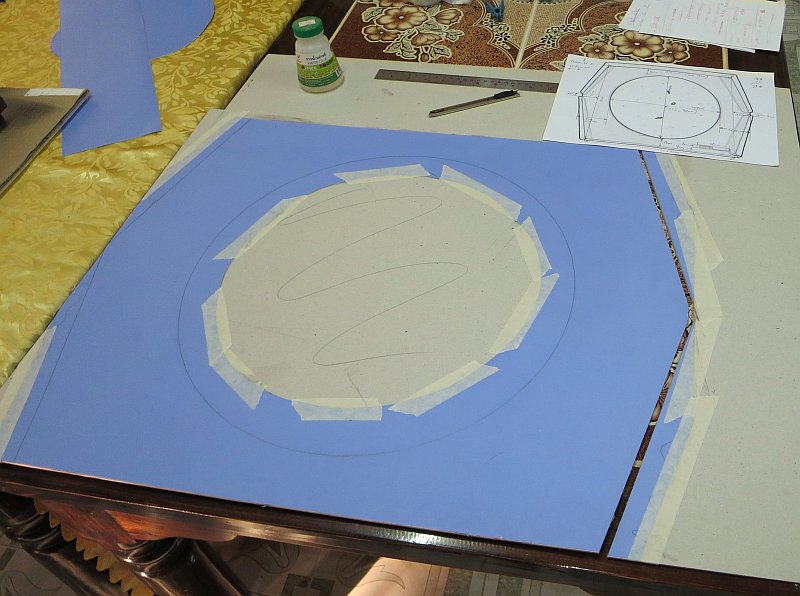
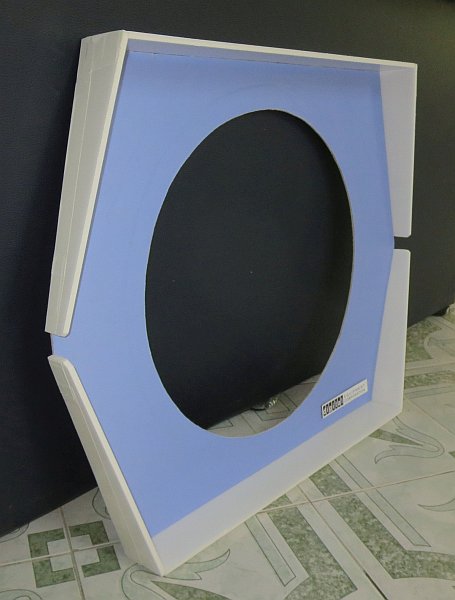
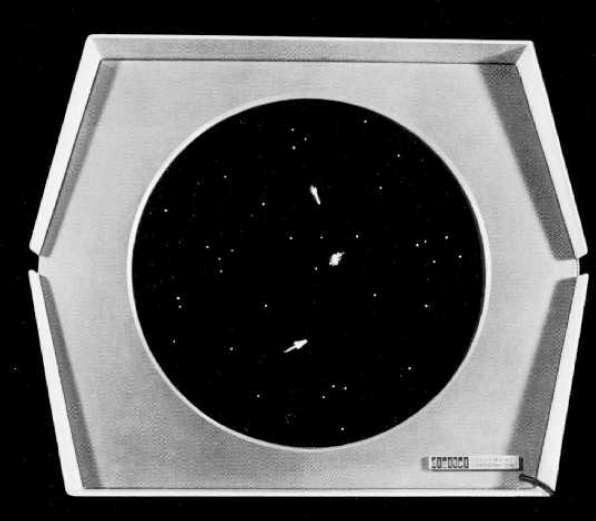
At Dan's seminar I thought it would be fun to make the 40" LCD TV (from the Payap Pinball Machine) we were using as a monitor look more like the PDP-1's original 16" Type 30 Precision CRT display. I bought a sheet of cardboard, a sheet of "PDP-1 blue" paper, and some white foamboard and then scaled up the original display using dimensions based on this photograph. See the images below.

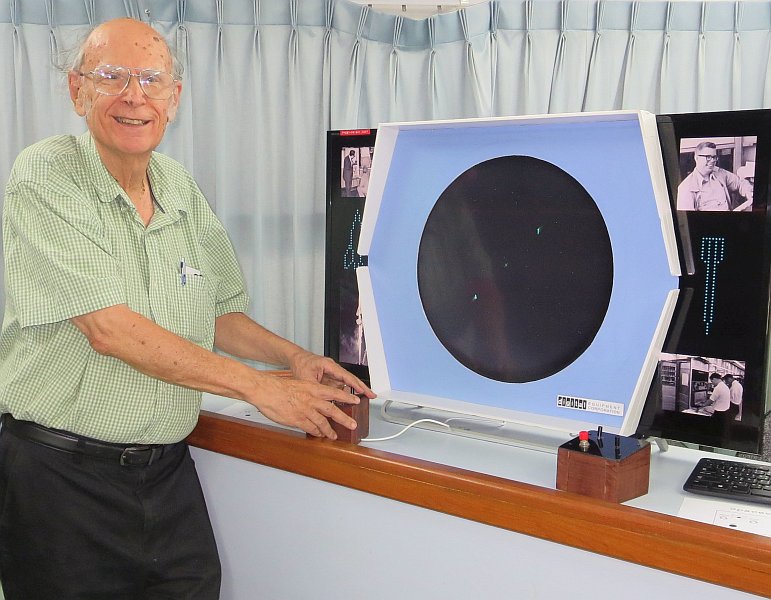
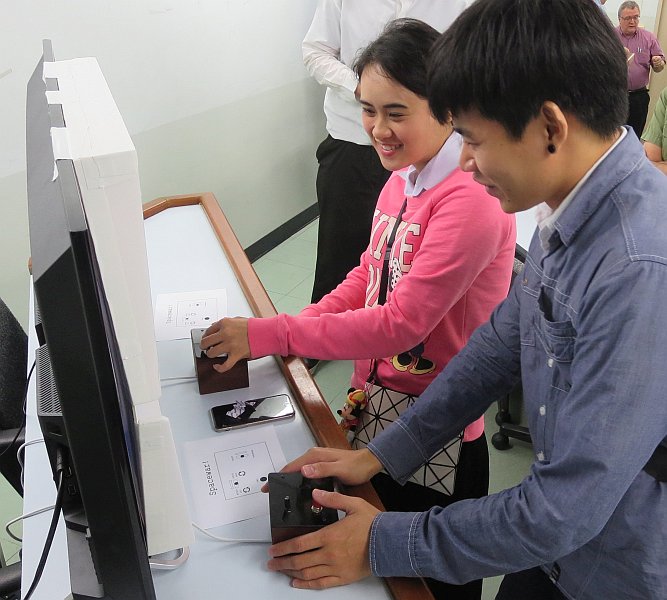
Below is a picture of Dan Edwards with my retro controllers and the Payap PDP-1 on the day of his seminar in February, 2015. The Type 30 Display facade was simply taped to the top of the widescreen TV and I turned the extra space on the sides into a feature by running a slideshow in the background with images from the era.
Dan spoke about the early days of Spacewar! and computing at MIT which was fascinating and I also learned that he coined the term "Trojan Horse" in the early 70's! It was a real privilege to hear him speak and as a token of appreciation I presented the retro controllers to him as gift.
You may also be interested in reading about some of my other projects: