
Thomas Tilley
[ Home ] [ Publications ] [ Resume ] [ Family ] [ Projects ] [ The Others ] [ Sitemap ]
[ Home ] [ Publications ] [ Resume ] [ Family ] [ Projects ] [ The Others ] [ Sitemap ]
 | |
 | |
 | |
 | |
 | |
 | |
 |
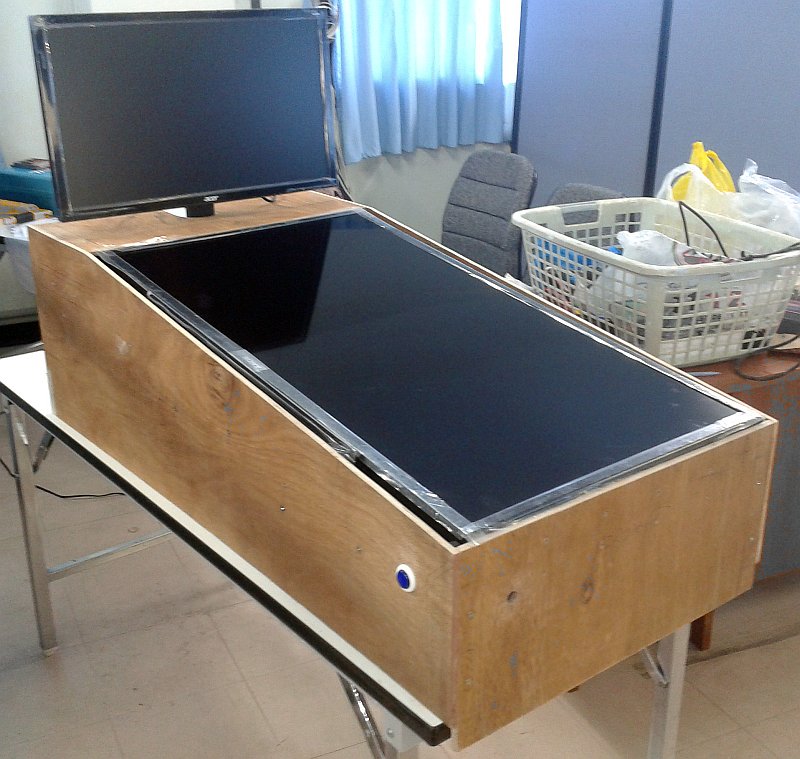
 This is a virtual pinball machine I built for a college fair to help promote Payap University. The machine is running Future Pinball in arcade mode with a Payap-themed version of the Sci-Fi Classic demo table.
The implementation is essentially the same as my original virtual pinball table but using a 40" LCD television for the display instead of an overhead data projector. This makes it a lot easier to set up and it doesn't require any custom mounting cages or long cables to suspended the data projector.
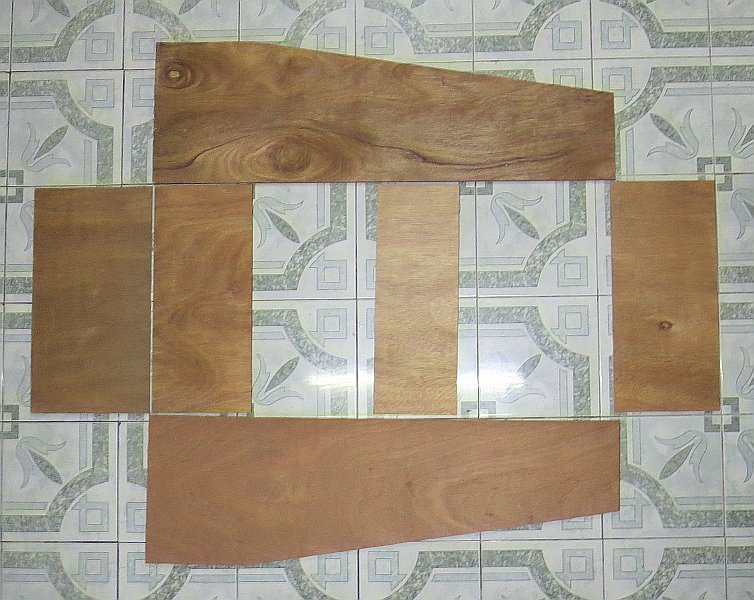
The cabinet is made from 8mm (3/8") plywood and I made it large enough to accommodate the TV so that the screen would be centered horizontally (the surrounds at top and bottom of the TV were different heights). The back panel is held in place with four screws for easy removal and after looking at the dimensions of a number of real tables online I chose a 9 degree slope for the "glass".
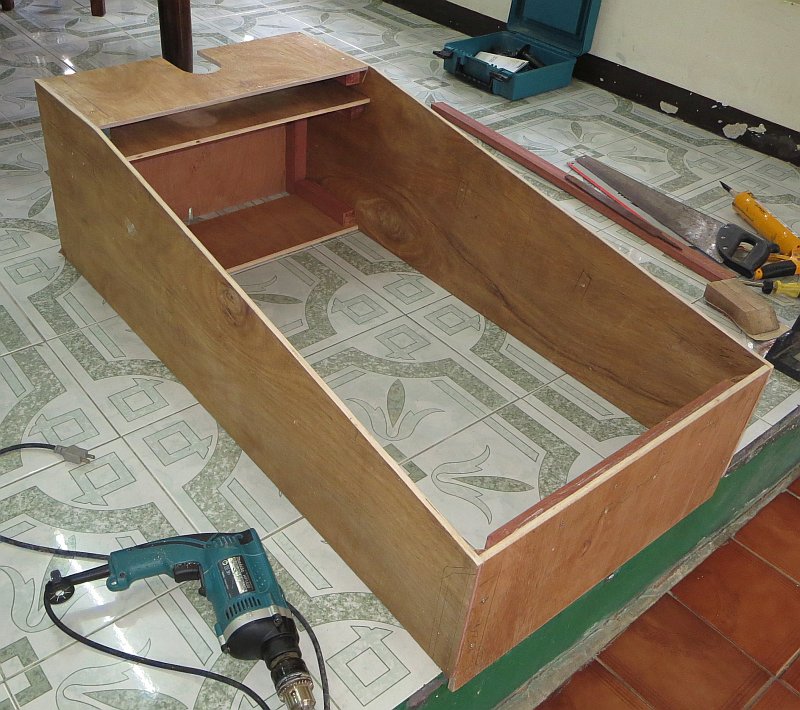
I added some wood to support the edges of the TV as well as two cross beams that were positioned under the TV's wall-mount points (see the third image below). The flipper buttons are lower than I would have liked but their position is constrained by the base of the TV inside the cabinet.

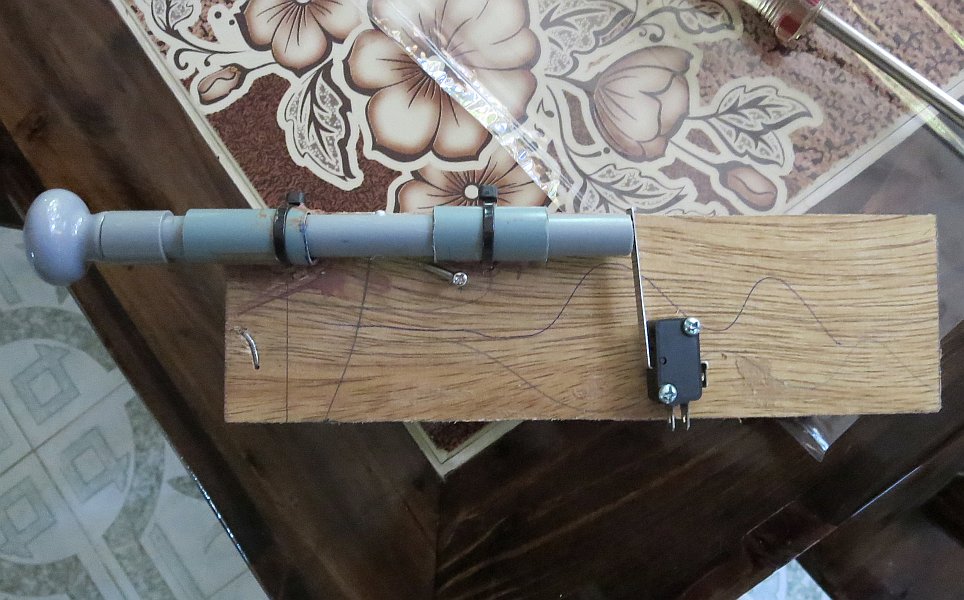
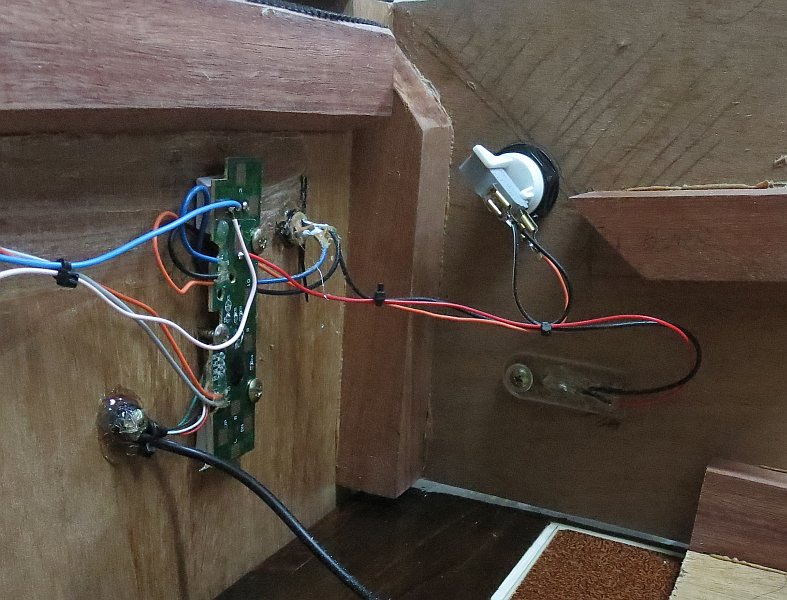
The plunger knob is a ceramic drawer knob that I spray-painted grey to match the rest of the mechanism which is made from electrical-grade PVC pipe (which is either grey or yellow here in Thailand - see the first image below). A small spring on the bottom side of the plunger shaft (from an old CD-ROM door mechanism) holds the end of the un-pulled plunger mechanism against the arm of a microswitch. The microswitch is normally closed so that when the plunger is pulled, the arm is released and the switch turns on.
The second picture below shows the right-hand side wiring on the inside of the cabinet and you can see the plunger mechanism in place. In the lower-right of the picture you can see the "insert coin" button. In the future I hope to replace this with a fake coin door with a mechanism similar to the one I used for my countertop arcade cabinet.
In my original virtual pinball table I wired the controls to a DB-25 connector which plugged into the back of a hacked joystick. For this machine I found a 55 THB (<$2 U.S.!) gamepad and mounted the PCB behind the front panel of the machine which can be seen in the picture below right. You can also see the back of the start button and the mercury "bump" switch mounted below the left flipper button. Next to the flipper button you can see the outline for the base of the TV.

I only had a short amount of time to build the machine and so to finish off the cabinet I used some white gloss spray paint, added some duct tape chevrons in the university's colour, and had some vinyl stickers printed with the university logo for the sides along with a surround for the start button. The TV is held in place by two lengths of 5cm (approx. 2") aluminium edging along the sides of the table that are held in place by screws and a length of 2.5cm (1") plastic edging along the front.

You may also be interested in reading about my original virtual pinball table...

...and/or some of my other projects: