
Thomas Tilley
[ Home ] [ Publications ] [ Resume ] [ Family ] [ Projects ] [ The Others ] [ Sitemap ]
[ Home ] [ Publications ] [ Resume ] [ Family ] [ Projects ] [ The Others ] [ Sitemap ]
 | |
 | |
 | |
 | |
 | |
 | |
 |
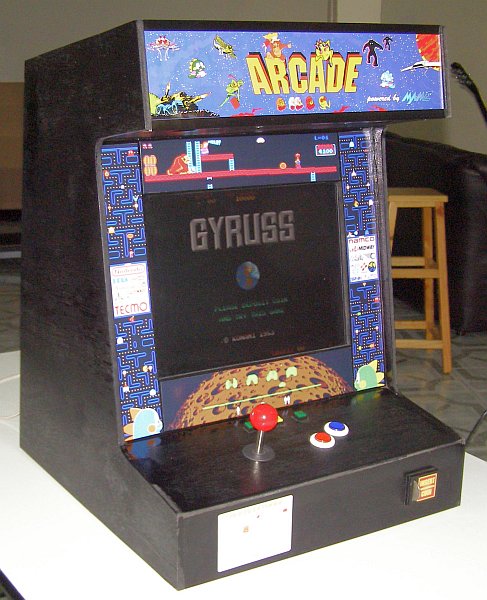
I'm sure there is a law somewhere that requires every geek who grew up in the 80's to build themselves an arcade cabinet at some point in their lives. This is my attempt to fulfil the requirements of that law - a countertop MAME arcade cabinet. You can read on below for some construction images and details on how I built the cabinet.
While the machine is already up and running a friend is going to design some custom artwork for the sides of the cabinet (when he has some free time) so I'll update the page with some new pictures when the artwork has been fitted.
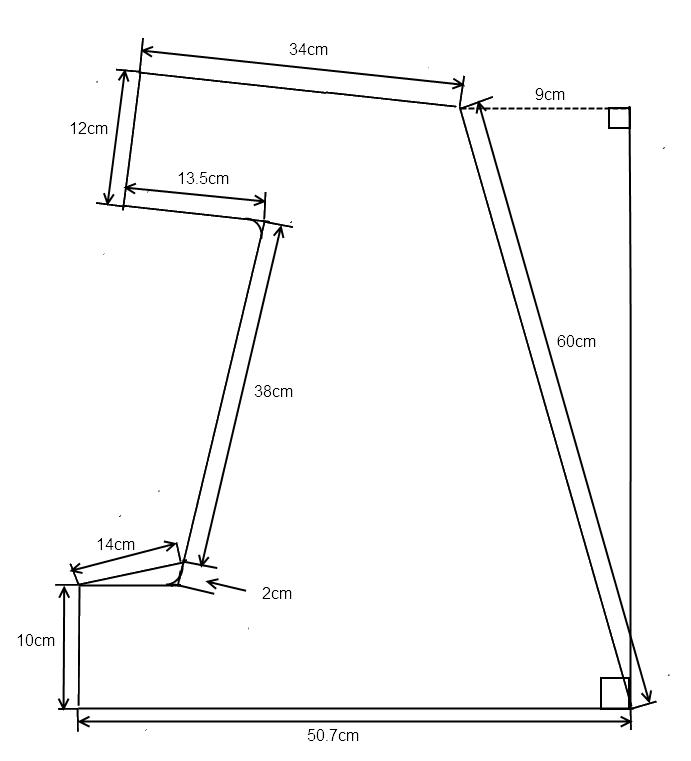
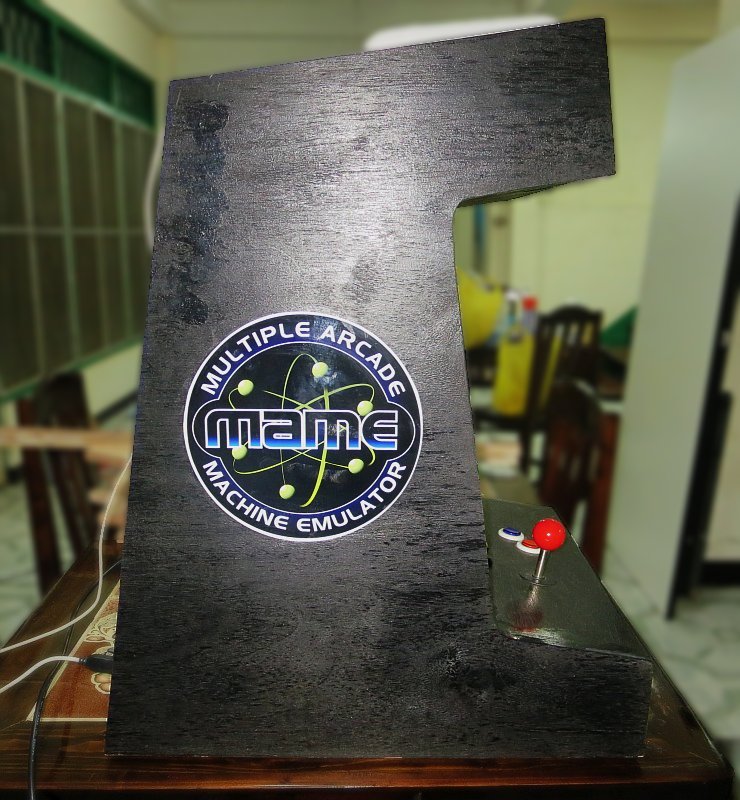
The cabinet is powered by an old Toshiba Satellite A40 laptop so the cabinet needed to be wide enough to fit the laptop inside with a few devices still connected via the USB slots located on one side of the machine. I also wanted a decent sized marquee and an overall look like the top of a stand-alone arcade machine. The side-profile I chose is similar to the top of an Armor Attack cabinet with an overall width of 45cm (approx. 1'6"), a depth of 51cm (approx. 1'8"), and a height of 64cm (approx. 2'2") (see the plan below but note that it is not drawn to scale). The cabinet is made from 8mm (approx. 1/3") plywood.
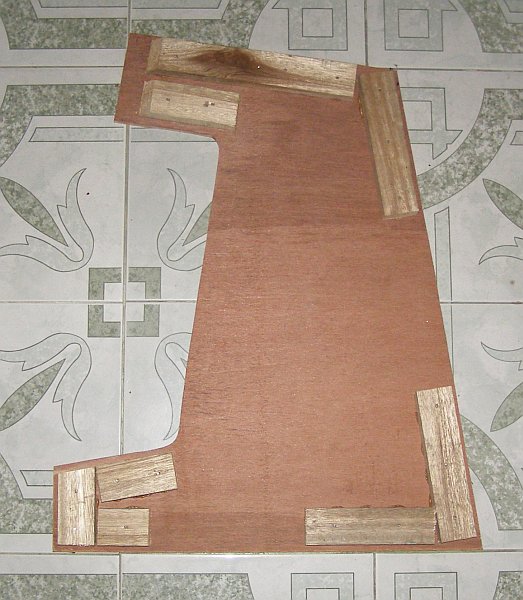
At this stage I hadn't decided how I was going to mount the screen/laptop inside the cabinet and so I decided to make three removable panels that would be held in place with screws on top, underneath and at the rear of the cabinet. These would allow me ready access to the inside of the cabinet while the remaining panels would be fixed in place to give it strength. I glued and nailed some pieces of 2cm x 4cm (3/4" x 1 & 5/8") wood on the inside of the two side panels. These pieces were inset 8mm from the outside edge so that I could then use them to attach the other panels to the cabinet.

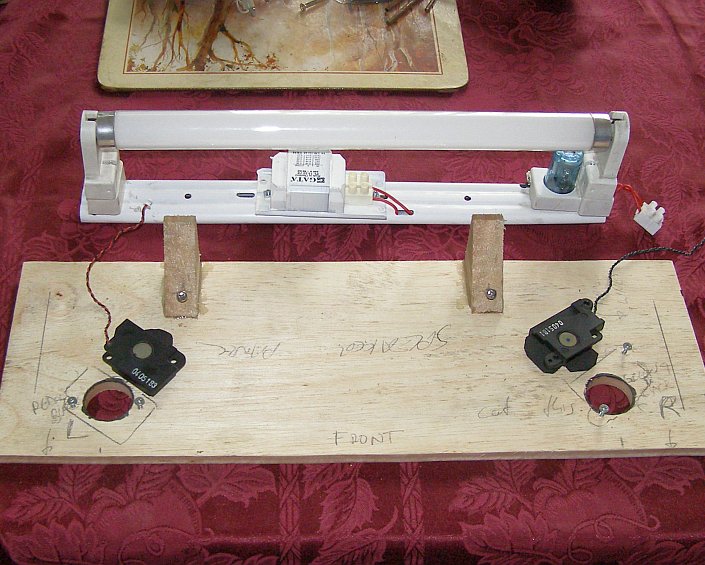
In the first two pictures below the fixed panels are now in place. The top panel has been screwed on and you can see the spaces for the bottom and rear panels. The marquee backlight is a fluorescent tube mounted using two angled blocks of wood so that the tube is vertically centred. I also cut two holes in this panel for the speakers which I removed from the laptop (more about this later).
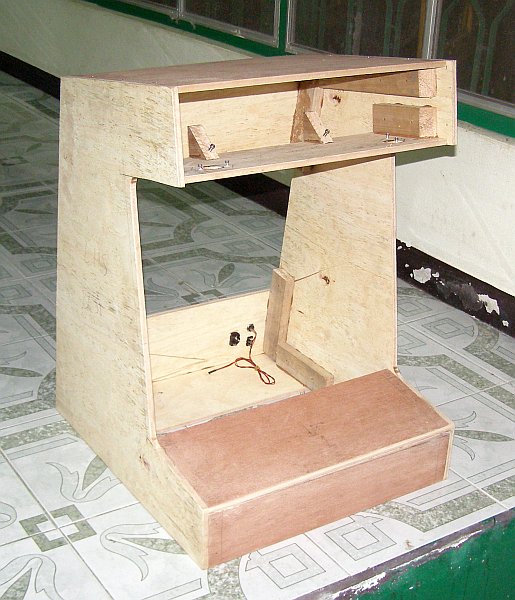

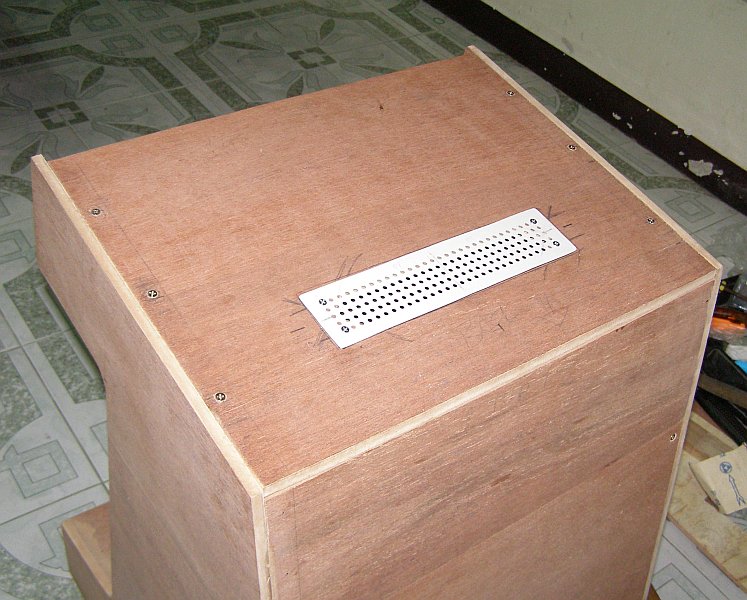
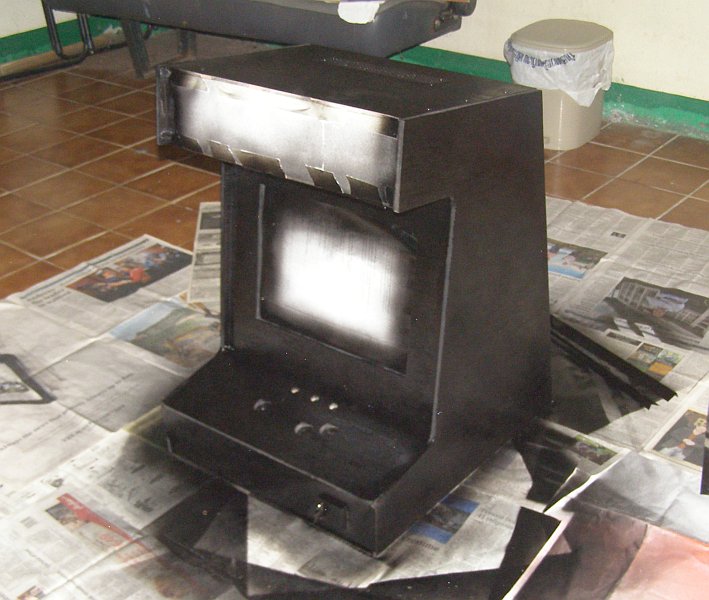
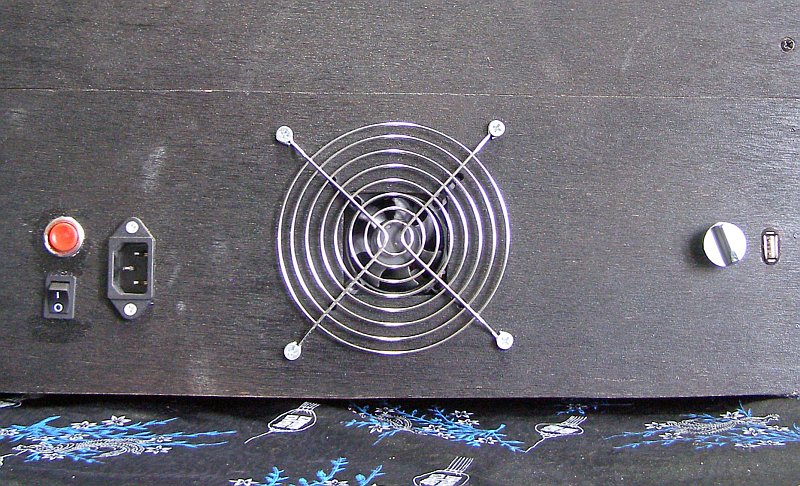
Computers tend to run fairly hot here in Thailand so to help promote airflow through the cabinet I added a vent on the top panel which was cut from the side of an old PC case. Below is the assembled cabinet with the bezel and all panels in place - puttied, sanded, and ready to be spray painted black.

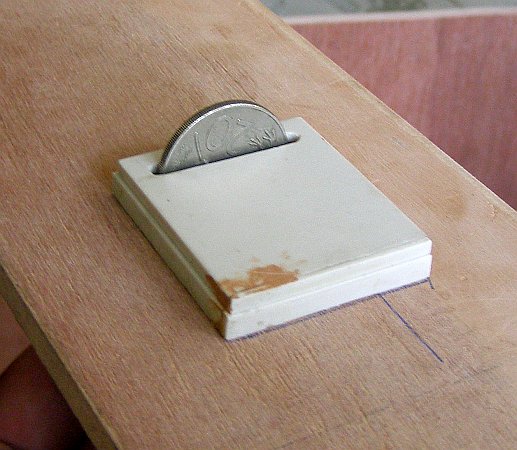
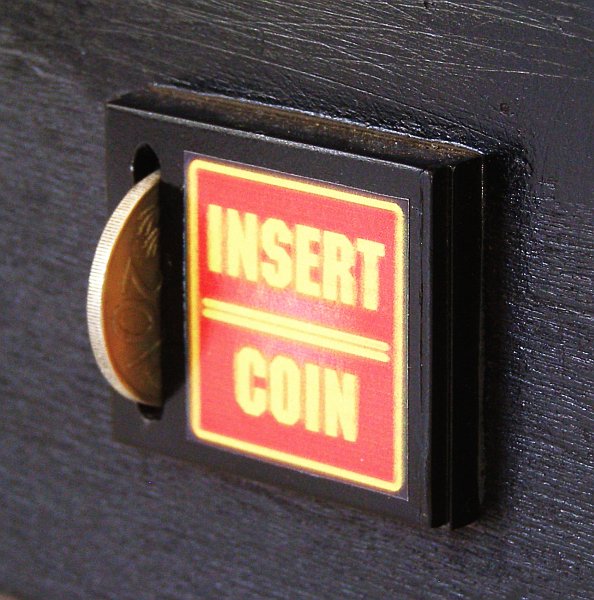
While showing the cabinet to a friend he said that it would be nice to be able to insert a real coin rather than having a simple credit button. I liked the idea so I built a simple coin mechanism by drilling a hole in a "novelty" 20 cent coin and mounted it on a shaft so that it sticks out of the coin slot. You can push the coin into the slot to insert a coin but when you release it the coin pops back out again.
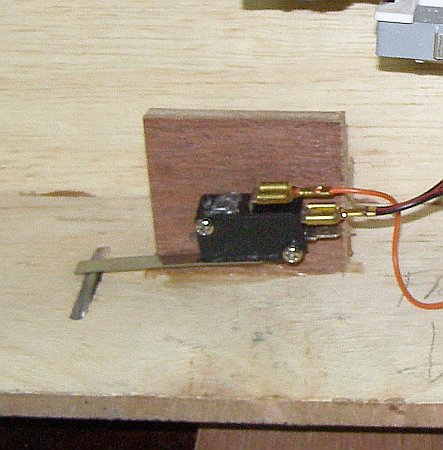
The box for the mechanism was a CD-ROM drive bay blank from an old computer. To shorten the box I cut a section out and re-glued it with epoxy and cut another hole slightly larger than the coin. The shaft that the coin rotates on is part of the slide mechanism from an old CD-ROM drive that I cut to length. I also cut a corresponding slot in the front of the cabinet and secured the shaft in place using three screws. The box is simply glued over the top and a long arm micro switch detects the coin "insertion" while also providing enough spring force to make the coin pop out of the slot.

The coin switch and the other controls are connected to the laptop using a USB gamepad which cost around $4 (AUD). I used spade connectors on one end of the wires for the arcade buttons and the joystick while the other end was soldered directly to the gamepad's printed circuit board (PCB). The board was mounted using a few screws behind the back of the lower front panel (beneath the controls).


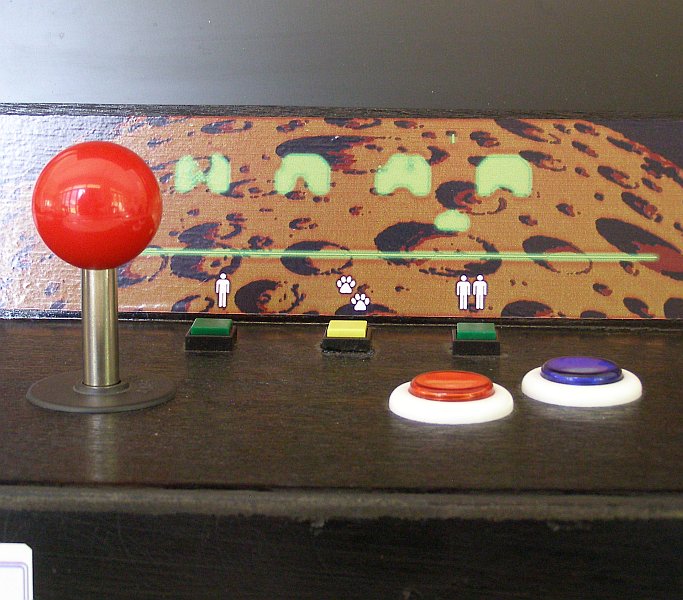
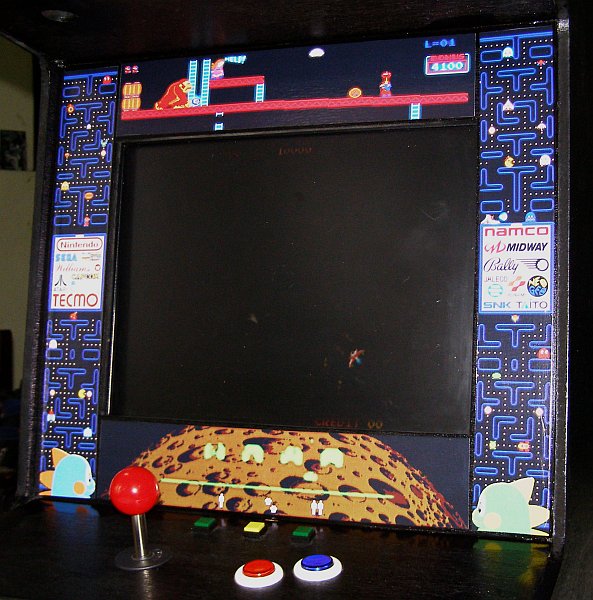
I've never really liked (or been very good at) fighting games (except for Virtua Fighter 2 at about 3am in the morning with a group of friends during an all night arcade lock-in session - I wasn't very good at it - but I liked it) so two buttons covered the vast majority of classic games that I like to play. In the rightmost image above you can see that I also included 1 or 2 player buttons, a pause button, and a small reset button hidden at the top left of the bezel. As with my Street Fighter joysticks I used a joystick and button layout from the Slagcoin Joystick Controller page.
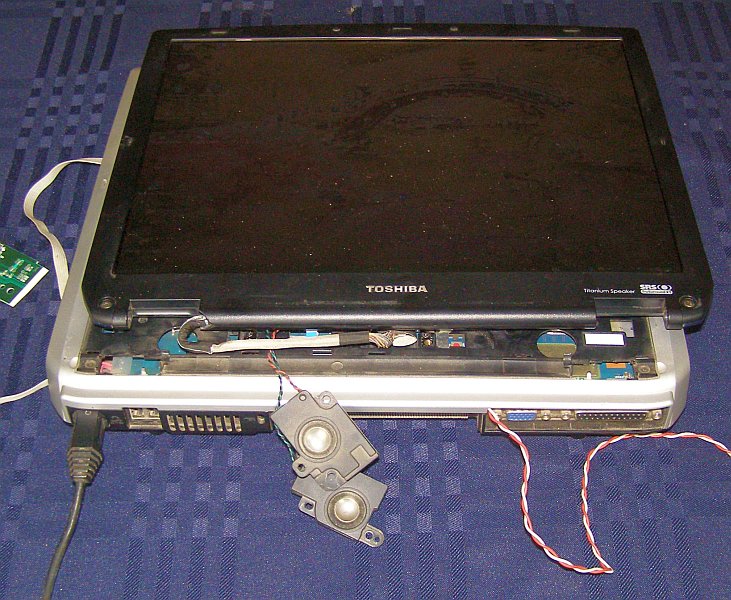
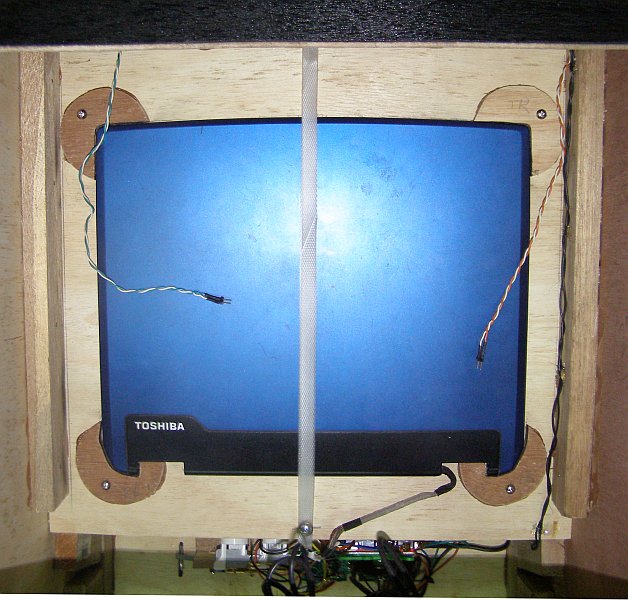
I had been keeping my eye out for an old computer or laptop to power an arcade cabinet for some time when a friend gave us a faulty netbook. I managed to resurrect the netbook so I used it to replace our 5 year old laptop which meant I now had suitable machine for my cabinet. The spring on the old laptop's lid hinge had broken some time ago and so I had been using a PVC-pipe stand that I made to support the screen. To ready the laptop for its new life in the cabinet I started by completely removing the hinge hardware from both the lid and body of the laptop along with the keyboard and the speakers. I reinstalled the operating system and then wired in an external volume knob and power switch (which ran to the lower fixed rear panel of the cabinet), and extended the leads attached to the speakers (see the images below).

To mount the screen and keep it in the correct position I cut four small pieces of plywood to match the shape of the corners of the laptop lid/screen and these were then glued and screwed to the back of the bezel. A doubled-over length of polypropylene strapping band (PP band) over the back of the screen holds it firmly against the bezel and this is secured in place with two screws.
With the screen now in place the body of the laptop needed to be positioned some small distance away that was governed by the length of the screen cable (the grey and black cable protruding from the bottom of the screen in the picture below, left). I had added some 2cm x 4cm pieces of wood inside at the front of the cabinet to which the bezel was mounted. These can be seen on the left and right sides of the image below. I used the back of these pieces to mount two plywood panels which would be used to hold the laptop body in place (see the image below, right). In the lower panel I cut a hole for the screen cable to pass through and glued some pieces of grip mat to both panels and then mounted the rest of the laptop using some more PP band and screws.

At this point I decided to fire up the cabinet for my first game
of Space
Invaders only to discover that with the laptop mounted in a near
vertical position the fan made a horrible grinding noise! I assumed
the noise was due to wear and checked the price of a new fan online.
A replacement fan was going to cost $70 so I removed the existing
noisy fan, made a cowl out of some high density foam, and replaced it
with a $3 fan instead. It's not very pretty but it does the job and
it's hidden away inside the cabinet.
Artwork
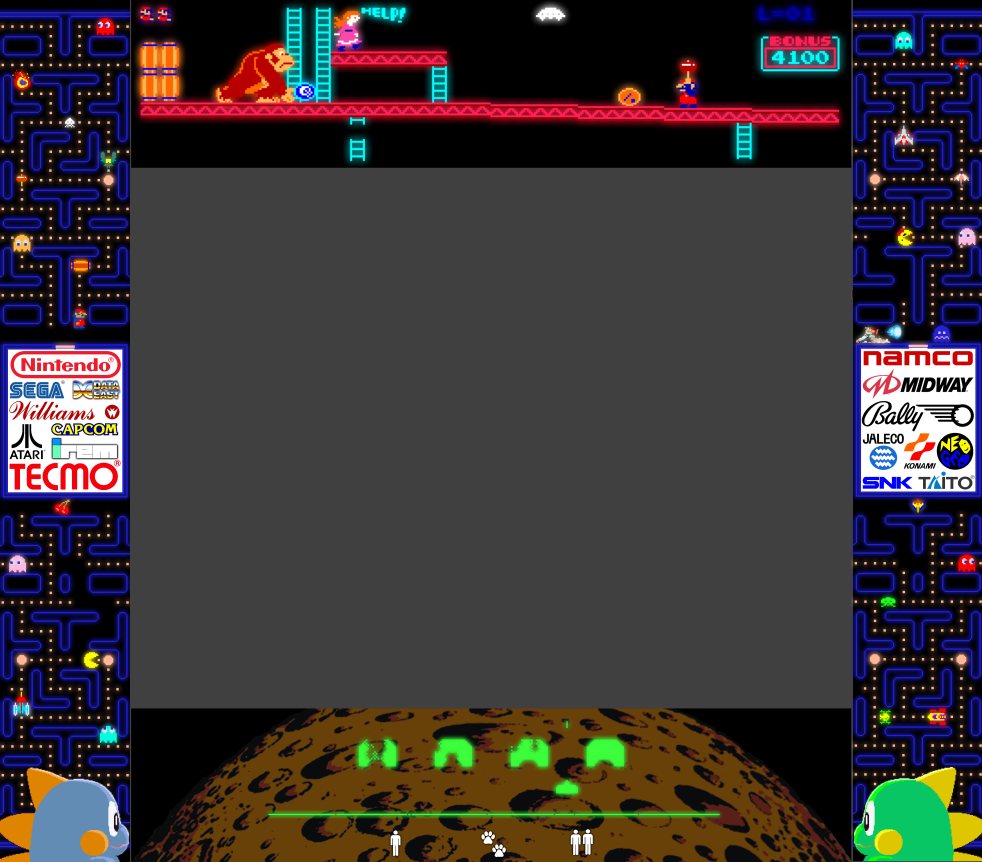
One of the things I love about arcade machines is the artwork and I wanted to include nods to some of the classics I grew up with in the marquee, bezel, and side-art of my machine. The background for my marquee artwork is a recoloured Defender marquee and it also includes elements from Space Invaders, Moon Patrol, Galaga, Galaxian, Frogger, Donkey Kong, Pac-Man, Ms. Pac-Man, Asteroids, and Bubble Bobble machines. I used Paint.NET to paste it all together and you can download the full-resolution version by clicking on the image below.
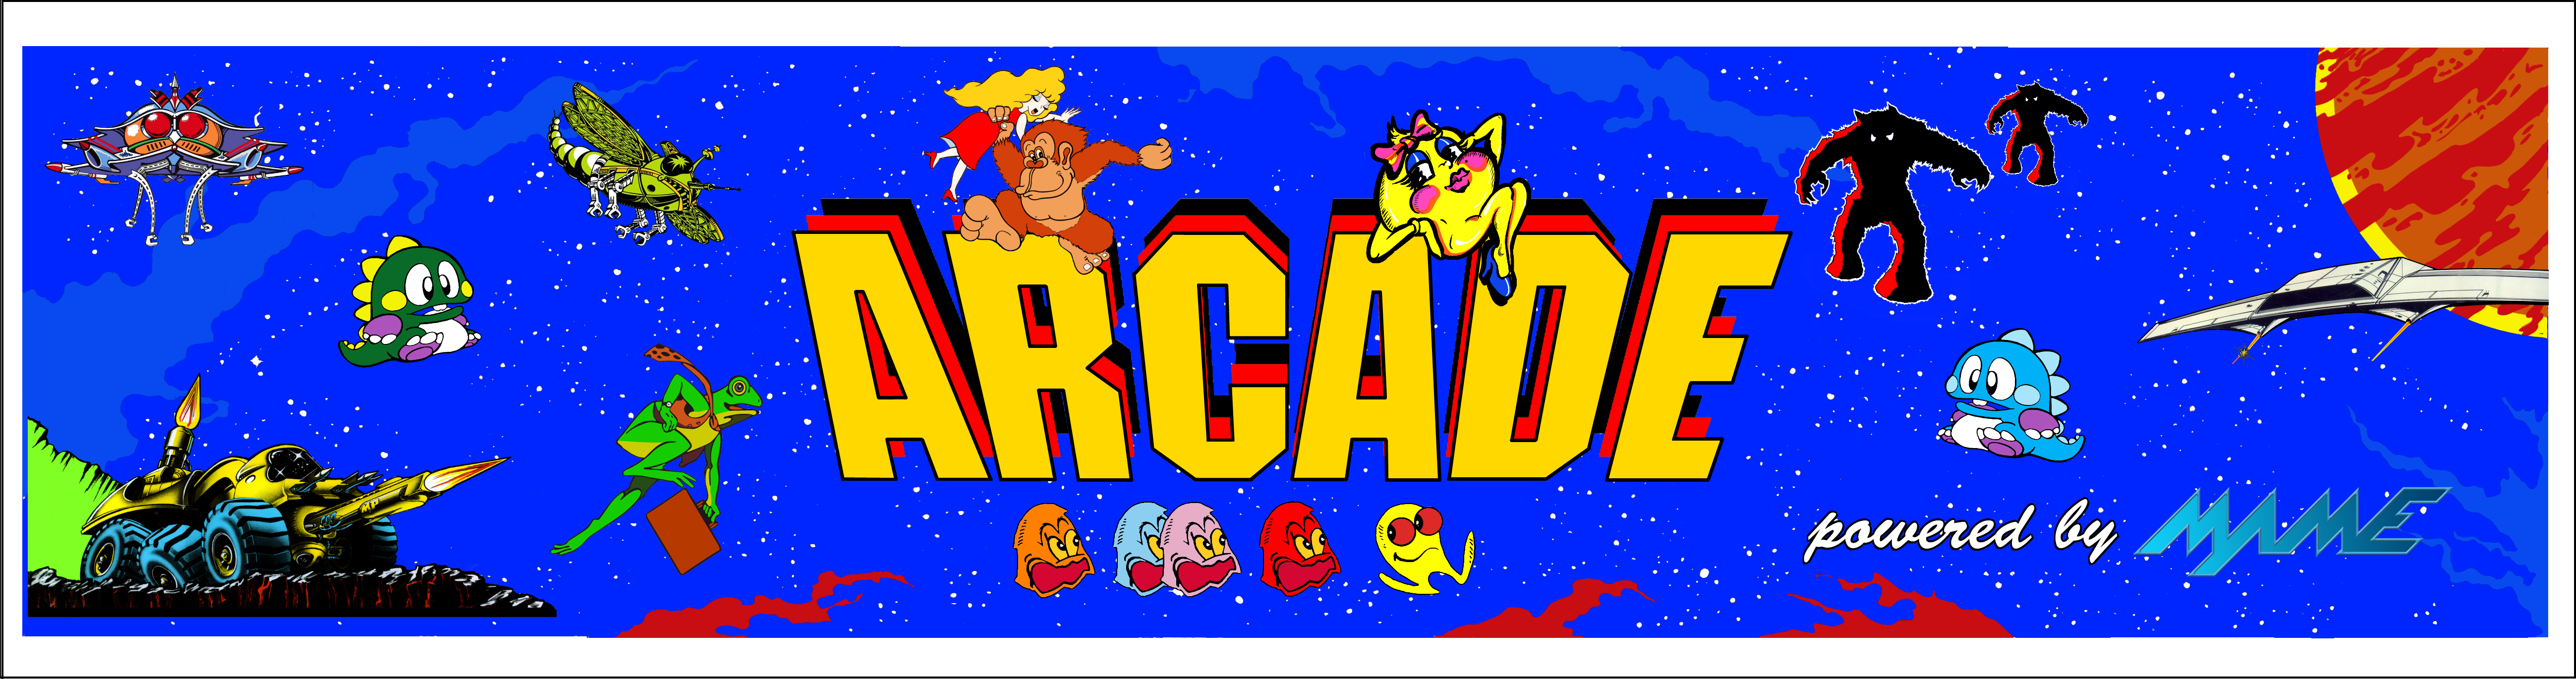
When I started working on the marquee I was surprised at how difficult it was to find the "SPACE INVADERS" logo font. Google searches for "space invaders font" turned up fonts composed of space invaders - which shouldn't have been surprising really - but not an actual letter font similar to the arcade artwork. I've had success using keyword searches to find fonts before but I suddenly realised that what I needed was someone who knew a lot about fonts so I could describe it to them using the appropriately fonty (typographic?) terminology.
Fortunately, I stumbled upon Identifont which helps you find fonts by asking a series of questions that describe the font you are looking for in readily comprehensible terms. Even though I only had ten uppercase sample letters to help me on my identification quest ("ACDEINPRSV") I was very impressed that after answering about 30 questions it suggested a font that was very close. Some quick image searches for the suggested font then led me to the Machine-LT series of fonts which was just what I wanted.
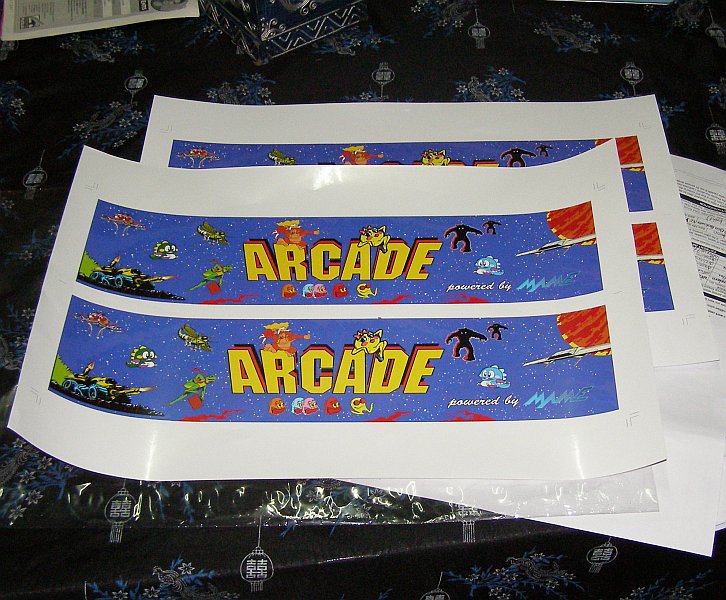
A student studying printing technology at "Techno" (Rajamangala University of Technology Lanna Chiang Mai) was kind enough to print two versions of the marquee for me - one as vinyl stickers and the other on paper. I was very happy with the amount of light transmission through the paper version so I sandwiched one of them between two pieces of clear acrylic. The acrylic sheets are held in place by two lengths of right-angled aluminium that a local hardware store sold me for about $1.

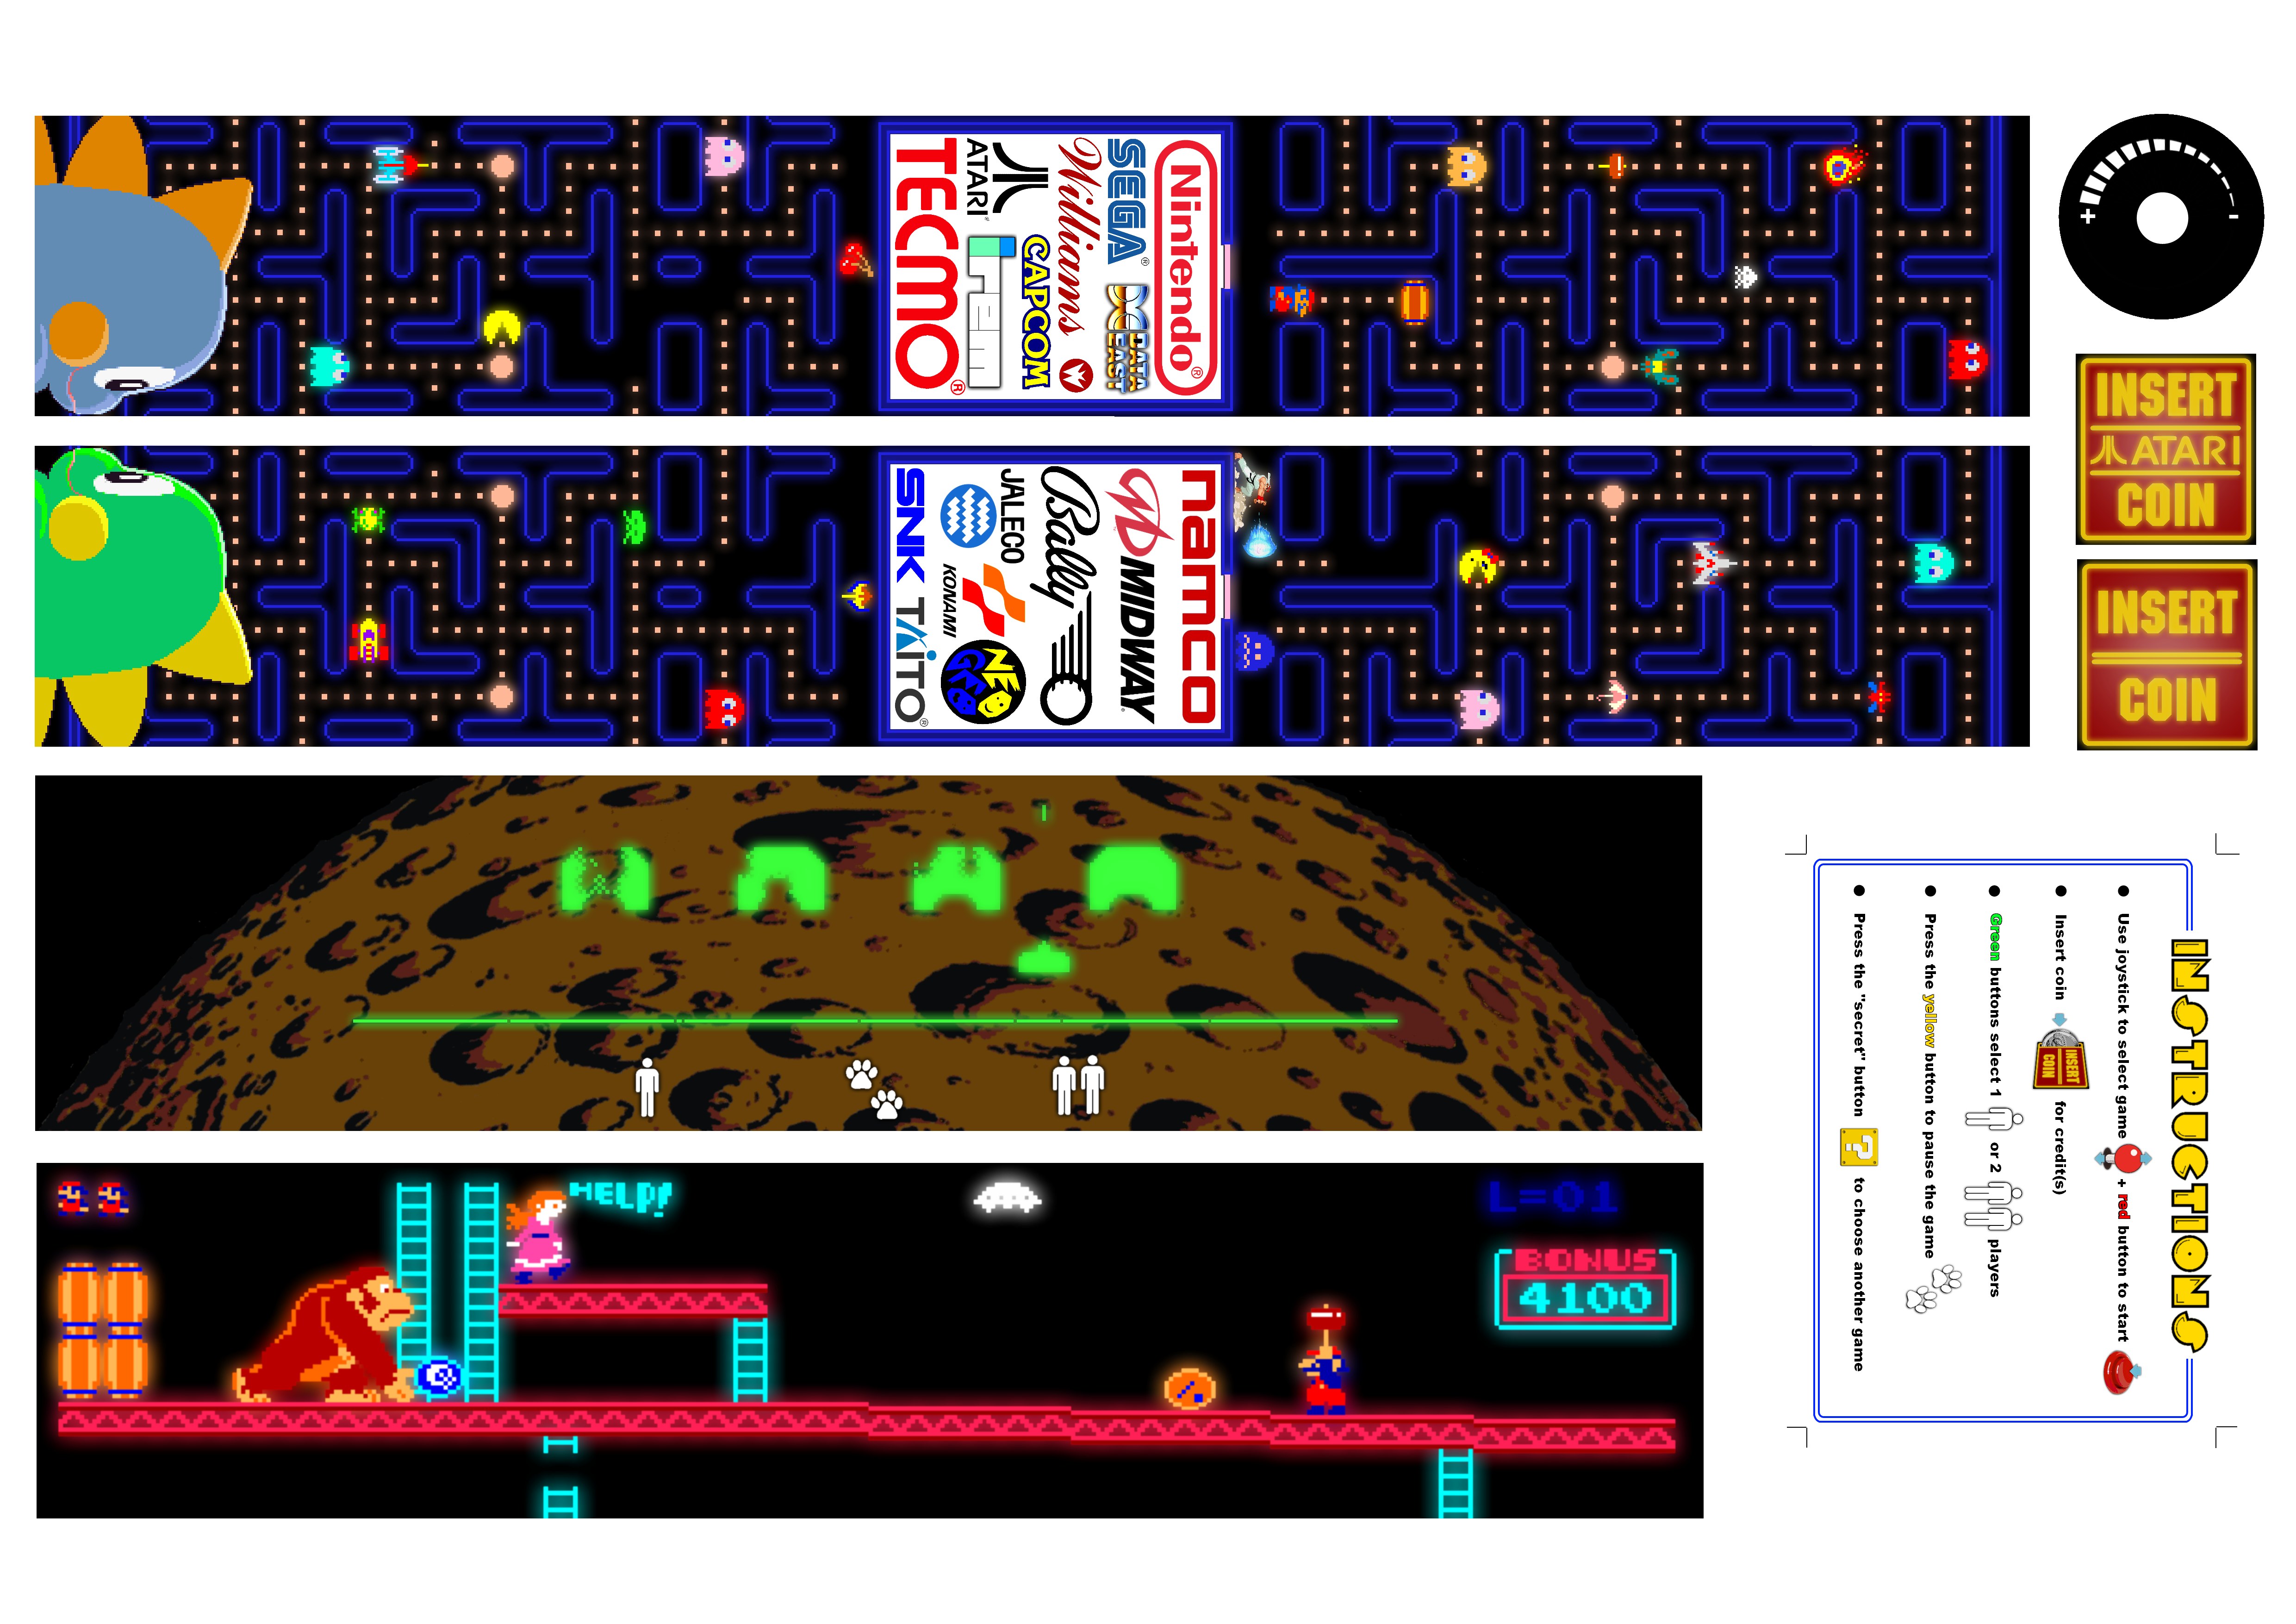
The bezel artwork also pays homage to most of the games included on the marquee but it features the in-game graphics along with the logos of many of the companies who created games. I also added Ryu from Street Fighter II (who has a ghost running scared in the right-hand panel) and the twin Bubble Dragon sprites from Puzzle Bubble's attract animation. You can see a preview of the bezel artwork below.
I was planning to print it as a large vinyl sticker but I have had plenty of air-bubble filled sticker misadventures in my time and so I decided to print it as four separate strips to help make the application process a little easier (click on the image below for the high-resolution version). After watching a few "how to apply vinyl stickers" videos on YouTube I tried the "middle taping" method which worked very well and you can see the results of my handiwork below.
In the end my friend ran out of inspiration for the side-art so I printed some stickers using a re-coloured version of PixelHugger's classic atomic sideart. It's on!
You may also be interested in reading about my Asteroids cabinet fishtank or some of my other projects: